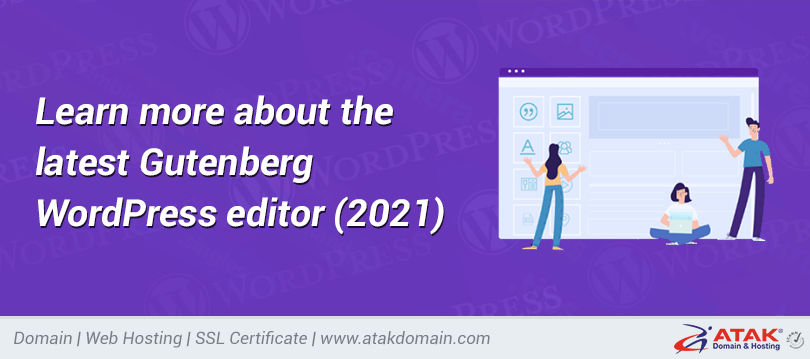
Learn more about the latest Gutenberg WordPress editor (2021)

When the WordPress or Gutenberg blockchain editor was launched in December 2018, we didn't know what would happen. Of course, we have a lot of time to play with its beta version, but we cannot predict how easy it will be, or how willing users and developers will be to accept the new editor.
From the day we first published this article, we have seen Gutenberg editors have grown tremendously in the past two years. It has grown from a small continuous product startup (MVP) into a larger project that is close to the goal of creating a unified web conversion experience for WordPress.
To illustrate these changes, we have re-edited the Gutenberg editor to give you a glimpse of her new face, although she will be where she is going soon.
contents
- What is the Gutenberg block editor?
- Advantages and disadvantages of Gutenberg and popular alternatives
- How to use Gutenberg WordPress Blocking Editor
- 10 useful Gutenberg tips for improving work efficiency
- Explore advanced block editor concepts
- Use plug-in extension block editor
- Gutenberg WordPress editor and website editor
What is the Gutenberg block editor?
Gutenberg, also known as "WordPress block editor" or simply "WordPress editor", is the WordPress content editor introduced in WordPress 5.0 released on December 6, 2018.
If you have not heard of this term, it is a custom editor used by all WordPress sites, unless you explicitly disable it. It looks like this:
Gutenberg WordPress editor.
The biggest difference between the Gutenberg WordPress editor and the previous WordPress editor (now called the "Classic Editor" or "TinyMCE Editor") is the new block-based content creation method.
With Gutenberg, every element in your content is a blockchain, which can be easily manipulated. Each paragraph is a block, each picture is a block, and each button is a block-you know!
Third-party developers can also create custom blocks, which can also help end WordPress connections using shortcodes. Suppose you want to fill out a contact form. You can now block attachments to forms instead of trying to add shortcodes as before (for example, `[your form-shortcode]`).
In addition, you can also use blocks to create more complex designs, such as installing multi-column designs or assembling blocks to create cohesive parts.
As we explore further and show you how to use the block editor, you will better understand how to use blocks to improve the way you create content.
Gutenberg started in December 2018, and a lot has changed since then!
The important thing to understand is that the goal of Project Gutenberg is more than just a content editor.
As of July 2021, Gutenberg is still the only content editor (mostly). But the long-term impact on Gutenberg is that it will lead to so-called total site changes.
The idea of Total Website Change is that you will be able to design your website 100% using the Gutenberg editor. For example, not only can you use the title option that comes with the WordPress theme, you can also use Gutenberg to design a custom title using the block editor.
This feature is not yet available, but it is under development. We have some "proof of concept" projects, which we will introduce to you at the end of this article.
Pros and cons of Gutenberg's popular alternatives
Now that we have been using the WordPress block editor for more than two years, we have a good understanding of some of the advantages and disadvantages of Gutenberg and other solutions.
There are two main alternatives to creating content on WordPress:
- TinyMCE WordPress Editor: This is the classic editor used by WordPress before WordPress 5.0.
- Page Builder plug-ins: These are third-party plug-ins that can add visual, crawl, and download designs to WordPress.
Generally, the classic TinyMCE editor provides a more complex Word-like experience, while the page maker provides a more reasonable visual design experience, namely caching and deletion.
If we could sort all three editors according to design flexibility, it would look like this:
Classic TinyMCE editor (not very reasonable) <Gutenberg <Page Builders (most reasonable)
Now, let's talk about some of the advantages and disadvantages of the Gutenberg block editor and alternatives.
Gutenberg and the classic editor: advantages and disadvantages
Let's compare Gutenberg and the classic TinyMCE editor first.
advantage:
- Gutenberg provides a more obvious design background
- You don’t need to use shortcodes to place content-you get a unified blockchain system
shortcoming:
- Some people find it a bit awkward to write in Gutenberg, because each paragraph is a different block. For long posts, text manipulation can be difficult. You might prefer to write in another editor and put the text into Gutenberg when you are done.
- Although Gutenberg's performance has been greatly improved, he can still be late on a large number of posts, which is less for the classic editor.
If you think the classic TinyMCE editor is more suitable for your needs, you can disable the Gutenberg editor completely.
Gutenberg or Page Builders/ Pros and Cons
Now, let's see how Gutenberg is fighting against third-party page builder plugins.
advantage:
- Gutenberg is a basic feature, which means you don't need to worry about compatibility issues.
- Because it is a core feature, all developers can build Gutenberg support in their plugins to improve compatibility.
- Gutenberg generates cleaner and lighter code. Nevertheless, designs made with Gutenberg usually load faster than the same designs made with page builders.
shortcoming:
- As the creator of the page, Gutenberg does not provide real visual editing. It is more advanced than the classic editor, but still not 100% perfect as a page builder.
- The page builder still provides you with more reasonable design and design options.
- Most page builders provide more efficient and smoother caching.
Comparative thinking
For most users, Gutenberg occupies the best position in terms of flexibility.
Most people don't need the flexibility of a page builder for their content, especially blog posts. But at the same time, it is also good to quickly install multi-column designs or add buttons, which does not make the classic editor easy.
So with this in mind, let us understand how to start using Gutenberg.
How to use Gutenberg WordPress block editor
Now that you know something about the Gutenberg block editor, let's explore how to use it to start creating content.
We will first introduce the interface, and then gradually develop advanced methods for using the editor and improving work.
Between the block editor Gutenberg
When you open the editor, it will hide next to the WordPress dashboard and provide you with a full-screen experience:
Intermediate Gutenberg WordPress blocking editor.
The editor is divided into three main parts:
- Content: Your content occupies most of the screen. You will see a visual preview of how it will look in front of your website. This is not 100% correct, but you should have a good understanding of the design on the back.
- Top toolbar: The upper toolbar helps you insert, cancel/rebuild new blocks and access other important settings.
- Sidebar: There are two tables next to it. The "Publish" tab allows you to set the settings of the publishing level, such as its category, tags, defined images, etc. Shows the block settings you selected-will be described in detail later.
To create a more immersive writing experience, you can hide it by clicking the "gear" icon in the upper right corner. Back to the side, all you have to do is to buy the "gear" icon again:
Click the "gear" icon to show/hide the side.
information
Your editor may look a little different, because theme developers can choose to add their own styles to the editor to create a more visual experience. Depending on your theme, you may find different fonts or colors.
For example, if you use a custom 21 theme, the editor relationship is as follows:
An example is twenty-one themes that implement their styles on the block editor.
Add block
To add regular paragraph text to your post, you only need to buy and write it. Each time you press Enter, the editor will automatically create a new paragraph block.
For other types of content, you will need to add a new block. You will use blocks as pictures, buttons, video captures, etc.
To add a new block, you can purchase one of the "plus" icons in the middle. It is the main block log icon in the upper left corner, but you will also find other icons in the bar to open the smaller block agent:
The "plus" icon allows you to insert new blocks.
First, place the mouse pointer where you want to insert the new block. For example, to add a new block at the bottom of a button, you can click the bottom of the button and then click the + icon.
You should see a side panel showing all the available blocks, divided into different categories. You can search in a specific block or just select an option from the list. When you stand on the block, you will see a description and preview of its function.
To insert a block, you just need to click on it. For example, to insert a normal image, you only need to purchase an image block:
Click the type of block you want to insert.
You can then follow the prompts to upload or select an existing image from the media library.
Basic format options
To allow you to set basic formatting options for your blocks, when you click on each block, you will see a toolbar.
If you want to format regular text, you can here:
- Add bold or italic
- Add a link
- Route changes
- Add format, such as internal code, click and subscribe
The process toolbar allows you to make basic formatting options.
For example, suppose you want to add a link to content. You will first select the specific text you want to link to-in our example, it is "For other types of content". Next, you can click the link icon on the toolbar to open the login options:
Add a link to the Gutenberg WordPress block editor.
Advanced block settings configuration
All blocks you insert into the sidebar have other settings. Some blocks may give you some settings, while other blocks may give you some options to control the design, design, function, etc.
To open the block settings, click the block in the editor to select it. Next, go to the "Block" tab next to it to view its settings.
Below, you can see the button block settings, which is one of the more reasonable blocks. You can change the color, widen the color, and so on.
When you change the block settings, you will immediately see the changes displayed in the editor.
You can access block settings side by side.
Similarly, the settings of each block are not unique to that block. For example, if you turn on the settings for regular paragraph text, you will only get some basic typography and color options. Below, you can see that we are able to implement a colored background to highlight certain text:
Block settings for regular paragraph text.
Block construction
In addition to using copy and paste (you can do this with text like any other editor), Gutenberg also provides two main methods to rebuild blocks.
First, if you want to move the block up or down several positions, you can use the up or down arrows on the flow device tree.
For detailed actions, you can use drag and drop. To drag and drop blocks, you need to click on the "six dots" icon on the left.
After hovering over the icon, you can drag the block to any position on the page:
You can use the arrow keys or cache and delete to rebuild the block.
Jilin
Copying and pasting non-text content can be deceptive. Later in this article, we will show you how to copy and track all blocks while maintaining the style.
Transfer content from other sources
Gutenberg comes with a separate block to store content from third-party sources, such as YouTube, Vimeo, Soundcloud, etc. You can find all these options in the embedded section of the block.
For example, to open a YouTube video, all you need to do is:
- Add the specified YouTube block.
- Enter the direct URL of the video.
- Click Embed.
Open a YouTube video in Gutenberg.
Next, you should see a preview of the attached video in the editor.
Create multiple columns or ratios
As we mentioned before, one of the main advantages of the block editor compared to the old TinyMCE editor is that you can create more complex designs without relying on custom code or custom shortcodes.
The block editor comes with two custom blocks to help you do this:
- Column: Build multiple columns.
- Group: Collect multiple blocks. For example, you can use it to set the background color for the entire section that appears behind multiple blocks.
The working principle of these two blocks is "nested" blocks, which means you put one or more blocks into another block.
We will show you an example of using column blocks, but the same basic principles apply to block blocks.
Suppose you want to create a two-column design with some regular paragraph text in the left column and a column in the right column.
First, you need to use a blocker to increase the block. It will soon show that you can choose the map you like:
Select the column structure and ratio.
We will choose a 50/50 two-column design for this example. With it, you will see two boxes of the same size with a + inside icon. To add content, you can click the + icon to open the blocker: How to add content to the column.
After adding the first block to the column, you can enter the + icon to insert other blocks. Alternatively, you can pull the block out of the column building and put it in the column.
10 useful tips from Gutenberg for productive work
Now that you have a basic understanding of how Gutenberg works, let's take a look at some valuable tips and tricks that can help you use the block editor more effectively.
- Use quick access block / (advanced slash)
If you need to insert multiple blocks, opening the blocks manually can be a bit tedious. Please, once you start learning the common block names you need to use, you can use the keyboard-/ (forward slash) to enter blocks faster.
If you press "Enter" to start a new paragraph block, you can quickly type a block with a forward type followed by the name of the block to be entered.
When you start writing, you will see a list of all the blocks related to your question. Then, you can use the arrow keys to scroll through the blocks and press "Enter" to select the block you want to insert.
The following is an example of using Quick Insert to add image blocks:
How to use the front lever for quick release blocks.
- Download photos by downloading photos from the desktop
If you include multiple images, the block editor includes another time-saving feature that eliminates the need to add image blocks before uploading the images.
Instead, you can simply drag the image file directly from the desktop to the location where you want to add it to the post. When you drag the image file to the content of your website, you will see a blue line where the image is displayed.
When you download a file, WordPress will automatically upload it and place the image block in the correct location:
You can save the image by downloading the file from the desktop.
- Use some Markdown format
If you are a Markdown syntax viewer for content creation, you will be happy to know that the block editor supports some limited uses of markup-especially when dealing with headings.
For example, if you want to insert a title block with H3 tags, you can type three hashtags (`###`) followed by a space. The editor will automatically convert to H3, and then you can continue to write the title:
How to increase the traffic?
Join others who have received weekly newsletter.
The block editor supports the basic Markdown syntax for headings.
Suppose you want more advanced Markdown support. In this case, you can install a free plugin like EditorsKit, which also allows you to use Markdown for bold, italic, and beats-we will discuss the Gutenberg plugin in detail later in this article.
- Pin the formatting toolbar to the editor title
If you don't like the way the formatting tool "searches" above the block, the block editor has a feature that allows you to pin it to the bottom of the toolbar:
You can see the toolbar above.
- Copy the block and all its settings
The block editor allows you to navigate and track text like in any editor-right-click "Ctrl + C" or select copy.
However, you cannot use this method to track and block all blocks while maintaining its settings. Instead, you will need:
- Select Block.
- Click the three-dot icon on the block toolbar.
- Select the copy.
How to copy the block and all its settings.
After copying the block like this, you can right click on it as usual-i.e. "Ctrl + V" or right click and choose Paste.
- Use the block list flag to quickly select the correct block
For most blocks, you only need to click on the editor to select the block. However, if you start using "nested" blocks, such as throwing blocks inside columns or group blocks, this can be difficult.
The editor returns a list view option, which you can open from the tree above to perform this operation. The log view will show every block, including named blocks.
You can select a block by clicking in the header, and when you click on it in the header, the editor will also highlight the block.
In the following example, you can see:
- Block the basic parent column
- Nested blocks per column
- Grouping blocks are nested in one column
- The title bar is embedded in the block
To select the main parent block, you just need to open the login view and select it from the login:
Opening the list viewer can help you find nested blocks.
- Open the code editor (for individual blocks or complete messages)
One of the advantages of the Gutenberg block editor is that it allows you to configure many design styles and options without relying on code. However, in some cases, you still want to directly access the code for advanced users.
For this purpose, the Gutenberg editor provides several different options.
First, you can change the code to only individual blocks, which is useful for small adjustments such as CSS-like input. To do this, open the download menu from the toolbar and select Edit as HTML:
How to edit a single block as HTML.
Selecting this option will convert the visual preview into a block editor for this block only, without affecting the visual preview of other blocks:
Single block HTML editor.
Second, the editor includes a custom HTML block that you can use to insert entire HTML fragments. All you have to do is to add the block and enter it into the code.
Finally, you can also use the drop-down menu in the upper right corner or the keyboard shortcut to open the complete code editor for the entire document: Ctrl + Shift + Alt + M.
Note that when you open the full code editor, you will also see the block format icon from Gutenberg, so it can be a small navigation:
Complete code editor, return block icon.
- Learn keyboard shortcuts
The block editor contains many keyboard shortcuts that allow you to perform common operations. It is worthwhile to take the time to learn them, because they will make you more efficient and avoid repeated mouse clicks.
Here are some of the most common shortcut keys-if you are using a Mac, you need to change "Ctrl" to "Command (⌘)":
- Open block list view-Shift + Alt + O
- Save changes-Ctrl + S
- Cancel the last change (s)-Ctrl + Z
- Repeat the last cancel operation-Ctrl + Shift + Z
- Repeat the selected block (s)-Ctrl + Shift + D
- Delete selected block (s)-Shift + Alt + Z
- Add a new block (s) before selecting the block-Ctrl + Alt + T
- Add a new block after the selected block-Ctrl + Alt + Y
When you are in the editor, you can also open the complete cheat file of all keyboard shortcuts. To do this, you can use the keyboard shortcut-Shift + Alt + H-or click the "three vertical dots" menu icon (⋮) in the upper right corner of the editor, and then select the keyboard shortcut from the download.
- Clear by hiding the middle block
By default, the block editor adds many blocks, but you may not use them all. To help you clean up plugins, the editor introduces a feature called Block Manager, which allows you to disable and hide blocks you don’t use:
You can remove blocks to hide them from the blocks.
- Add a jump anchor to the link
Finally, my last help feature is the HTML link building feature of the block editor, which allows you to create run links from specific parts of the content, such as the table of contents.
In the classic editor, you must manually add HTML anchors using code. But with Gutenberg, you only need to type the text of the run link in the HTML anchor field in the advanced block settings area:
Need a hosting solution that provides you with a competitive advantage? Your atakdomain achieves incredible speed, state-of-the-art security and automatic measurement. View our plan
How to set custom anchor text.
Explore advanced block editor concepts
At this point, we discussed how the editor works and some tips for working more efficiently. Now that you have mastered these basic knowledge, let us continue to learn two slightly advanced strategies:
- Block mode
- Reusable blocks
Block mode
The block mode is basically a template. It is a collection of blocks arranged in the design. It may be some small things, such as adjustment buttons. The theme can be a template for an entire section, or it can be a page theme.
WordPress comes with a built-in blockchain style, and third-party plugin developers can also add their own.
You can add new templates from the Sample table to the main block:
How to insert block mode.
After inserting the block map, you can completely change the blocks that make up the pattern, just like adding blocks manually.
Until now, Gutenberg's basic editor did not allow you to create your own block templates (until you know how to code them). However, you can use Justin Tadlock's free Block Pattern Builder plug-in to solve this problem. With the enabled plugin, you can use Gutenberg to create your own design, and then use that design as an example.
First, go to Block Templates> Add New to create a new template using the editor. Make sure to publish it when you are done:
Create your own custom blockchain style.
Once this is done, you will be able to enter your block template like any other template-it will appear in the "Uncategorized" section:
Enter the instance of the custom block you created.
The core WordPress team also launched an official blockchain library on WordPress.org. You can use copy and paste to insert them into the editor. Just click the copy button on the sample block library website and insert it into the editor.
Reusable block
A reusable block is a collection of one or more blocks that can be inserted as a group. They are similar to block templates, but there is one basic difference:
Although the block pattern is the initial template that you will change in each instance, the reused block is the same in each instance you include.
If you update the block again, these changes will automatically be applied to all existing instances.
For example, you can use repeating blocks to create action calls (CTA) that you want to be the same in all content. Next, if you want to update the CTA, you only need to reuse the block once so that it will change throughout the site.
To create a new user block in the Gutenberg WordPress editor, click and drag to select one or more blocks. Next, select the Add to Blocks Reusable option. (The plugin we mentioned above also allows you to create such block patterns.)
How to recreate the block.
Then your blocks will be grouped-you can rename the blocks you use again in the block settings in the sidebar.
Now you will be able to reuse the block by searching for its name. You can use `/` to quickly insert blocks:
Enter how to reuse the block.
If you change the blocks used again, you will be able to choose to publish these changes when you update the post. If you decide to republish block changes to users, these changes will be automatically applied to every instance of the user block:
Update again how to use blocks.
Use plug-in extension block editor
So far, we have focused on the basic block editor functions, but there are some exceptions.
However, one of the most important things about the block editor is that you can use plugins to extend it, just like you can use the rest of your WordPress website.
You can use plugins for a few different things:
- Add new content blocks: The plugin can add new blocks that you can use in your design. This is currently the most commonly used situation for Gutenberg supplements.
- Add new templates/block templates: Some plugins use the basic block template system, while others build their own template system.
- Edit editor settings/functions: You can use the plug-in to edit the editor yourself. For example, you can add better Markdown support.
In addition to plugins designed specifically for Gutenberg, many other WordPress plugins can also use the block editor.
For example, if you use a contact form plugin, it may provide you with a special block plugin that you can use to execute your form. The same is true for many other types of add-ons.
Once you have mastered the basics of editing, it is worth looking for these plug-ins to see if you can find plug-ins that can improve the experience.
Here are some of the most popular options as we write this article:
- Gutenberg Ultimate Plugin
- Kadence block
- Generate blocks
- Stackable
- Gewei
You can find more information in the blocking plugins section of WordPress.org.
Gutenberg editor for WordPress and website conversion
As we mentioned at the beginning of this article, the goal of Project Gutenberg is more than just a content editor.
The long-term plan is to integrate WordPress into a complete website transfer. This is exactly what it says-the goal is that you will eventually be able to edit all parts of your website using the Gutenberg editor. It includes your website, Footers, hats, etc.
Unlike starting the block editor in WordPress 5.0, full website editing uses a repetitive approach. This will be an incremental feature, and each new version builds on the previous version.
For example, starting with WordPress 5.8, you will now use the block editor to manage your site widgets. You will also visit some of the new blocks of the topic, such as the website logo, navigation, query loops (allowing you to create templates for posting posts), and more.
However, although the official network-wide revision is still in progress, some illegal theme developers have begun to publish block themes, providing us with some good examples of how the whole-network revision might work.
In addition, you can access some of the features of Complete Experience Website Transfer in an additional version of Gutenberg.
So, let's look at two things:
- The basic functions of all website editors. We currently have WordPress 5.8
- How to "finish" website modification according to the test function
Jilin
Before the full site modification takes effect, it may undergo major or minor changes. This is just to give you an idea of what it might be.
Use block widgets instead
Starting with WordPress 5.8, you will now use blocks to control rows and files instead of widgets (optional-you can disable it if you wish).
When you go to Appearance> Widgets, you will be able to use the block editor to manage the content of each widget area.
You can see that each widget area has a different editor, which you can open by clicking on the adjustment changes. You can also move blocks between different areas of the widget by clicking the arrow icon at the top:
Use blocks to change the widget area.
Use new topic block
WordPress 5.8 also adds new theme blocks, allowing you to add dynamic content to your site. These blocks will also play an important role when you design templates for themes in future versions.
For example, suppose you want to place a list of the latest content on the page. Now, you can add a Query Loop block, and you will be able to dynamically add the content of a specific post type (such as a blog post) to the content, including filtering by category, author, keyword, etc.:
Use Query Loop blocks to display dynamic content.
Within the query loop block, you can add other subject blocks to control the template of the content displayed there. For example, you can display the history of each post by adding a post history block to the template.
Using the query loop block in WordPress 5.8, you can basically design your own custom blog page. Changing the complete real website will expand your entire theme-so we will look at it later.
Content template design
The template editing mode is another new feature of WordPress 5.8. It allows you to use Gutenberg blocks to design your post templates and pages.
So far, this feature is only available when your theme developer has specifically enabled it, so if your theme developer has not enabled it, you may not see it.
If you use a theme that supports template editing mode in WordPress 5.8, when you edit a post or page, you will see a new template section in the post/page tab next to it. You can create a new template or choose one of the existing templates:
Create a new template in a theme that supports template mode.
If you create a new template, you will be able to name it to help you remember it. Next, you can design templates using the custom template editor mode and the new theme blocks we detailed in the previous section:
New template editor in WordPress 5.8.
Complete Blockbase website change example
Blockbase is a theme of Automattic, which serves as a kind of "proof of concept" and a playground for completely changing the site. It is still being tested, so it may need to be modified before including these features in the basic WordPress software. But it does provide an idea to change the complete website.
After installing Gutenberg's theme and plug-in version, you will get a new web editor area that allows you to "build" your theme using the same editor you saw above.
However, the key difference is that you are not just creating a single post or page. Instead, you use the Gutenberg WordPress block editor to create real templates that will use all of your website content-for example, your title template.
An early example of a complete website change.
For this, you will receive a series of new design blocks, including some of the thematic blocks you saw above:
The new design prevents the website from being completely modified.
To navigate between different templates, you can click on the WordPress logo in the upper left corner to modify other templates and create new templates:
Change the templates for different themes.
Again, the idea is that you will eventually be able to use the Gutenberg editor to control all theme templates/lines. When this happens, building a WordPress site will be very different from the "normal" site we saw in 2021.
In the more than two years since Gutenberg was founded, many changes have taken place, and there are more!
Since 2018, the Gutenberg block editor has made great strides. With the imminent transition to a complete website transformation, blockchain editing will only become a more important part of WordPress.
In this article, we cover everything from the basics of the block editor to advanced headings and features. We also studied what a complete website change might look like in the future.
If you are not ready to try, you can permanently disable Gutenberg and use the classic editor. However, Gutenberg will continue to grow, so you don't want to ignore it forever.
Do you have any questions or thoughts about the editor? If so, we would love to hear your comments, whether they are good or bad.
_______________________________________
Save time, money, and improve website performance by:
- Instant help from WordPress hosting experts, 24/7.
- Cloudflare Enterprise integration.
- Reach global audiences through data centers around the world.
- Use our built-in application performance monitor for optimization.
Check our plans and contact the seller to find a plan that suits you.