


Complete HTTPS Migration Guide: Install SSL and Redirect from HTTP to HTTPS
HTTPS stands for Hypertext Transfer Protocol Secure and encrypts the information sent between a visitor’s web browser and the server where the website is hosted, using a secure communication channel (such as contact forms, passwords, credit card numbers, and other sensitive user data).
When you obtain an SSL certificate for the first time, you’ll need to update your URL settings to ensure your website functions over HTTPS as expected.
All of your URLs will change their prefix from http to https, and it is important to implement proper redirections to avoid broken links and ensure visitors always access the secure HTTPS version of your website.
To Redirect HTTP Links to HTTPS:
1. Purchase an SSL Certificate:
The first step in redirecting all your connections from HTTP to HTTPS is purchasing an SSL certificate.
You can review different SSL certificate types offered by Atak Domain and purchase the one that fits your needs using the link below.

2. Install the SSL Certificate:
The installation process of an SSL certificate varies depending on the hosting panel or server you are using. You can receive free support from the Atak Domain Support Team for the SSL setup.
3. Redirect HTTP to HTTPS:
You can redirect HTTP to HTTPS using various web servers.
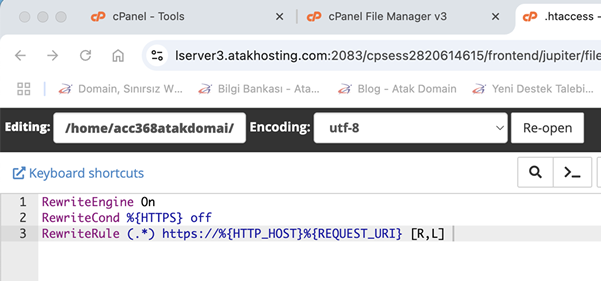
Redirecting via .htaccess File (Linux, cPanel)
You can do this using the .htaccess file. Simply add the following lines to the .htaccess file located in your FTP directory.
RewriteEngine On
RewriteCond %{HTTPS} off
RewriteRule (.*) https://%{HTTP_HOST}%{REQUEST_URI} [R,L]
Automatic HTTPS Redirection via Plesk
1. Log in to Plesk
Log in to your Plesk panel.
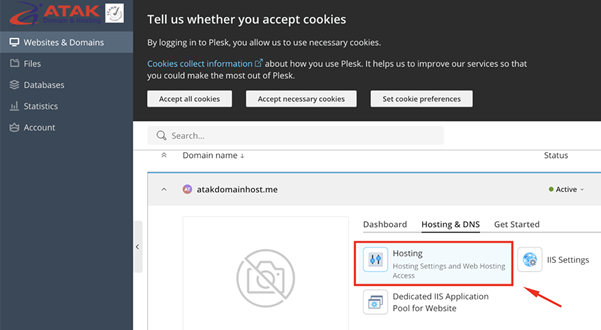
2. Go to the Websites & Domains Section
Click on the "Websites & Domains" section from the left menu.
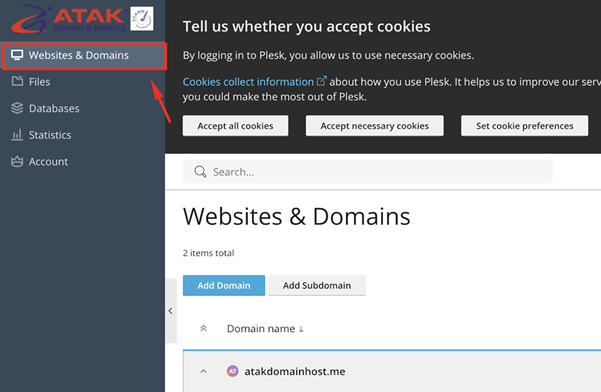
Find the domain name you want to work on from the list.
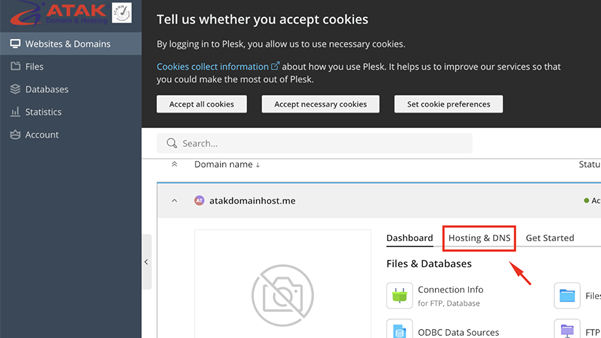
3. Click on Hosting & DNS
Under your domain name, click on the Hosting & DNS option.
4. Click on Hosting
Finally, click on the Hosting option.
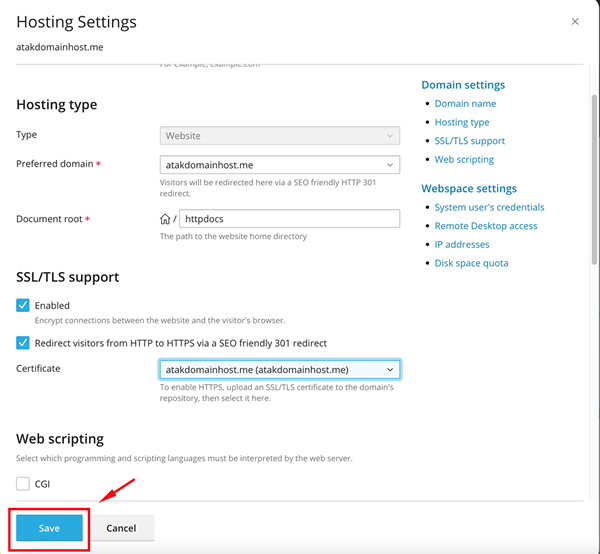
5. Select and Enable SSL
On the page that opens, under “SSL/TLS support”, click the “Enabled” button.
Select the checkbox “Redirect visitors from HTTP to HTTPS via a SEO friendly 301 redirect.”
Choose your SSL certificate from the Certificate section.
Finally, click the “Save” button.
This process ensures that the Plesk server automatically redirects all HTTP requests to HTTPS.
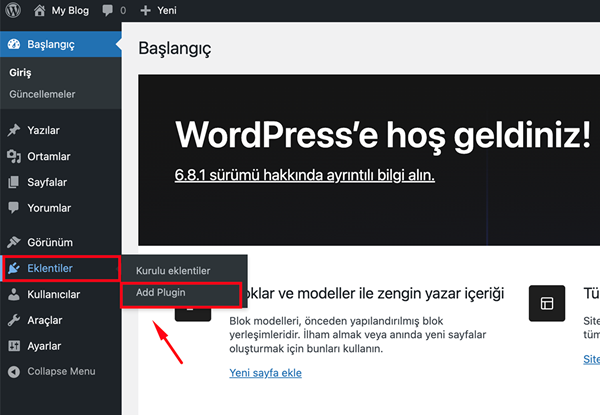
Redirecting to HTTPS with the Really Simple SSL Plugin (WordPress)
1. Log in to your WordPress admin panel
2. Go to Plugins > Add New
3. Search for "Really Simple SSL" in the search box
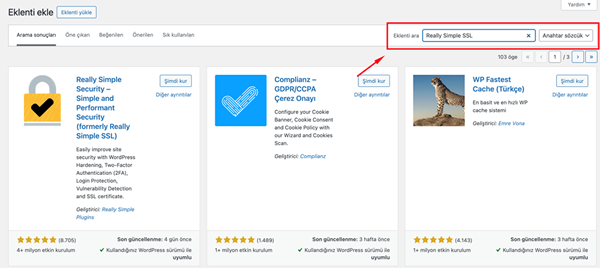
4. Install and then Activate the plugin

5. After activation, you will be directed to the plugin’s setup screen
6. If SSL is active, click the “Activate SSL” button

7. All settings will be configured automatically and your HTTP to HTTPS redirection will be completed.
Note: You must already have a valid SSL certificate installed on your site to use this plugin.
Random Articles

10 Best WordPress A/B Testing Tools to Optimize Conversion Rate
30.06.2022
WordPress 504 gateway time error
29.11.2021
19 Proofreading Tips for WordPress Bloggers (Write Better Content)
22.06.2022
WordPress or Blogger
03.12.2021
Best Grammar Checker Tools for Writing and WordPress
28.02.2022