


Step-by-Step Guide to Restoring MySQL Database with phpMyAdmin via cPanel
phpMyAdmin is a free software tool designed to manage MySQL via a web browser.
phpMyAdmin comes pre-installed on most web hosting control panels (cPanel, Plesk, etc.) by default.
Restore refers to the process of securely uploading the MySQL backup you created.
In this article, we will explain step by step how to restore MySQL in cPanel.
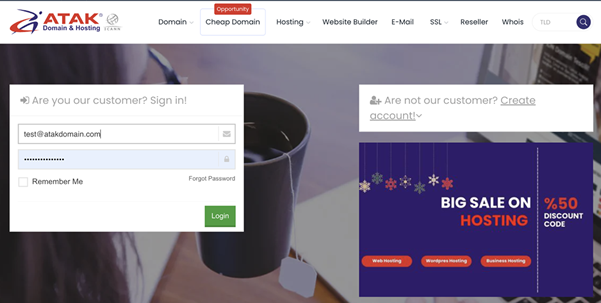
1- Log In to the Customer Control Panel:
- Log in to the Atak Domain customer control panel.
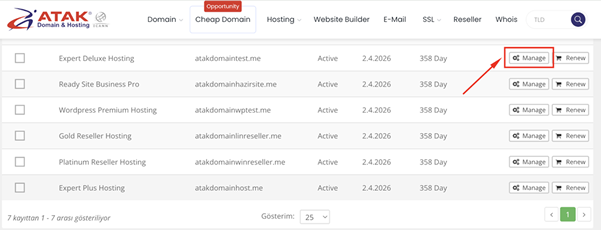
2- Select Your Hosting Account:
- Click the "My Hostings" button in the Atak Domain Customer Control Panel.
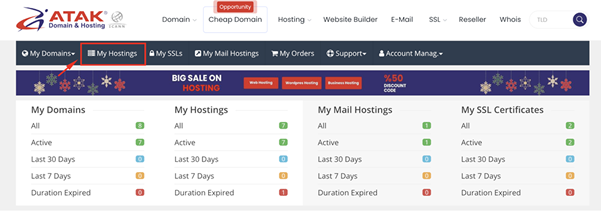
- Click the Manage button located next to your hosting service.
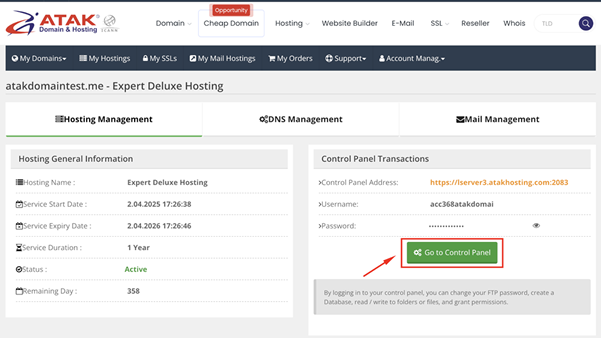
3- Access cPanel:
- On the "Hosting Management" page, click the Go to Control Panel button to log in to cPanel.
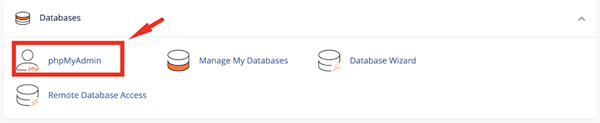
4- Access phpMyAdmin:
- On the main page of cPanel, find the Databases section and click the phpMyAdmin icon.
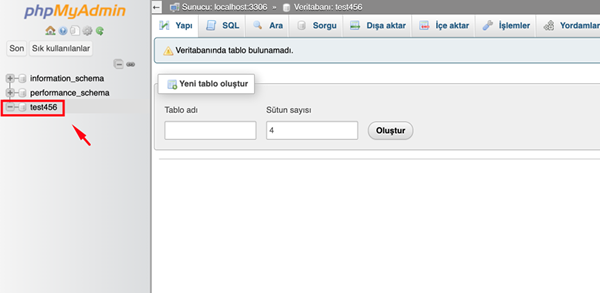
5- Select Your Database:
- When phpMyAdmin opens, you will see a list of your existing databases on the left side. In this example, the database is named “test_456”.
6- Import:
- Click the "Import" option on the top toolbar of phpMyAdmin.

- Under the File section, click Choose File and locate the .sql file you want to import on your computer. In this example, the backup file is named db_backup.sql.
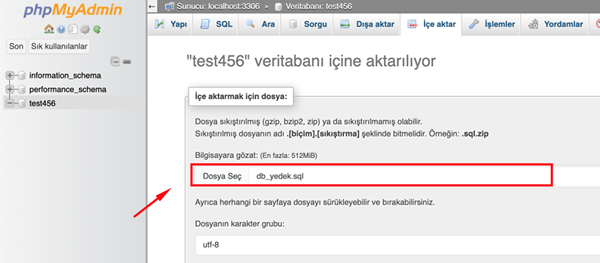
- The default settings are sufficient for most users. However, if you use a different character set or format, you can adjust the character set and format options.
- To import the database, click the Go button at the bottom of the page.
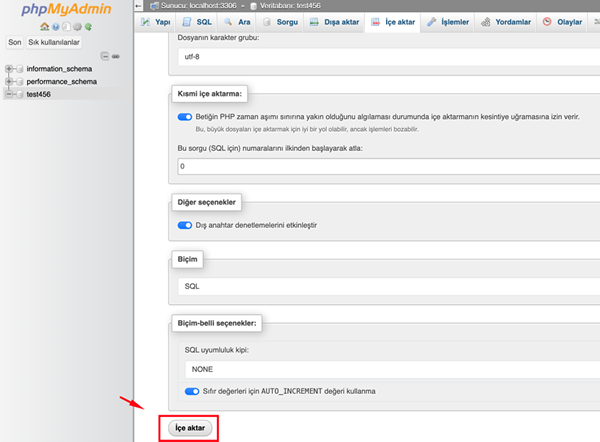
- After clicking the import button, phpMyAdmin will import the SQL file. This process may take a few seconds or several minutes depending on the file size and content.
- When the import is complete, phpMyAdmin will display a success message. New data will be added to your database, and database tables will be created.
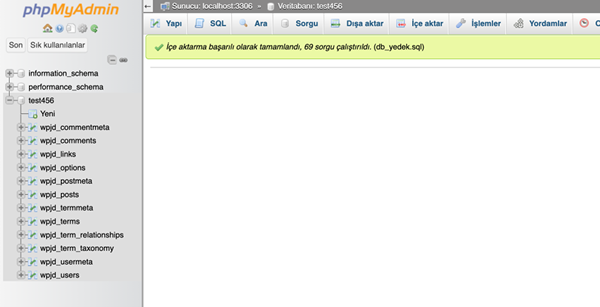
Congratulations! You have successfully completed the MySQL restore process.
Random Articles
Rebuild thumbnails in WordPress
06.01.2022
11 Fastest WordPress Themes in (Based on Thorough Testing)
13.01.2022
VIP alternative to WordPress: the benefits of choosing Atakdomain
22.12.2021
Django or WordPress?
02.12.2021
Shareaholic Review: A Suite of Audience-Engaging WordPress Tools
16.02.2022