

The WordPress image of the future: how to add, edit, and customize themes
Future WordPress images come in various shapes and sizes. You can upload a background image to the entire site, place it behind the button, or set a solid color background for the login page. No matter where you want to put them, you need to understand the basics of uploading photos, even a background photo.
This article explains what a background image is and how to change it for better results. We will also explain how to quickly activate the latest images on your website and resolve any issues that may arise during the process.
contents
1. What is a WordPress background image?
2. Various types of suffixes
3. Best practices for using WordPress reverse images
4. How to set a background image in WordPress?
5. Background image size, source and basic changes
6. Correct the common problems of WordPress background images
7. Improved WordPress background image plugin
What is the next WordPress image?
The last WordPress image serves as the complete background of your website. It is also called the proper surname.
 An example of a WordPress background image
The background can also be a solid color.
No matter which option you choose, the functions.php file will capture the last image in the WordPress theme. It is also displayed by the header.php file of WordPress.
Therefore, theme developers can better control whether to enable custom background features for your WordPress theme. You can still activate or deactivate this feature, but your site theme will usually be configured with custom settings.
You can implement many types of backgrounds on WordPress. You can choose a standard full site background or a background behind specific elements (such as pages and articles).
Custom backgrounds can also be used in specific locations on the WordPress website:
• Behind a WordPress page or post
• On the WordPress category page
• For pages or posts in content blocks
• On the login page
• Behind the navigation menu
• On maintenance or upcoming pages
Generally, if custom background support is enabled in the theme, users can choose to upload an image or color to fill the entire background of the website.
These settings are located in the WordPress dashboard under Appearance>Autonomy>Future Image. However, other future types are possible through pages and caches that place manufacturers, plug-ins, and various options.
Uploading later images to the dashboard is only part of the process. After that, you need to adjust the settings of the next image. Sometimes you can leave the settings unchanged, and sometimes it is important to reset the settings to make sure the image looks good.
The following WordPress image settings are:
• background color
• grow up
• Image location
• Should the image be copied
• Options to fill the screen or expand the image
We will first introduce best practices when using future WordPress images. Next we will introduce how to set a WordPress background image in different situations.
A large number of backlinks
The real benefit of WordPress backgrounds is that they are not all static images. You may encounter all kinds of backgrounds, from videos to photo samples to slideshows.
 Example of the last photo on the Atakdomain website
You can usually create a unique background with the help of custom CSS or plug-ins (or both). We will show you these two methods in this article.
Here are some future trends to consider:
• Standard background images: These are static images (PNG, JPG, and other image formats) that extend most of the site space and are located behind the original content. Their benefits include simplicity, options for high-resolution images, and custom support for WordPress Core. Disadvantages include views that can confuse front-end elements, and large, high-resolution images that slow down the site.
Light background: A combined colorful background image is useful when you want to add some richness to your website but there is no image suitable for your brand or an image that looks like a beautiful background. Palettes also provide clearer, more professional images, and their implementation does not take long. They are great for compiling your brand without the need for custom code or plugins.
• Gradient background: The gradient background changes from one color to another. It is more visually attractive than a solid color, but it will not take too much time to add it, you can add one with a lot of additions. The main disadvantage is that the exhibit may look good on one end of the gradient, but not on the other end.
• Pattern or texture background: All templates and text backgrounds are images, but they focus on repetitive objects or close-up textures in the image, such as wooden boards or a piece of grass. The advantage of a map or grid is that it is like an amazing background, and seeing how you expand it, most people will not notice a break in the map when the image is not big enough.
• Image slideshow background: Image slideshow allows website owners to share many different designs or images in the background, while customers who browse your website have increased their efforts to adjust the weather. However, displaying slides may be as distracting or slow as your website.
• Video background: The video background is interesting, pleasing to the eye, and easily reflects the nature of your brand. However, if done improperly, they can also cause performance issues and may distract your sales promotion. In addition, the latest video should be of perfect quality and played at the right time. As long as you choose free videos, the cost of producing them will be high.
Best practices for using WordPress images of the future
Installing a custom background image seems to be a simple task. Just upload the photo to the correct location and watch it appear in front, right?
In most cases, this is indeed the case, but sometimes you will find that the next picture may be a bit annoying. Therefore, we recommend that you follow the best practices for WordPress backlinks to eliminate the problem as much as possible.
Tips for using WordPress images of the future
Get high-quality images
Parsing the next image usually creates or destroys the display. You may think that the photo you took with your phone is very suitable for the next photo, but most likely it needs higher quality.
 Free stock images on Unsplash
You can purchase photos for free from websites such as Shutterstock. These websites usually have professional-level images that are ready and willing to upload as large background images. You can also find many of them on free photo sites.
The last image may not be fully displayed on your website because most of its content is captured by the content. Nevertheless, the actual image is still displayed on the screen.
If you are not using high-quality images, you may see extended backgrounds.
Make sure the photo on the back is the right size
In addition to the image resolution, the main size of the image is also very important.
All screens have different scales. Mobile devices will make it even more chaotic. But the goal is to use images that look great on the screen. Otherwise, you will run the risk of having to stretch the image again, otherwise it will not be displayed correctly.
Generally, a good way to do this is to stick to a minimum WordPress background image size of 1024 x 768 pixels. However, other experts recommend something like 1920 x 1080 pixels. In general, your best practice is to keep the width between 1000 and 3000 pixels, depending on the display position.
 WordPress background image template
Another factor you need to consider is the aspect ratio. Will the images of the future cover the entire website, or just the top quarter?
Technically speaking, a website has a vertical (height is greater than width) aspect ratio. So you can look at those types of pictures. However, part of the background (such as the background of the headline or banner advertisement) should maintain the shape of the temple (longer than the height).
In addition, the most common ratio for desktop computers today is 16:9. It helps to stay close to the target. Responsive themes or apps may automatically correct the next image for mobile viewing.
Finally, experimenting with future images on real sites and various devices should make the latter decision easier.
Opt in before creating a WordPress backup image
Like all images uploaded to WordPress, if you don’t like them before you publish them on the Internet, you are hurting yourself. This is especially important for backlinks, as they are usually displayed on multiple pages throughout the site. In addition, they are great images and occupy an important place on the screen.
Large images will put a lot of burden on your server. Save your image resolution, but resize it to load your website faster.
You have two options for optimizing the image:
1. Before uploading them to WordPress, optimize the background image (and all website images). Use tools such as Photoshop Express, GIMP, and Pixlr to complete this manual process.
2. Automatically optimize the process by installing the WordPress plugin, which can resize and reduce images when uploading.
Read our in-depth image optimization guide to learn how to optimize images for better website performance.
Check the backup theme before installation
Unfortunately, not all themes support custom background images. This is often because the background is not suitable for the overall design of the theme, so the developer chooses to completely separate it.
However, if you really want a backlink to your website, it makes sense to check the feature entry when downloading a new theme, especially if you plan to pay for premium themes. Many theme sales sites provide information about whether it supports future themes.
For example, the themes listed in the WordPress theme library support custom backgrounds as labels. You can also find references to specific backgrounds in the topic description.
 "Autonomous background" support for the theme
Other theme sites often contain similar information about custom background images. If not, please contact the developer to find out if there is any possibility that if it passes the future image block (as shown in the image below), it will cause problems with the theme.
Consider using a visible page creator to simplify the background image
Page builders such as Gutenberg, WPBakery, Divi, and Elementor provide custom block titles and modules to insert elements such as images and text boxes anywhere on the web page.
 Elementor website developer
If there is no cache-and-drop maker, setting the background image will become a bit difficult. Solving the problems you are facing is especially difficult.
Page builders also tend to modify the custom background image feature in WordPress. You can override theme limitations or missing elements that help display background images in the code.
Make sure your background image is legal
For photos, especially photos posted on the Internet, the law always comes first. There is a huge trend on social media, and people seem to find that adding credit to an automated photo can make better use of the image.
That is a lie.
Whoever shoots owns it. As long as the photo comes from a fast iPhone file-they immediately have copyright protection for that image in the United States and many other countries.
If you have the legal right to use other people’s photos, they need to ask the copyright owner for a written statement that allows you to use their photos-a simple email error. Then, if people ask you, you may need to post pictures.
We have a comprehensive guide to protect the images on your website, but this article also provides valuable information for those who want to use images from other sources.
The difficulty with images in the future is that adding plugins is often impractical, because WordPress has no place to include visible captions for future images. No, you cannot add a single deduction to an article or blog post and expect it to be credited to the entire background image of the website.
To protect yourself and respect the photographer, please consider one of the following when purchasing future WordPress image sources:
• Take a picture of yourself. This is the easiest way to ensure that you do not violate the rights of anyone else on the property.
• Pay for photos on websites such as Shutterstock and iStockPhoto. These are sometimes expensive, but for the last photo, it may just fit your budget.
Imagine free photo sites like Unsplash or Pexels. However, rest assured, no separation is required! You can sometimes find images on these sites that suggest but don’t ask for the source.
• Contact the photographer or artist and ask if you can use it for free. This may be what you need, especially if you provide some return.
• Imagine throwing a background image, or consider using a colored background image.
How to set the backend image in WordPress?
There are multiple ways to install background images in WordPress. These rules usually depend on where you want to take pictures.
For example, you might decide to keep the background image constant throughout the site. On the other hand, you can find a way to display unique backlinks on all your pages.
Since there are many possibilities, we will explain how to add a background image or color in the following sections:
• Entire site
• WordPress page
• A WordPress post
• Block individual content
• WordPress themes
• Category archive page
• WordPress login page
• Navigation menu
• Care page
How to add the next image to the WordPress title and menu
Before you begin: Enable automatic backup support on WordPress (if needed)
The developer determines the fate of the subsequent functions of the site. WordPress has basic functions, but theme developers can open it without the need for dashboard settings to open it.
If at any time during the course below you find that your topic is the reason you don’t have a self-service option, please follow the steps below to quickly correct it.
The basic custom WordPress backup is managed by the functions.php file. Open the file and enter the following code if it is missing:
$defaults = array(
'default-color' => '',
'default-image' => '',
'default-repeat' => '',
'default-position-x' => '',
'default-attachment' => '',
'wp-head-callback' => '_custom_background_cb',
'admin-head-callback' => '',
'admin-preview-callback' => ''
);
add_theme_support( 'custom-background', $defaults );
Note that the element that actually activates future support is the add_theme_support() function that contains everything. It will open the last feature code in the WordPress dashboard, and you can use it in many courses below this article.
You can also use the functions.php file to add a custom background image to the entire theme. Just use the custom image value to go to the field in the previous code and add the image URL in the space between the'' after => -.
This is a quick and easy way to create a custom background in the WordPress dashboard.
Follow the new hippies and their global warming, I will tell you. Removing the custom background feature may have its purpose, or the developer may have noticed that it causes a lot of problems in the design.
How to add a background image to the entire WordPress website
If your theme offers the ability to add custom images (which many people do), then this will be much easier for you.
First, go to your WordPress dashboard and click Appearance> Customize.
 Click the "Apply" link under the "Appearance" menu
It brings you the WordPress theme automatically, with custom settings on the left and website previews on the right.
Here, view and purchase the "Background" tab.
 WordPress background image in the editor
Or, if you can choose Appearance> Background, you can use it as a direct path to this setting.
 Click the "Next" link under the "Appearance" menu
Future custom fields manage the back-end elements of the entire site.
Click the "Select Image" button to continue.
 Click the "Select Image" button
In the "Select Picture" window, select a picture as a good background for your brand and website style. In general, a neutral color map of black, white, or gray usually helps to ensure that most of your text and content still look good in the background.
After selecting the image, click the "Select Image" button to continue.
 Choose a background image
The background you entered will now appear in the website preview.
See if your content is still prominent and appears with the selected image. Sometimes you may find that you need to completely change the background or change the text or link color.
A small background will also appear in the Settings panel, indicating that the image has been implemented.
 WordPress background image thumbnail
There are several other settings for WordPress fonts, including preset areas.
Click the "Current" field to change the image format using preset designs and lines. "Preset" options for future WordPress images
You can choose from the following presets:
• Suggestion: This is usually called a repetition, but it may be related to your topic. The default settings usually work best, but this depends on the image used.
• Full screen: This setting stretches the image to ensure that all parts of the screen are covered, although it means cropping the image so that it flows out of the screen. It is suitable for many high-resolution images, but may cause cracks in low-resolution images.
• Fit to screen: This will preserve the aspect ratio of the original image and try to use that aspect ratio to match the existing screen image. It can take photos close to the original state very well, but may not cover the entire future area.
• Repeat: This part uses the screenshot function to enlarge the image, but it will also repeat the image when the full screen cannot be successfully captured. For example, it usually looks beautiful. But for some images, it may create a clear line between repeated images.
• Customization: This setting allows you to control the background to the utmost extent, and provides you with multiple options to customize the size of the WordPress background image, such as how it is copied on the page, stretched, or grabbed users.
Because images have different sizes, resolutions, and details, it is impossible to determine which Provider is the most effective. Therefore, it is best to start with the default preview, and then try each of the other previews to see which one is best for your background image.
If all other methods fail, go to "Automatic Settings" and make your options very special.
 Display "full screen" for future WordPress images
The "fit to screen" recommendation for this image doesn't look like it at all, especially because the original image is much longer than its width and leaves an important space on the right. I can change the position of the image in the center, but it is likely to leave blanks on the sides.
 "Fit to Screen" Offer
The last setting to consider is the image position tool. Click the arrow to rotate the background image, correct the path to focus the image in the center of the image, or fill the screen.
Like the preset settings, the image location tool requires a process of estimating and checking your work, because the original image and its content determine its appearance.
 WordPress background image layout
Next, there is a checkbox field to move future images to the page.
After saving this box, the next image will stop at the previous content and scroll as the user scrolls up or down the page.
 Enable the "Browse Page" option
Unchecking it tends to change the overall layout of the last picture, but its main feature is that when the user clicks on the page, the last picture will remain static.
The first content item (such as the product in this example) flows on the image of the future, creating an interesting effect.
 Disable the "Browse by Page" option
Use automatic presets
When you choose options other than automatic preview, you won't get some additional settings to configure.
However, there are many other aspects to consider when choosing an autonomous preschool.
For example, you can choose to capture the screen or use the screen, and then combine it with a repetitive or non-repetitive background image to combine elements that have been preset. And you still get the "scroll with page" option.
 Presets and image sizes for future photos
See if you can use the original image without modification or settings. Sometimes the original image is almost perfectly matched and used as a background, so why mix things that are already prepared?
However, its size may be too large for your site, or the aspect ratio may be incorrect. However, we recommend that you try this setting to see if it works for you.
 Resize the next picture
Once you have decided on the perfect background settings (for this course, the default options look good), click the publish button to make changes to your site.
 Click the "Publish" button
Go to the front of your website to see the running background.
The home page is a good starting point. You will notice that there are no future title and image fields. This is why the welcome image at the top of the website has captured the entire horizontal part of the screen as a full-screen hero image.
As for the title and menu, you will learn how to set these backgrounds in some of the following courses.
 View the latest WordPress images
Remember that every page and post of your website has custom WordPress custom backgrounds enabled. This is a universal feature for people who want to get up and running a website quickly and increase firepower.
For example, visiting the sales page on this site will show the background behind the product selection.
 Next image in WordPress on another page
How to create the next color image for the entire website
The process of activating the background color on the entire site is not much different from when you open future images. First go to Appearance> Background in the dashboard, and then navigate to the next color field.
Press the "Select Color" button to open more settings so that you can choose and change different colors for the background.
 Choose a solid color as the background
The color panel provides many options for you to determine the color. The first is by writing a color code, or adding it. All colors have unique color codes, and you can find these colors and their related codes through a quick Internet search.
Another option is to surround the color panel to find the perfect background color. As long as you like to use a simpler color at the bottom of the panel, they also have universal colors.
To activate the background color, make sure that it is selected and displayed in the "Select Color" preview.
 Choose "Next Color"
You should see a colored background in the WordPress customizer preview. If it is not, it probably means that you have set an image background with a colored background.
To highlight the colored background, all you have to do is click the "Delete" button at the bottom of the "Future Image" preview.
 Delete WordPress background image
The colors now appear on your website, behind the content. As with any photo background, it’s wise to check your website to make sure all text, images, and links are still displayed in the new background.
 Reliable preview of the original WordPress background
Learn how to add the next image to a WordPress page
But what if you want to insert an image in WordPress so that it appears as the background on the WordPress page? The previous section defines the general settings for the site background image.
Most people like to add content to their pages because you can add specific topics to the pages that deliver the content. For example, if the company is located in Los Angeles, the "About Us" page may have a Los Angeles background. Or a book introduced by a writer can provide a background suitable for the theme of the story.
In this section, if you don't have to worry about spending money on plugins or choosing a page builder, we will guide you through a basic method and some alternative methods to add a WordPress background image to your page.
Note: It doesn’t matter whether you use Gutenberg or the classic WordPress editor.
For specific back pages, these methods look best:
• Add a single page background with custom CSS.
• Use plugins that allow personal page titles.
• With the help of the page builder, a custom background is added to each page.
Add your own custom CSS to the page to find the class ID of the page, and call the future URL in the custom CSS module in the WordPress page settings. Fortunately, calculating the class ID of a page is not so difficult, because we can search for it, or you may already know what it is.
Go to the website page where you only need the backlink of that page.
 Add a custom WordPress background image to the page
Right-click on the page location to highlight the download menu on the screen. Select the check tool at the bottom of the download menu.
The Inspect module displays the encoding of the page itself, as well as the custom CSS used globally for your site. This is a useful area for finding information on the page or posting information on your website.
 Check the page
The Inspect box contains the lines of code in the page, but we are only interested in the class tags specifically assigned to the page. For clarity, every WordPress page has a class symbol as an identification code.
Use the search function and type body or class to find the line of code marked with page-id.
In this example, the page ID is id-352, but yours will be different.
Despite the dashes, you still want to use the keyword id-#-to copy the entire code snippet.
 View page ID in WordPress
After saving the page ID for the next few steps, return to your WordPress dashboard and click Appearance> Automatic.
 Recap the topic
Select the CSS tab in WordPress customization.
 "Add CSS" in the customizer section
This section allows you to write or paste custom CSS that you want to operate on the entire website. In this case, it is useful to keep track of the custom background image and activate the background image for one page instead of another.
Follow the code in the Add CSS field below, but remember to change the "#" to the actual number you entered as the page ID in the previous step. In addition, you should enter the URL of the actual image, not the full text we included (http://YOURIMAGEURL.jpeg).
body.page-id- # {
Background image: URL ("http://YOURIMAGEURL.jpeg");
Background position: center;
Background size: cover;
Background repetition: no repetition;
Background attachment: fixed;
}
In this example, the page ID is filled in as 352, and we have the URL of the last picture extracted from the media library.
If necessary, if you have trouble adjusting the screen image after adjusting, please change the custom background settings. For example, you may want to resize elements such as WordPress background image size, plugins, or location. If not, please keep them all in the sample code.
 Add custom CSS to your WordPress site
Once you are satisfied with the custom CSS, click the "Publish" button.
 Click the "Publish" button
In addition to the custom CSS, the submitted page also contains a backup image using code size and location. Unless you reuse CSS for different page IDs, no other pages on your website will display the same background.
 The next picture now appears on the page
As mentioned earlier, there are other options to add a unique background to a WordPress page using a page builder or plugin, which allows you to add backlinks to a single page.
However, the cheapest and fastest way to place a background image on a personal page is to use the CSS code method described above.
How to add the next image in a WordPress post
The most recent image is placed behind any page in the WordPress page or web page.
The custom background feature in WordPress has nothing to do with personal posts, but this background will also appear in blog posts. It is not suitable for all organizations, because different blog posts may have different topics.
Blogs like this can take advantage of their unique backlinks. However, WordPress posts do not have their own future image settings, which makes it more difficult.
Therefore, when adding a background image to a post, we have several options to consider (you will notice that they are not the same when dealing with specific backlinks to a page):
• Use custom CSS to insert a background image.
• Use plugins to set the background of personal posts.
• Set a visible page for the post background maker.
As in the previous section about unique page backgrounds, you can use the page builder or custom post-specific extensions to add it.
Seeing that there is not much difference between creating a background and creating a background, we will only briefly start the steps of this process of managing personal posts.
When using custom CSS to implement special backlinks, you use the same code as the backend of the page, with one difference: you should see the post ID and the page ID.
Therefore, open the front of the WordPress post where you want to add a background.
 WordPress background image for the post
Right click on the post and select the "Check" option. Complete the search in the code to find the body class part of the code. Check the postid-# section-this is the post ID where you need to insert custom CSS.

You will notice that in this example, the post ID format is slightly different from the page ID, where the postid-# tag does not have the same line as the page ID between "post" and "id." -#. At the same time, these are not strict rules. You can find different forms of signs.
Now, go to your WordPress dashboard and click Appearance> Automatic. Go to the CSS tab.
 Go to the "More CSS" section
Submit the following code to the custom CSS field:
body.postid- # {
Background image: URL ("http://YOURIMAGEURL.jpeg");
Background position: center;
Background size: cover;
Background repetition: no repetition;
Background attachment: fixed;
}
After that, get the post ID number you have seen from the post you requested. Replace the number "#" in the CSS code. Also, change the text http://YOURIMAGEURL.jpeg to the exact URL of the future image you want to display, without leaving any traces around it.
 Add custom CSS for specific post ID
Before exiting the Add-on CSS tab, be sure to click the Publish button, as this will save your changes to the web page and let you see the latter in front.
 Click the "Publish" button to save the changes
After making these CSS changes, you can now go back to the front of the WordPress blog post to see the new background. Check the posts and other blog pages on your website to see if others have background, unless you apply the same code to these post IDs.
 View the background image in the post
How to add the next image to the personal content block
Content blocks The Gutenberg WordPress block editor allows you to display content options, including text boxes, images, and galleries.
These divide your content into different parts. Therefore, you only need to add a color bar or background image to it.
For example, suppose you wrote a blog post about the state of the clothing sales industry. You want to end your post with a call to action or start getting people to register for your next webinar. It is reasonable to use future colors or images to highlight this part.
Unfortunately, the WordPress block editor does not provide a complete configuration, so you can add a background to each block. However, some blocks can choose to run on a colored background.
There is also a separate block, called the experience block, which is the closest thing we can add to a single block in a post or page. Experience allows you to focus on writing and some media content, which is suitable for our next purpose.
The following are techniques that can be used to place color images or backgrounds for personal WordPress blocks.
Install colors for a piece of backup
The easiest way to add vibrancy to a block is to add a colored background. It doesn't look like a beautiful image background, but the colorful background is indeed the only background type available for standard blocks in the standard WordPress block editor.
Note: Some blocks do not have all default settings. If so, it is better to use the retrieval block and place other blocks on it, as described below.
For example, the paragraph block has a setting to enable a colored background.
To open it, select the block and find "Color Settings" in the lower right corner of the "Blocks" tab.
 Rename "Color Settings"
This section defines the text color and future color fields.
Go to the "Future Color" field and select a color from the list of available options. You can also select the "Auto Color" link to enter your color code or choose a color.
As you can see, when this setting is in place, the background of the paragraph block changes to a different color-in this case blue.
 Choose background color
Add a colorful background to any WordPress block
As mentioned earlier, not all WordPress blocks have this built-in backup feature. If you want to create a gallery or other block element that does not provide the latter option, what should you do?
The fastest solution is to use the block function in WordPress.
To do this, select multiple blocks already in the content. For this example, I will select both the paragraph block and the gallery block.
Click the highlighted square icon on the menu that appears.
 On the "Our Team" section of the page
Select the group option in the drop-down menu.
It captures the blocks you currently select and sorts them into a group, allowing you to exchange or modify them together instead of different blocks.
 Assemble the parts into one block
This defines the group as its block. This means you can go to the "Block Settings" tab on the right side of the page to view its settings.
Go to the "Color Settings" tab and click on it.
 Change the "color setting" of the assembly block
Like standard paragraph blocks, group blocks also have future color functions.
In this case, choose your favorite color to ensure that everything in the group no longer has that colored background.
The important point in the Group block is that it requires another block without background attributes (such as the Gallery block) and allows you to activate the background for it in any way.
 Set the background color to blue
Add an image background to a single WordPress block
The WordPress block appears in both the page and the post. So we can implement this strategy in both. You can add almost anything on top of the blockchain background—or just a WordPress block.
To start this process, press the "+" icon and navigate to the Berg block.
Select the block to insert it into your post or page.
 Add a photo block to the page
Then you have to click the "Upload" or "Media Selection" button so you can browse for images that can be used as backgrounds.
 Click the "Select Media" button
Select the image you want, and then click the "Select" button.
 Select the image and click the "Select" button
Now you can see the image as the background of the Cover block.
Voluntarily click on the block to start writing the content of the paragraph, because the basic function is to retrieve the text.
The most important thing about the Berg block is that it provides many formatting options, which allows you to convert from heading format to paragraph format in a few seconds.
 WordPress background image in section
To add more blocks to the background, press the "+" icon inside the Berg block itself. You may need to press Enter once to clear the key.
 Click the plus sign in the block section
Just like adding a content block to a regular article, the cover block allows you to search all potential WordPress content blocks.
This means that you can place images, galleries, columns, or any type of WordPress block in the Berg block, which will be an ideal solution for image backgrounds with personal blocks.

In this example, I took a photo and formatted it a bit to get approval in the Cover block.
Each block you place behind has its own custom settings in the block table on the right, so when you put them into the Berg block, please be aware of the changes.
 Block template with latest WordPress image
At some point, you may want to modify or resize the background image yourself. If so, select the block bar and go to the block settings tab on the right side of the page.
It shows several settings adjusted for the next image, including the following:
• Fixed background
• Background Durbar
• Focus options
• aspect
• Overlay
• Not satisfied
• advanced
 Change block settings
One of the most important settings to view is the bottom of the "Block Settings" panel.
Scroll down to see the overlay section. Open this section to specify color schemes and options to make these colors thicker or gradual.
This is an important option to change the background color slightly to be relevant to your brand or to highlight your first content. You can also adjust the opacity to ensure that the color does not completely cover the background.
 Change the background color of the block
Or, consider using the Stackable Page Builder Gutenberg Blocks plugin to open advanced tools for the background of a single block.
How to put the next image behind the WordPress title
So far, we have been discussing how to add background images to the entire WordPress site, as well as future guidelines for specific areas (such as WordPress blocks, posts, and pages). But where do your menus and logos come from?
Sometimes, you just need the background behind your head.
Installing future images for the title can add a new vibe to your website, especially if there is a holiday or a large store that you can light up.
First, go to Appearance> Title in the WordPress dashboard.
Note: You can also check the title setting by going to Appearance> Autonomy> Title.
 WordPress Dashboard> Appearance> Title
You should now see a preview of the homepage on the right side of the screen, and title settings on the left.
The title module explains the preferred criteria for each subsequent image of the title, so you can delete the image before uploading, or wait until the image is available on the WordPress dashboard.
Under the current title tab, click the Add New button.
 Click the "Add New Image" button
The title is useful because you want to make sure that all chains and elements of the text (not to mention your logo) are clearly displayed on future images.
Therefore, we recommend that you try the latter image and consider images that have nothing to do with more intense colors and patterns. They will not make it difficult for you to find your menu items and logos.
Select the image you think is ideal, and then click the "Select and Select" button to continue.
 Choose a picture
We like the built-in agricultural tool because it will automatically find the correct measurement value for the next head image. You need to speed up this process by converting older images to images like Photoshop.
Move the farming box to the place that makes the most sense to your background image. If you need to cut the image further, please drag one of the corners at will.
When you have the perfect product, click the "Crop Image" button.
 Crop the picture
The title background image will be immediately activated in the WordPress customizer preview, helping you really understand what your customers look like in this context.
You will notice that the last image of the title does not infiltrate the rest of the page content. Instead, it stays in the head, behind everything that currently exists, such as logos, slogans, menus, and search bars.
 Choose header image image
Another option on the back of the header is to upload some pictures and rotate them randomly, adding a little sparkle and surprise to your website when the user clicks on the homepage.
To do this, you must first upload some images to the title setting box. Click the Add New button to complete the process.
When you have multiple images, click the random upload title button to activate the function of displaying a different title each time.
 Add another title
You may notice that adding a background image to the title makes certain title items difficult to see, such as your menu or shopping cart.
If so, we recommend that you immediately avoid deleting the header image. Instead, go to the "Text Color" and "Link Color" fields to see if some adjustments help.
The text color setting controls every text in the header that is not linked to another internal or external page. Usually, this only means a slogan (if you have a slogan), but sometimes you may have other content, such as a shopping cart network or social media icons, which also change with the color of the text.
The other box is used to connect colors. When you make adjustments in this way, you will most likely see more changes because it does not include all menu items that link to other pages.
 The color of the image text on the back of WordPress
Below is an example of what happens when you choose new colors for text color and link color. You can see that the site name and title have changed, the white menu has changed, and most of the title elements (such as the shopping cart icon) have also changed.
 Title element control
For those who don’t want to use a background image in the title, you can also choose to use a solid color background.
To do this, find the future color field under the same heading settings area.
Click the color selection button and select a color from the panel to see the preview result. You can also change the text color when using the background color.
 Set background color
After trying the title that suits you best and deciding on the next perfect image for that title, click the "Post" button to let everyone see the changes.
If you have trouble making changes in the first place, consider clearing your WordPress cache.
 Click the "Publish" button
How to add future images to your WordPress login category and login page
How to add future images to WordPress categories
The WordPress category archive page compiles all the posts listed under a specific category. For example, many websites have categories for custom mail types (such as products). By default, all WordPress sites have post categories. Those that are uncategorized are marked as uncategorized.
Since the category archive pages compile similar content, it makes sense to include relevant background images on these pages to better reflect the category. For example, you might have a technical background in the web design category of the sea or sea travel category.
The custom CSS method (described below) is the cheapest option. However, you can also check the different builders and plugins for the page to see which of them allow backlinks on category pages.
To accomplish this task using CSS, open your WordPress tab and go to Appearance> Customize.
Select the Add CSS tab to open the module that allows you to write your own CSS.
 Go to the "More CSS" section
Open one of the category archive pages on the WordPress website. Typically, these pages contain the following URL: http://yourwebsitedomain.com/category/travel. You need to change the traffic part to the category on your website, and change the domain part of your website to your real domain name.
Right-click the category page and click Check. It will display the inspection tool in your browser, as well as the code for the page that you are viewing.
 Click on the correct website and select "Check"
Search for "body" or "class" to find the CSS class of the category page and the class of that particular category.
In this case, my CSS class is "category-traffic" because I have a category called "Traffic" on the site.
Save the CSS icon for later use.
 View the categories listed
After that, return to the CSS section in the WordPress customizer.
Enter the following code in the box, change the category’s travel rating to your own, and paste the actual image URL where it says http://YOURIMAGEURL.jpeg.
body.category-travel {
background-image: url("http://YOURIMAGEURL.jpeg");
background-position: center center;
background-size: cover;
background-repeat: no-repeat;
background-attachment: fixed;
}
 Add the custom coding for WordPress background image
Click the Publish button to save the changes.
 Add "Custom CSS" code
Finally, return to the category archive page at the front of the WordPress site. It should now display the same page as before, but with the background specified in the CSS code. If there is a problem with your WordPress background image format, please return to the CSS plugin panel to specify elements, such as future position, size, and repeat function.
 Go to the category page and find the last name
How to add future images to your WordPress login page
There are two versions of the WordPress login page: one for ordinary users who visit your website and want to register and log in to your website, and the other for internal users, such as administrators and writers.
These login pages are separate from the main functions of your site (most of the files are located in the wp-login.php file). Therefore, customized future imaging equipment will not infiltrate the log module.
You can use an add-on called "Customize Login Page Customizer" to do this. First, install and activate the plugin on your WordPress website.
 Log in to the news plugin
On the left, a new tab will appear in the WordPress dashboard menu of LoginPress.
Go to LoginPress> Settings.
 Go to LoginPress settings
Here you can adjust the plugin settings before adding the last name and customizing another part of the login page.
For example, it provides users with settings to remember automatically, display custom password fields, and end the session after a specified time.
 Change LoginPress settings
To enable a custom image background for the login page, click LoginPress>Customizer.
 Go to "Login News>Automatic"
This will take you to the WordPress utility, where a new page has been added for the LoginPress tool. You will find tables for themes, logos, backgrounds, etc.
You can also customize the login page by clicking the button in the visual preview.
 Install LoginPress theme
We will not hide all other settings because we focus on the future of the future.
Click the Last Name tab to continue.
 Go to the next tab of "Login News"
The first task is to decide whether you want a colorful background or a photo background.
If you like colored backgrounds, check the "Background Color" field and click "Color Selection". This color panel shows that you can actually choose colors that are meaningful to your business.
As you can see, the changes in the WordPress customizer preview also took effect.
 Select the "Login News" background color
Just below the Future Color setting, there is a background image section.
Enable future image editing to display a set of pre-made recent images.
 Enable the latest WordPress image
There are not many people to choose from the free version, but if you decide to upgrade to the premium version, the plugin will add more.
Keep experimenting with these pre-made backgrounds and see if they are suitable for your brand.
 Build a future gallery
The most likely way is to upload your picture as the background of the login page.
Browse to the Future Image heading and click the Select Image button.
 Select the "Select Image" option
You have uploaded images from your computer using the WordPress media library or selected one of them already in WordPress.
Select the image you want, and then click the "Select Image" button.
 Choose a WordPress login background image
The last activated image in the Customizer panel and the actual preview of the login page are displayed as thumbnails.
 Set background image options
Now you can choose to click the "Publish" button and follow the instructions on the screen. Alternatively, you can check the add-on settings to ensure that the best view for uploaded images is now active.
Use the "Future Repeat" download area and try options such as "Repeat", "Do Not Repeat", and "Repeat-x".
Depending on the size of the image, you may or may not be able to rotate the image slightly.
 Select the "Future Detection" setting
Next, check the "Select Options" option to further change the next image.
Usually, they place the image in the center of the screen, but sometimes it looks better if it is placed in the lower right or upper left corner. Try them all to find out which one is best for your background image.
 Choose background position
Going forward, the WordPress background image size tab has settings for how the image takes up screen space, and each preset option will adjust its size.
Again, try these to decide which one looks best. You may find that settings like including settings provide a better view than automatic or web settings.
 Adjust the WordPress background image size
That is to upload and activate the background image for your login page!
If you want to display the video as a background instead of a photo, you can use the last setting. If you have an interesting video related to your business and it does not attract too much attention from people who enter the site, please turn on this setting.
 Enable "Future Videos"
After completing all operations, click the "Publish" button to open the background of the login page, and it will be displayed when a user tries to register or log in to the site.
How to add the next image to the navigation menu
You may have seen some websites have beautiful menus with future images or icons. This is a common practice in the field of e-commerce. Brands may provide a large menu with categories and background images for each category button.
Want to know how we increased traffic by 1000%?
Join over 20,000 people to receive my weekly newsletter, which includes a built-in WordPress plugin!
Subscribe now
If you want to add more content to the menu in the future, check out our article on the best WordPress menu plugins. Many of these menu plugins provide options for including images and color backgrounds in the menu.
Seeing that there are several plugins that can add a background to the navigation menu, we will provide courses for two people, one of which allows the background behind the background. Instead, the other adds a background to your menu.
To add background images to various sub-menus, please install and activate the WP Mega Menu plugin. This plugin allows you to activate and manage a super menu with multiple download levels. It is great for large online stores, but also for smaller menus, especially when you want to add background images or icons.
 Add WP Mega menu
First look at the WP Mega Menu tab in the WordPress dashboard.
Click the theme menu.
 Go to the "Themes" panel
Here you can find a list of custom themes created by the app for your menu.
You can purchase it to change one of the themes or add your own design.
 Many super menu themes
Each theme has its own settings for specifying elements such as the theme title, menu bar options, and brand logo. Almost every part of the menu, from the drop-down menu to the bottom of the menu, is customizable.
However, for the back of the menu, you only need to know which theme to choose.
 Install Mega Menu theme settings
Go to Appearance> Menu in the dashboard.
 Go to "View>Menu"
You will find a new module connected to the Mega menu settings.
Click to activate the super menu, and then select the menu that best suits your website.
Finally, click the save button.
 Click the "Enable" button
Now, pay attention to the structure menu area.
Navigating to one of the current menu items will display the WP Mega Menu button. Here, you can get the exact design and layout of each download section.
Click the WP Mega Menu button of the desired menu. In this case, we will add a super download menu in the Sales tab.
Note: We assume that you have already installed a menu on your WordPress site. If you need help, please read my WordPress Dropdown tutorial guide.
 Add a large menu to your website
In the new window, rotate the variable to open the Mega menu for that particular menu.
Then you can add a drop-down row and drag some widgets from the left into the row. For example, we will drag the product list so that when someone clicks on the store menu, they will appear.
 Click the "Add Now" button
To add a background to this download area, click the option button in the lower left corner.
 Select the "Options" chain
Please refer to the uploaded future image field.
Click the "Upload" button to find the correct image in your media library to use as a background.
 Select the "Upload Picture" button
After selecting it from the media library, a small image will appear.
There are some other settings to be aware of, please feel free to check them if you wish.
 Correct thumb
Be sure to click the "Save Changes" button at the bottom of the "Options" panel.
 Click the "Save Changes" button
You also need to click the Save menu again in the Preview Structure field of the WordPress dashboard.
 Click the "Save Menu" button
Now, browse to the front of your website to view the menu. If you are looking for a theme that we just updated, you should find a future download section.
 The menu now has a background image
Another way to add a background image to the menu is to use a mobile responsive menu, which will detect your site when someone visits your site with a handheld device.
You can set the background behind the mobile menu with the help of the WP Mobile Menu plugin.
 WP Mobile menu extension
After installing and activating the WP mobile menu plugin, go to the mobile menu option in the WordPress dashboard.
 Go to the "Mobile Menu Options" link
The application provides a variety of ways to configure the mobile menu. The general requirement is to enable one of the menu formats and specify the WordPress menu to be used for the mobile menu.
For example, we can click to activate the left menu switch (open the mobile menu located on the left side of the screen) and select the main menu option from the left menu menu. This connects my existing main menu to the mobile menu, so guests can see the same table.
 Install mobile menu options
It depends on the type of mobile menu you are creating, but since we are creating the left menu, we can click on the left menu table to specify the appropriate settings to add the background.
 Select the menu settings on the left
Navigate to the rear panel area of the panel and press the "+" icon to open the media library.
 Add a background image to the mobile menu
Choose a photo from your media library and add it to the field.
You should see a small version of the background image as confirmation.
Select the "Save Changes" button to activate the background.
 Adjust the background image with arrows
By looking at how the application creates a mobile menu, the menu only appears when your browser is set to a narrower width or when you visit your website on your phone or tablet.
The new menu is merged under a hamburger icon (three horizontal lines).
Click this button to try a new menu with a background.
 Click the hamburger menu icon
As shown in the screenshot, the background is placed behind the entire phone menu for everyone to view.
 Mobile menu with future pictures
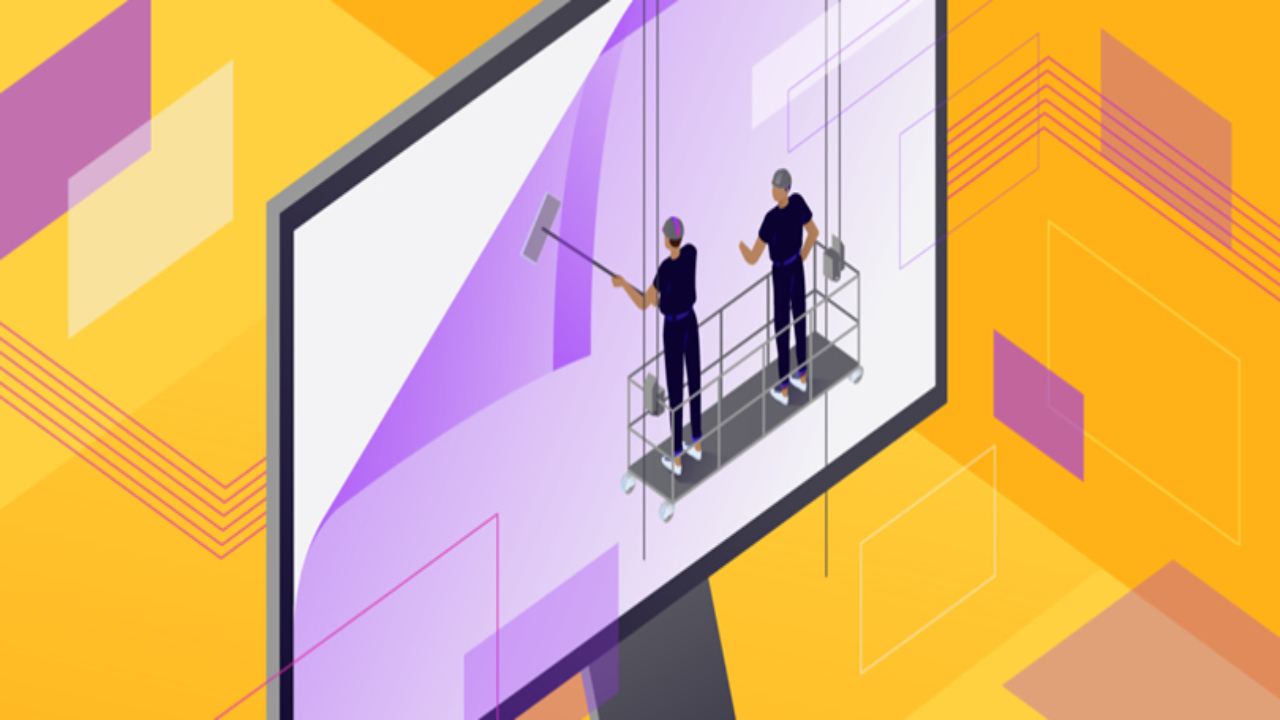
How to add a WordPress background image to the content page
All websites need care sometimes, and sometimes this care takes a long time, so that it helps to care about the appearance of the page.
The latter image plays an important role in the processing of nursing pages. Most care pages consist of a full-screen background image, which may contain some text or links to other resources.
If you already have a care page and it does not take future photos, follow the steps below to create a comfortable environment for use when you need to open your website to the public for a period of time.
You can add a background image to the maintenance page with the help of the maintenance plugin. Install and activate the plugin on your website.
 Maintenance supplement
When it is active, check the maintenance on/off button at the top of the dashboard.
Click the button to enter the maintenance settings page.
 Click on the "Protection Invalid" chain
Another way to enter the settings page is to click the maintenance menu next to the dashboard.
 Click the "Protect" menu button
The maintenance extended settings page has many options to choose from to make it comfortable, but the main area to look at is the general settings module. Here you can fill in the title and description, both of which are included as text in the background we will include.
The page title appears in the browser table, so you should also be able to customize it.
You can use the maintenance plugin for everything from the maintenance page to nearby pages, so you can write content such as "Our site is protected", or you can display some information about your company and be written by people Form. In their email address.
 Add a title to the care page
Looking to the future, the plugin provides the option to load the logo, which also includes the back image.
 "Load Logo" button
Click the "Upload Logo" button and select your logo to view its thumbnail in the dashboard.
 Logo for nursing page
Finally, the "Future Image" field requires you to click "Upload Wallpaper".
Upload photos from your computer or browse to your media library to find a suitable background for the care page.
Note: The last photo that looks best is large, high-resolution, and towards the temple. Subsequent alternatives to "Portrait Mode" can be used in the following settings.
 Click the "Start Upload" button
When you select a background, it will appear in the dashboard as a smaller preview.
 Thumbnail of next photo
Although images of the future with temple paths are very meaningful for desktop computers and widescreen screens, many people on your website end up using screens with vertical lines, just like the phone stays in a straight line.
Therefore, a detailed back photo will not make it look so good. Therefore, the app provides a portrait image background as an alternative, and when the user navigates the page using the portrait screen, the response will change.
It is important to include an image in this area, so click the upload image of the portrait device orientation button.
 Upload portrait pictures in portrait orientation
This time, view an image that is wider than portrait (portrait mode). You can always save the original background image to make it a portrait, or you can choose to download a completely different image to fill the space.
You want to highlight the image and click the "Select Image" button to insert it into the dashboard.
 Choose a background image
Unless you enable maintenance mode, all these settings are meaningless.
To do this, refer to the "Maintenance On/Off" variable at the top of the "Settings" page.
 Set maintenance page "on" or "off"
Turn the switch to "On" and select the "Select Option" button.
 Activate the care page
Go to the front of your website and make sure the background image and care page are displayed correctly.
It will most likely not happen.
There are two reasons for this: First, you must log out of your WordPress administrator account to view the maintenance mode website. Second, you may need to clear the site cache to update content changes.
 View the site in "Maintenance Mode"
For example, when I log out of the administrator account, every maintenance page appears when I log in.
The last picture, and features such as my logo and text description.
 The next picture is on the nursing page
In addition, changing the size of the browser window to include a vertical path further replaces the portrait mode background.
When you visit the website on your phone or tablet, you should also see portrait mode.
 The next picture is in portrait mode
Another image backend with attachments is called an image preloader. This is basically uploading an animated quick image before displaying the actual care page, background and content.
As with regular thumbnail images, click the "Upload Preloader" button to find pictures that look good and add them to the dashboard.
Click the "Save Changes" button again and clear the cache.
 Click the "Upload Preloader" button
Naturally, the Preloader Image effect will rotate for a while and then disappear to provide the care page and the next image.
Whether you want to maintain this influence is entirely up to you.
 Add a description effect to the next picture
There are many other final items you can try in the "Maintenance Settings" panel.
For example, you may want to add a background color instead of a background image.
If so, go to the Future Color field and choose the color chosen according to your brand.
 Open the next color gamut
Until you disable all other background images, the background color will not be displayed for the care page.
Therefore, be sure to delete the background image.
 Delete next image
You should also delete the last image in portrait mode.
 Install the next image in portrait mode
Save the changes and clear the cache. Then go to the front of your website to effectively view the background color. Check the front of your website
Other settings considered include elements such as font colors, font families, and future fonts.
Need a hosting solution that provides you with a competitive advantage? Your atakdomain achieves incredible speed, state-of-the-art security and automatic measurement. View our plan
We also recommend that you consider whether you need to pre-login. This provides a way for users to log in to their account and access configuration files when needed.
After finishing all operations, press the "Select option" button.
 Set font color
The maintenance application also provides many pre-made themes with beautiful background images and professionally designed text.
You can find topics about nursing pages and designs, as well as pages for editing email addresses and other contact information in the near future.
You must purchase themes to use them.
 Purchase premium themes
According to your budget, they are very cheap and look good.
 Template example
For those who are not interested in purchasing themes, all the settings listed above are at your fingertips. You can also enter the custom CSS module to customize the maintenance page and background image as needed.
 Go to the "CSS Customization" module
Remember, the maintenance page settings rarely take effect until you log out of your administrator account and click the "Clear Cache" button.
When you use Atakdomain, you can see the "Clear Cache" button in the upper right corner of the dashboard. If you use a different host, please consider one of the many cache plugins on the market.
 Click the "Clear Cache" button
After clearing the cache and saving the settings, you should see a beautiful background image and complete the care page!
 Check the care page
How to add a WordPress theme to the third page creator
Our article on the best page builders provides a list of options for choosing a page builder with drag and drop capabilities. WordPress already has a page builder in Gutenberg, but there are still many website owners who prefer other solutions.
The following section explains how to use some popular page builders to achieve the background, including Elementor, Beaver Builder, and SiteOrigin's page builders.
Use Elementor to add a WordPress theme
Elementor is a popular page builder, which means that website production is rapidly accelerating. It provides a free plug-in with many background image tools.
At the same time, Elementor provides visual background flexibility for different parts of your website, rather than restricting the future to the entire website. For example, you can add a background after each part of the building block and display different backgrounds between pages.
First, install and activate the Elementor plugin.
 Appendix elements
Elementor distributes its background settings throughout the maker, simplifying element selection and implementing backgrounds when needed. So, technically, you can go to any page or post in the hope of getting the next upload button.
In this case, we go to our test site. Visit the page of your choice and select Page> All Pages. You can do the same thing with Posts.
After entering the custom WordPress page editor, click the "Edit" button of Elementor.
 Click on the "Edit with Elementor" plugin
Transfer this view to the Elementor editor on the screen. Here, there is a menu with cache and delete modules on the left to build and edit your page.
The latter function is not in the section or block, but can be used for this page in the basic settings.
So, click on the small settings icon in the lower left corner of the editor (it looks like a gem).
 Click the settings button
This section shows the general settings of the page.
Click the Style tab at the top of the page setup section.
 Go to the "Style" sheet
Under Style, find the Background Type field and click the paintbrush icon to add a standard background.
 Set the "Future Type" field.
Next, select the type of background to display. For example, the color field allows you to change the background to a solid color. If it suits your style better, there is also a gradient option in the Backup Type field.
 Set the background to the next color
Click the "Image Selection" button at the bottom of the "Image" field to exit the media library and select the appropriate background image for this page.
 Click the "Select Image" button
As always, test your background image and stick to better measurements and best practices (for most high-resolution and portrait edits), then select the image that works best and press the "Insert Media" button.
 Click the "Insert Media" button
The last selected image is now displayed in the Elementor website preview. You may need to correct other parts of the content to ensure that content such as text and images is displayed on the back.
Elementor provides image background settings, such as position, attachment, repeat, and WordPress background image size. Adjust the settings to determine if your background looks better as a fixed extension, or using a vertical path or alternate dimensions.
Click the "Update" button to save all changes on the page and publish the new background of the site.
 Add new background
Part of the last name with Elementor
Elementor provides advanced back-end features for most parts added to the page.
All you have to do is select a section on the Elementor page and change the Future settings so that the background is limited to that area.
For example, we can select this text editor section to view the text section settings.
 Use Elementor to select parts of text
Select the "Advanced" tab and find the "Last Name" section in that tab.
 Go to the "Background" section
Future settings include background type, color, image, etc., just like the settings we found for general page background settings. The only difference is that it restricts these settings to selected parts.
Select the brush icon of the background type and click the image selection button at the bottom of the image field.
 Click the "Select Image" button
Select an image from the media library and click the Add Media button.
 Select the image and press the "Insert Media" button
As you can see, when sitting behind the content created for the section, the last image stays within the boundaries of the section.
Use the "Position", "Attachment", "Repeat", and "Size" options to change how the next image is displayed in that section.
Finally, click the "Update" button to save the changes.
 Click "Update" to see the changes
Use Beaver Builder to add later images
The Beaver Builder plug-in includes a Lite version and some basic post tools. It is one of the most popular page builders on the market, providing content modules for videos, images, paragraphs, and more.
Most importantly, it allows you to apply background images, colors, or videos, and use visual tools and CSS to place final elements on entire websites, individual pages, or individual parts of pages. .
First, install the Beaver Builder plug-in to get started.
 Beaver generator plugin
Go to any page or submit it for editing with Beaver Builder.
You need to convert the previously created page into a Beaver Builder form. Alternatively, you can choose to recreate the page and choose to modify the page in Beaver Builder.
To convert an existing page to Beaver Builder, open the page editor and click the three-dot icon to open the "View" menu in the upper right corner.
 Enter the page setup menu
Browse below to find and select the Beaver Builder download link.
It will try to compile everything on your page and convert these elements into compatible Beaver Builder modules.
 Click the "Convert to Beaver Builder" link
To recreate the page, go to Add Page> New.
Then click the Start Beaver Builder button.
 Click the "Launch Beaver Builder" button
The Beaver Builder plug-in provides you with a preview of the site. It occupies most of the screen and is like a true first-time editor, where you can click on items and move them around the box with the mouse.
The first method is to add a background to Beaver Builder by uploading the background to a single-part block. This can take up most of the page or part of the page, depending on the block size of your part.
After selection, please refer to the "Line Settings" button (icon ⚙).
Click the icon to specify the settings for that row. You can do this for sections and columns and other types of blocks.
 Change line settings
The settings panel appears in your website preview. Click the Style tab and go to the background section.
At the bottom, click the download menu to display all types of backgrounds.
 Go to the "Style" sheet
You have several types of Futures to consider, one of which is Image. still got more:
• colour
• Slope
• video
• Embedded code
 Install tips for the next WordPress image
Feel free to try different types of futures.
For example, you can see that the gradient background looks better than the image. Each future type contains its own settings. In this example, the gradient type requires two colors to move the gradient from one to the other.
 "About the company" section
Selecting the next image will display the area you selected from the media library or enter the URL of the image. If you are using a media library image source, please select the "Select Image" link.
 Click on the "Select Image" link
Find your favorite background image and click the "Select Image" button.
 Select media
Beaver Builder puts the image in the last selected position. The image settings section asks how you want to format the image. Choose from options such as "Size", "Copy", "Position", and "Add".
 Set the size of the next picture
Universal and full-page Beaver Builder images of the future
Beaver Builder works with custom WordPress design tools to take advantage of the latest built-in features.
Therefore, you can go to the Appearance> Backlinks tab to enable the image background for the entire site.
Or, open any website in Beaver Builder and click the tool download menu in the upper left corner.
Click here for the general settings option.
 "Common Settings" of Beaver Builder
The global settings panel provides an opportunity to customize the entire site, modify or modify custom WordPress coding. Therefore, we need to insert a piece of CSS code to change the background image of the entire site (global).
Click the CSS tab in the global settings and enter the following code snippet in the field:
body {
Background image: URL ("Image URL");
Background repetition: no repetition;
Background position: centered on the top;
Background attachment: fixed;
Background size: 100%;
Background color: #0f1066;
}
Change the URL of the image text to the URL of the desired background image. You can also modify the repeat function, extension, and subsequent size using CSS code.
 Go to CSS table
It makes more sense to use Beaver Builder to customize the page background, because each page has its own image as the background.
In your page editor, open the "Tools" menu again.
Choose CSS and Javascript layout options.
 CSS and JavaScript layout buttons
Insert the same code into the CSS table, change the URL with the image text to the correct URL, and adjust the settings you want:
body {
Background image: URL ("Image URL");
Background repetition: no repetition;
Background position: centered on the top;
Background attachment: fixed;
Background size: 100%;
Background color: #0f1066;
}
As you can see, the entire future of URL images that you have in CSS encoding will change. Please note that the CSS/Javascript layout panel only controls existing pages. Other than that, you will not see the background on any page.
 Add custom CSS
Use the page creator to add a simple line or widget background to the website creator
SiteOrigin's Page Builder is another tool for creating cached and drop-down visualization websites. Its ability to insert backlinks for the entire site is limited (you will return to the standard WordPress customization tool). Nevertheless, it provides settings for adding images and colors to the lines and widgets used by SiteOrigin.
First, download and activate the Page Builder plug-in from SiteOrigin.
 Page builder powered by SiteOrigin plugin
Look for new pages or consider adding SiteOrigin lines to existing pages on the site.
Each SiteOrigin section will ask you to add a widget or row. If you don’t want to design from scratch, you have the opportunity to check out Pre-built Lines.
The good news is that both the widgets and rows are configured in SiteOrigin to contain future images.
So, click the add widget or row button to continue.
 Add new widget or row
In this example, we will look at the Widgets library.
Here, you can choose from one of the many widgets provided by SiteOrigin, from menus and navigation pages to published content and product lists.
We will choose the Products widget in this example, but you can use one of many other widgets according to your design needs. Or, you can group these widgets in a row, and then add a background image to that row to make the background appear behind many widgets.
 Select the "Product" widget
The widget or new line ends in the SiteOrigin page editor. Most SiteOrigin resides in the WordPress dashboard, so like other page builders, there is no pre-made editor.
To add a background to any SiteOrigin project, browse to the project and click the "Edit" link.
 Click on the "Edit" chain
I chose the Products widget for this example, but each widget has its own settings to configure its appearance on your website.
The latest tools are located under the design drop-down menu. Purchase it to move on.
 The "Design" tab of the next WordPress image
Find the Future Image field and click the Select Image button.
You can also choose to follow the external URL to get the next image.
 Choose the next image and color
The media library displays the existing images you uploaded to WordPress. Click on the image that best fits this background and select the "Finish" button to launch the SiteOrigin module.
 Click the "Finish" button
Now the Future Image field provides a small version of the image.
Browse the settings to set everything from the background image display to the font color of the title.
Generally, you should be able to get the desired result by selecting the cover screen. SiteOrigin seems to include a tiled display, so you may need to modify it.
After completing the custom settings of the background, be sure to press the "Finish" button.
 WordPress "Future Image" settings
The widget for this page (in this case, the product widget) goes to the WordPress editor SiteOrigin. You can drag this element to the desired page and add new widgets and rows at the top and bottom.
You need to click the "Preview" or "Update" button and then scroll to the front of the page to see the results.
 Go to the "Products" section
The current background I added appears in the details of the "Previous Products" widget. Of course, this background needs some adjustments to make it look better, but it is a high-quality start to look more creative background images.
 Last name of this part
Use Brizy to add unique background photos
The creator of the back page of this demo, Brizy, provides beautiful templates and high-end front ends for adding unusual designs and quick fixes.
Brizy Page Builder includes a comprehensive set of caching and drop-down modules that can be built on your existing website. It also allows you to start with a blank template and then use Brizy to build your entire website.
In this way, you will be happy to hear that Brizy also provides a future tool for every item you add to the page maker. Not to mention, Brizy incorporates many unique futuristic styles, such as adding subtle videos to the background or the entire map.
To take advantage of these latest settings, please install the Brizy app and activate it to get started.
 Brizy page builder plugin
Most of Brizy's design process requires you to start with a blank template. Brizy will try to replace your old design with Brizy modules, but we have found it best to start over.
Go to the page or submit it in your WordPress dashboard, and start building the page with the title and some content.
You need to find a button to edit with Brizy. Purchase it so that you can send it to Brizy, the full-page maker.
 Click the "Continue to Edit with Brizy" button
The Brizy Page Builder uses buttons, text, and images to display a complete preview of your website. If the page is blank, click the "Start Page" button.
 Click the plus icon to create your page
Browse the layout and block tabs in the upper menu bar.
The planner provides a pre-built website that contains demo content and is available at any time until you customize your business content. Blocks are smaller parts of a web page, but they are still pre-built and are generally easier to use and manipulate than building blocks yourself.
It doesn't matter which way you go. Look at the design and blocks, and add as many as needed on the page. These are just some goal setting shareware that you can use to create a perfect website.
 Layout and block section
After you have a few blocks or designs on the website, please return to the editor screen to view your work.
You will see that each block section has a setting icon in the upper right corner of the block, which usually appears when you scroll the section.
Click it to get the block of your choice. We will add a background to the block.
 Click the "Settings" button
The block settings panel is located in the upper right corner. Check the menu icons to understand what they do.
One of them is color, which means colored background. If you are willing to pay attention to a solid color background or gradient, you can change it and add a gradient.
 Click the "color" button for the background
The icon button on the left contains future settings.
Press the button to open the quick tool to upload the background image to this block.
 WordPress background image button
Brizy provided three things about the media background:
• picture
• video
• Map
First, try using the Image type to see how it works with your existing design.
Click the picture upload area, find a picture in the media library and add it to the background.
 WordPress background image type
We found the panel image for this course and decided not to want the parallax effect.
This adds a nice effect because the colorful background acts as an add-on, but we can still see the wood texture behind it.
Remember, you can always adjust the parallax area to make the background image look like a fixed background, animation, or browser.
 The last picture without parallax
So you and Brizy took the last picture!
The best part of Brizy is that you can browse the design and click the "Settings" button for each section.
Next, we can add another background image without spending too much time.
 Add another future image
In order to show the power of other future types, we can click on the map background type, click on an address, and then watch the map show the exact location behind the previous content.
The map occupies a complete background, and if the setting is incorrect, it has a zoom function.
 Add a map as a WordPress background image
Finally, we recommend that you check out Brizy’s latest video tool, which is in the same section as the photo background tool. It works by defining the video URL (YouTube or Vimeo) and retrieving the complete video behind the original content. It also provides settings to watch the video and choose when to start when the user browses the section.
 URL of the next WordPress image
The animated gif below gives a short example of a running video, although it may be modified.
 Background with video
Background image size, source and basic editing
As we mentioned earlier in the article, although there is no perfect size for future images, we recommend starting with no less than 1024 x 768 pixels and sticking to common aspect ratios such as 16:9. The aspect ratio is not as important as the actual size and resolution of the image, because you can save the image or let WordPress do it for you.
If you don’t plan to shoot your own images, you also need to find a suitable place to buy or borrow future WordPress images.
Where can I find a suitable background photo
To find the next image, see our guide on how to find and add stock images without leaving WordPress. There are also useful market resources that can be found in high-resolution stock images, many of which are free.
In general, we recommend that you try to take the final photo yourself. If this is not possible, or you have no experience in photography or graphic design, please consider using free photography resources. You can also choose to purchase background photos from one of many high-quality stock photo sites, some of which charge a monthly fee to download a set of photos.
Some details of these links are:
• Unsplash-Free, no source required.
• Visual Hunt-Free images. Most photos do not need to be resized.
• Pexels-Free, no attachments required.
• Pixabay-Most photos that do not need to be taken are free.
• iStockphoto-a low-cost premium subscription for free photos.
• Shutterstock-Non-royal images that charge a reasonable subscription fee.
How to edit WordPress Future Image with custom CSS
As we know, you can add a WordPress background image using standard built-in WordPress tools or add-ons. It doesn't matter which way you choose, as long as you get the result you want. There is also an option to use custom CSS to style the background image or add it completely to your website.
We will not hide the custom CSS configuration, we will see how each subsequent image and theme will have a different process. However, we recommend that you read our guide on editing, adding, and customizing CSS in WordPress. This article contains useful tips for adding backlinks to almost any part of a website, from menu items to specific page blocks.
Correcting common problems with WordPress background images
All WordPress sites can add backgrounds. However, this does not mean that the basic functions are applicable to all sites. For example, you may find that the theme you are using does not support custom support. Or you can continue to load your background, but it does not look real (too big or too clear).
Facing your WordPress background problem is frustrating, unfortunately, it is a bit common. We have summarized some of the most common problems with the pictures below, and outlined each operation process.
How to solve the 5 most common problems with future images in WordPress
My theme does not support WordPress background images
Theme developers control the custom background feature in WordPress. They can turn it on or open it, depending on whether they want to activate custom support. When you do not need to cut backwards, or may not be consistent with the overall design of the theme.
If you find that your theme does not support custom backgrounds or limits your ability when adding backgrounds, please consider the following solutions:
• Change the theme to a theme that supports custom supporters. When buying or downloading items in the property list, look for automatic backgrounds.
• Use the backend to override the blocked custom background function.
Although it is possible to add custom encoding to the theme file to reactivate the custom background, we generally recommend that you oppose these two options. Your best bet is to find a theme that supports the theme or an extension that allows a background but does not unduly interfere with the theme's functionality.
My last WordPress image is too dark or the color is wrong
The dark background image may come from many settings next to the background image itself. In most cases, it is associated with additional filters or weakly colored backgrounds.
For most examples where the background is colored, you should check the topic or appendix for automatic background control.
Look for settings that require filters or plug-ins near the back area. You can also see the ambiguous features that need to be cleared to display the background correctly.
If all other methods fail, there may be a hard drive in the theme file. In this case, please contact the theme developer for future color schemes.
My last WordPress image is not in the correct position
The last image that appears in the wrong place will ruin the overall design of your website. You can see that the background is too far to the left or right, or the content that you want to be the center of attention of the latter may never appear on the screen.
Fortunately, it only takes a few clicks to navigate to the next round.
Go to Appearance> Background in the WordPress dashboard. Find the image you are currently uploading as the background and navigate to the location field. This field allows you to change your future location and provides options to return you to the left, right, top, bottom, or corner.
We recommend clicking the All Location buttons to see the results they produce. After finding the correct location, close the page.
My last WordPress image repeats itself over and over again
Strong textures and backgrounds usually look better when repeated, see how they look when the image is interrupted. However, many images look scary when repeated multiple times as a background, especially those with very different textures and degrees of color.
If your source image is not large enough to hide the entire background without showing the extension, it is useful to copy the future image layout. Therefore, WordPress sometimes redesigns itself to maintain image resolution.
The main solution to this problem is in the background section of Word> Backwards in WordPress. Load the image as a background and try to use previews such as "Capture Screen", "Fit to Screen" or "Auto" instead of the default options.
However, you may find that trying to use a smaller image to hide the entire background may lead to unsatisfactory results. In this case, the best solution is to completely change the picture from the future source and look for a large, high-resolution picture that is ready to be published on the Internet.
The last image of my WordPress is expanded
Expanding the background image means that your custom background settings try to take a smaller image and hide the entire screen with the image.
You can also see that this can happen if the large image and high resolution do not match the desired aspect ratio. For extended background images, please consider the source file. Choosing a suitable different image is the best choice.
Another problem is that you may have configured future settings incorrectly. Check the position of the future image and the extension on the screen in the screen capture mode. Maybe you just need to stick to the original standards or add repetitive features to make them all work.
Other back solution tips
• Theme developers have full power to customize WordPress background functions. If you have already installed a theme and the background does not work, it is best to contact the theme developer or install a new theme to see if the problem can be solved.
• Customizing the background color and image usually removes the custom CSS code you implemented to control the size, position, or source of the background image. You may have to rely on theme settings instead of using custom CSS.
• The item may be sold with the custom background activated. Normally, all you have to do is replace the last image with a new image. Sometimes you need to adjust the size of the theme file or use custom CSS to adjust the size of the theme settings.
The best WordPress background image plugin
If you want to have other editing features for post images, and are interested in video backgrounds or tools that allow specific page backgrounds, you can consider the following WordPress background image extensions:
Simple full screen background image
 Full screen background image attachment
The Simple Full Screen Background Image plugin is not much different from the custom background image tool in WordPress, except that it adds automatic functions for browsing and scrolling the browser.
Overall, this plugin is best for those who find their theme's ability to prevent the addition of backlinks, or they may have problems using the latest built-in WordPress tools. It highlights what you have on WordPress and adds a special background button to your WordPress dashboard to instantly upload images from your computer.
that's all!
The plug-in also has an advanced version that provides better zoom, supports an unlimited number of backgrounds, unparalleled effects, and more.
Advanced WordPress background
 AWB-WordPress development plugin
The WordPress background development plugin takes a different approach to the WordPress background, allowing you to take advantage of the unique effect of enhancing the background. An example is the parallax backend, which can interact slowly with users when they browse your website.
The app also supports video. The video background is downloaded from places like YouTube and Vimeo, or you can host it yourself.
It can also have a dry skin tone or a regular background. All of these future features include advanced features that you might not find in basic WordPress tools. Some of them include grid and measurement effects, blur effects, and custom speed options.
It supports Gutenberg and can be used with the standard WordPress editor and many other visual page builders. Finally, you can use its custom CSS options to add more styles to your background.
Perfect photo + retina
 Perfect photo + retina supplement
The Perfect Images + Retina app comes in handy as a two-in-one solution. It allows you to manage the size and appearance of WordPress background images, as well as update defects and edit images. Image management is great, especially for high-resolution backgrounds.
If you choose its premium version, the app will provide the features of the higher version. It creates a retina image for future images so that the image looks like it wants, focusing on the high-resolution screen.
care
 Plugin with WordPress background image
Maintenance is an easy-to-use application that can be used to maintain your design and pages in the near future. There are free and premium versions of the maintenance plugin, but the free version is enough to activate the maintenance page and add future images with text and fields.
Then, you can upload your own logo, custom fonts and icons, etc., and choose different templates with beautiful background images. You can also install many of its pre-built templates, but most of them require additional advanced permissions.
WordPress will not try to add a basic background image and display it throughout your site. This is a feature built into the core WordPress, so you can easily change the background of certain events or holidays. You can also wait for life with a background.
In addition to standard WordPress backgrounds, you can also use custom CSS codes, plugins, and page builders to implement various backgrounds on your WordPress site. From the background of the image on a specific page to the background of the menu button, the possibilities are endless.
Now is the time to add the background you always wanted to your WordPress site.
Have we forgotten something? If you are having difficulty adding or managing recent WordPress images, please leave a comment.
_______________________________________
Save time, money, and improve website performance by:
• Instant help from WordPress hosting experts, 24/7.
• Cloudflare Enterprise integration.
• A global audience reaches data centers around the world.
• Use our built-in application performance monitor for optimization.
Categories
- Domain Guide & Registration Process
- Email Services & Setup Instructions
- Step-by-Step How-To Guides
- Insights & Articles from the Tech World
- Server Management & Performance Tips
- Software Development & Coding Resources
- SSL Certificate Guide for Secure Websites
- Choosing the Best Hosting & Optimization Tips
- Key IT Terms & Their Definitions
- SQL Database Management & Queries
- WordPress Setup & Optimization Strategies
Random Articles

WordPress 504 gateway time error
29.11.2021
The WordPress image of the future: how to add, edit, and customize themes
06.03.2023
Shareaholic Review: A Suite of Audience-Engaging WordPress Tools
16.02.2022
What is the second level domain?
20.04.2021
Best Grammar Checker Tools for Writing and WordPress
28.02.2022