
Adding an A Record
DNS management is crucial for the proper functioning of a website and the seamless operation of email systems.
DNS (Domain Name System) records determine which IP address a domain name points to, which email servers are used, and various other technical details.
In this article, we will explain step by step how to add an A record.
What is an A Record?
An A (Address) record allows you to direct a domain name to a specific IPv4 address.
For example, if you want the domain ataktestdomain.click to point to the server with IP address 185.46.40.71, you need to use an A record.
An A record is also used to direct subdomains to an IP address.
For instance, if you want blog.ataktestdomain.click to point to the same IP, you just need to create another A record.
Note:
Before adding an A record, make sure your domain's DNS management is handled by Atak Domain.
If your DNS is managed by another provider (e.g., Cloudflare, Natro, GoDaddy, etc.), you must add the A record through their platform.
Otherwise, the changes you make will not take effect.
Steps to Add an A Record
Follow these steps to easily add, edit, or delete your A record:
1- Log in to the Customer Control Panel
Log in to the Atak Domain customer control panel.

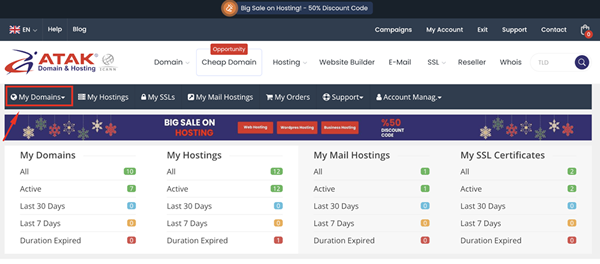
2- Select Your Domain Account
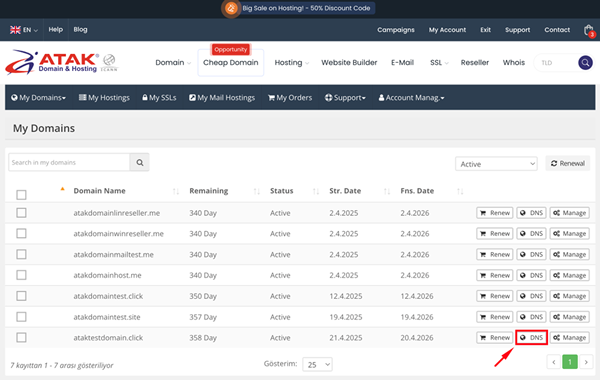
In the control panel, click on the "My Domains" button.
- Click the "DNS" button in the row of the domain for which you want to manage DNS records.
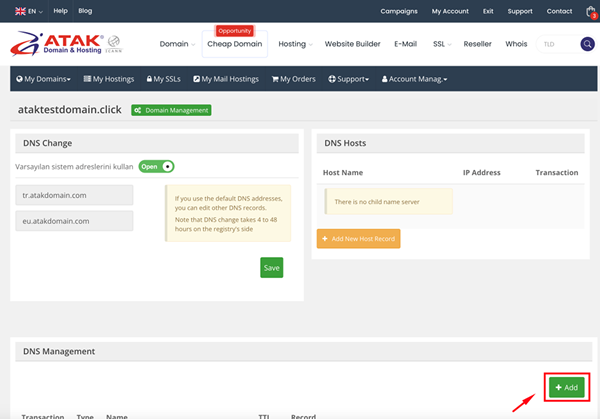
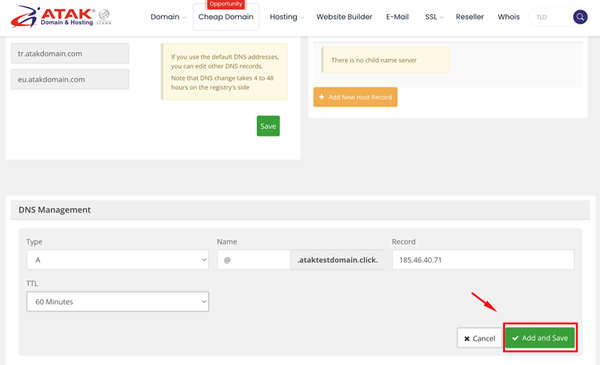
3. Add a New A Record
- In the DNS Management screen that opens, click the "Add" button.
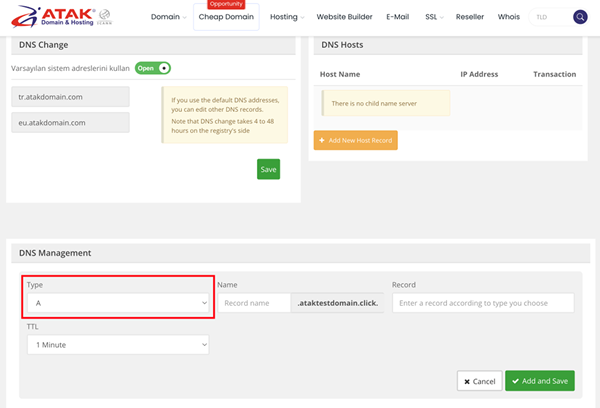
- Select "A" as the record type.
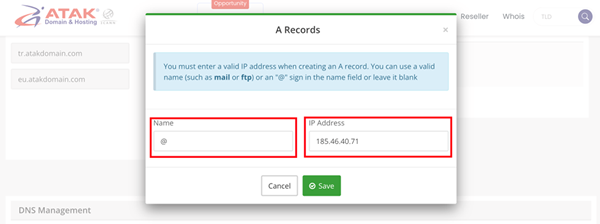
For example, suppose you have hosting services with another company, and your hosting provider asks you to point your A record to the IP address 185.46.40.71.
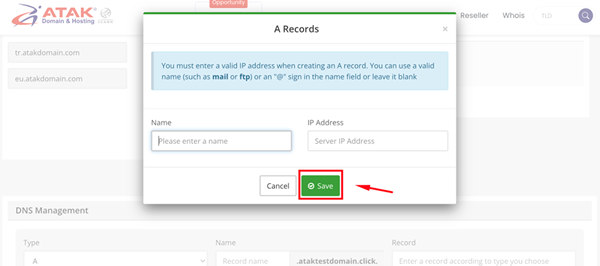
In the window that opens, fill in the following fields:
- Name: The main or subdomain to be directed (@)
- IP Address: The target IP address to direct to (185.46.40.71)
- TTL: Determines how long the DNS record will be cached on the internet. (Default: 60 minutes)
After filling in all the information, click the "Save" button.
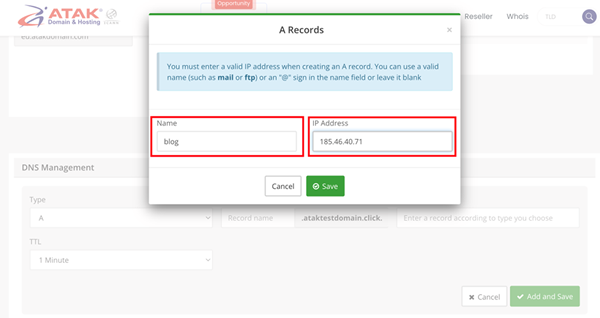
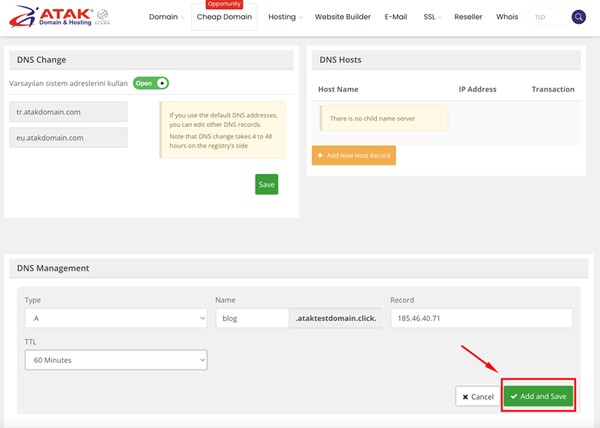
Creating an A Record for a Subdomain
If you want to add an A record for a subdomain (e.g., www.ataktestdomain.click or blog.ataktestdomain.click):
- In the "Name" field, enter only your subdomain (e.g., blog or www).
- Enter the IP address and set the TTL duration. (Default: 60 minutes)
- Then click the "Add and Save" button.
Congratulations! You have successfully added your A record.
DNS changes usually propagate to servers worldwide within a few hours.