


How to Create a Subdomain in cPanel?
In this article, we’ll walk you through the step-by-step process of creating a subdomain under your cPanel account.
Let’s first define what a subdomain is.
A subdomain is a subdivision of your main domain. For example, while www.atakdomain.com is the main domain, blog.atakdomain.com is a subdomain.
To create a subdomain in cPanel:
1- Log in to the Customer Control Panel:
Log in to your Atak Domain customer control panel.

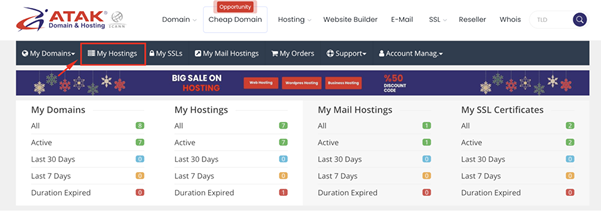
2- Select Your Hosting Account:
Click the "My Hostings" button in the Atak Domain customer control panel.
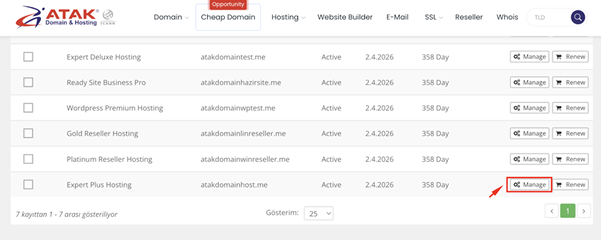
-
Click the Manage button next to your hosting service.
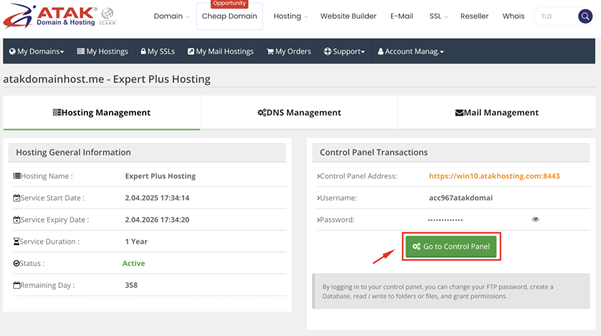
3- Access cPanel:
On the "Hosting Management" page, click the Go to Control Panel button to log in to cPanel.
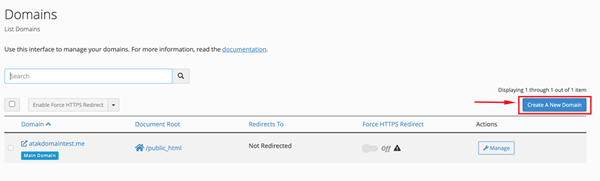
4- Click on the Domains section:
Under the "Domains" heading, click Domains.

Click the Create a New Domain button.
In the "Domain" field, enter the subdomain you wish to add. (In this example, the subdomain is named blog.atakdomaintest.me.)
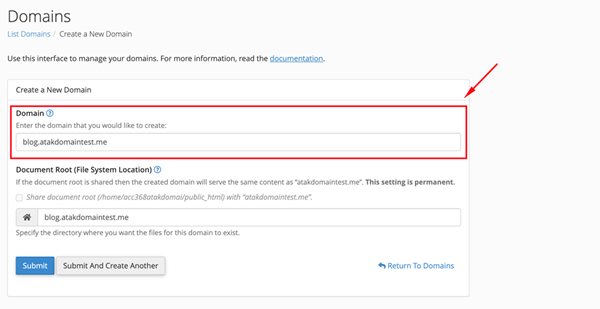
Click the Submit button.

You will see a confirmation message indicating your new subdomain has been created.
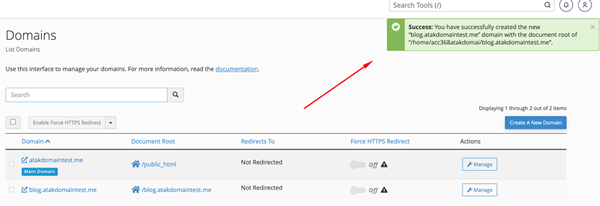
Congratulations! Your subdomain has been successfully created.
Note: When you create a subdomain, you must also create an A Record wherever your nameservers (NS) are hosted. Make sure to point the A Record of the subdomain to your cPanel's Shared IP Address.
Random Articles

An In-Depth Look at the 10 Best WordPress Comment Plugins
22.06.2022
19 Proofreading Tips for WordPress Bloggers (Write Better Content)
22.06.2022
24 WordPress Membership Plugins to Capture Recurring Revenue
13.01.2022
How to find the owner of the domain name
21.04.2021
What are the Effects of Domain Names on SEO
23.01.2020