

Adding an MX Record
DNS management is crucial for the proper functioning of a website and the seamless operation of email systems.
DNS (Domain Name System) records determine which IP address a domain points to, which email servers are used, and many other technical details.
In this article, we will explain step-by-step how to add an MX record.
First, let's define what an MX record is and explain its use with examples.
What is an MX Record?
An MX (Mail Exchange) record specifies which mail server should receive emails sent to your domain.
Things to Do Before Adding an MX Record
- Obtain the required MX records from your email service provider.
- If available, delete the previous MX records.
Note:
Before adding an MX record, make sure that your domain’s DNS is managed through Atak Domain.
If your DNS is managed by another provider (e.g., Cloudflare, Natro, GoDaddy, etc.), you must add the MX record through that platform.
Otherwise, the changes you make will not take effect.
Steps to Add an MX Record
Follow the steps below to easily add, edit, or delete your MX record:
1- Log In to the Customer Control Panel
Log in to your Atak Domain customer control panel.

2- Select Your Domain Account
In the control panel, click the “My Domains” button.
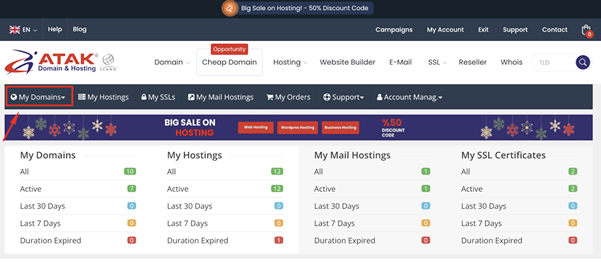
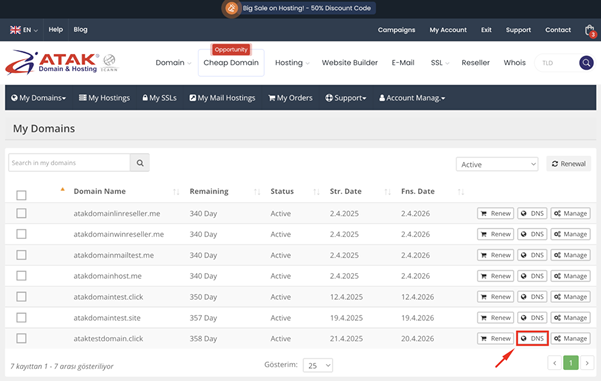
- Click the “DNS” button next to the domain name for which you want to manage DNS records.
3. Add a New MX Record
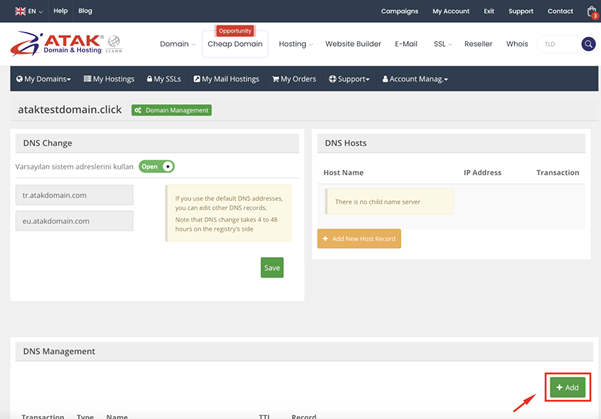
In the DNS Management screen that opens, click the “Add” button.
From the Type options, select MX.
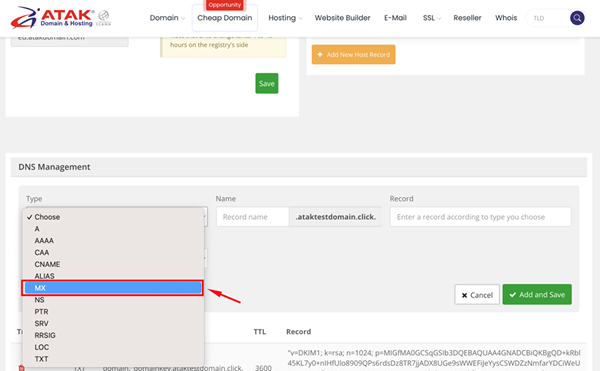
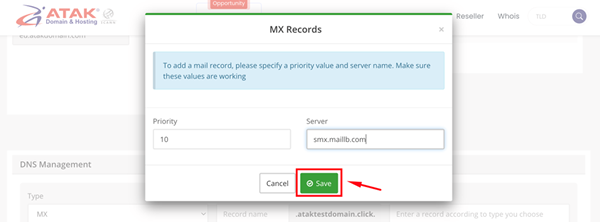
Enter the Priority and Server values, then click the Save button.
MX Record Details
Server/Record and Priority:
The server value shows the mail server that handles emails for your domain. You can obtain this information from your email service provider.
For example, Atak Domain email servers have the following two records:
- Smx.maillb.com (Priority: 10)
- Smx.maillb.com (Priority: 1000)
Name:
If you're adding MX records to your domain, enter “@”.
TTL:
It is recommended to use the default value (60 minutes).
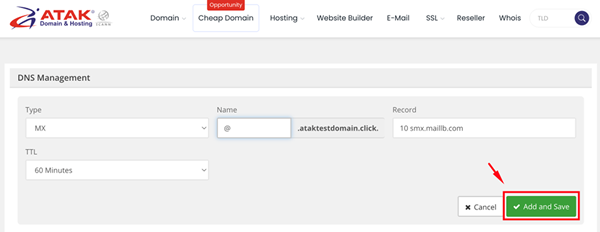
Congratulations! You have successfully added your MX record.
DNS changes usually propagate to all servers worldwide within a few hours.


