


How to Generate a CSR and Install an SSL Certificate in cPanel
When you purchase an SSL certificate, you need to generate a Certificate Signing Request (CSR) to send to the Certificate Authority (CA).
In this article, we will explain how to generate a CSR on cPanel, validate the SSL, and complete the installation steps.
Generating a CSR, Validating and Installing SSL on cPanel
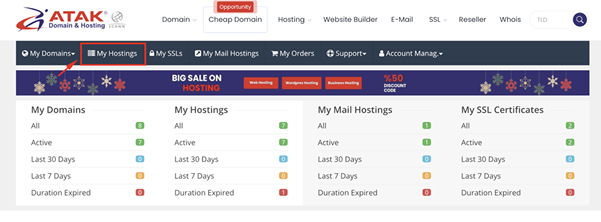
1- Log in to the Customer Control Panel:
-
Log in to the Atak Domain customer control panel.

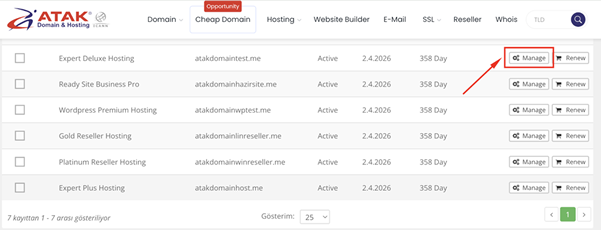
2- Select Your Hosting Account:
-
Click on the "My Hostings" button in the Atak Domain Customer Control Panel.
- Click the Manage button next to your hosting service.
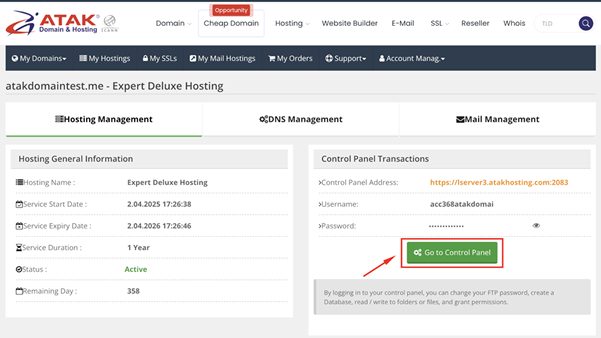
3- Connect to cPanel:
-
On the "Hosting Management" page, click the Go to Control Panel button to access cPanel.
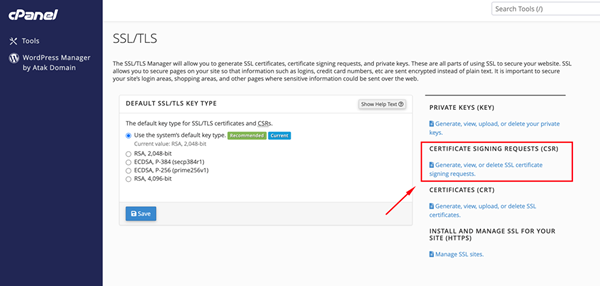
4- Generate CSR:
-
After logging into cPanel, click the SSL/TLS option under the "Security" section.

-
Under the "Certificate Signing Requests (CSR)" menu, click the "Generate, view, or delete SSL certificate signing requests." button.
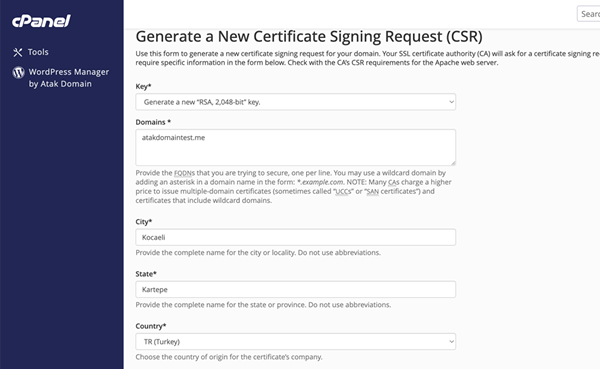
CSR Generation Steps
-
Domains: Enter the domain name where the SSL certificate will be used. For wildcard certificates, use an asterisk at the beginning (*yourdomain.com).
-
City: Enter your city name.
-
State: Enter your district or state.
-
Country: Select your country from the dropdown list.
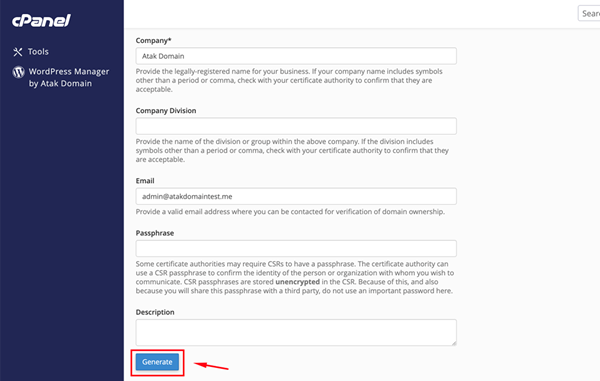
-
Company: Enter your company name. If you don't have one, you can write NA.
-
Company Division: Enter your department or division. If none, write NA.
-
Email: Enter your email address (e.g., [email protected]).
-
Passphrase: Used to verify the identity of the certificate requester. This field can be left blank.
-
Description: Used to identify the CSR within cPanel. Enter your domain name.
Note: It is best to use only English characters and numbers when generating a CSR.
-
Click the "Generate" button to create your CSR.
-
You have successfully generated the CSR.

You can now send the generated CSR to the SSL provider. Make sure to include the lines "-----BEGIN CERTIFICATE REQUEST-----" and "-----END CERTIFICATE REQUEST-----".
Once your certificate is issued, you can proceed to install it in your cPanel.
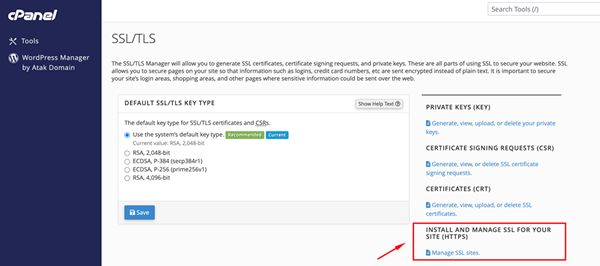
5- Install SSL:
-
After logging into cPanel, click the SSL/TLS option under the "Security" section.

-
Under the "Install and Manage SSL for your site (HTTPS)" menu, click the "Manage SSL sites." button.
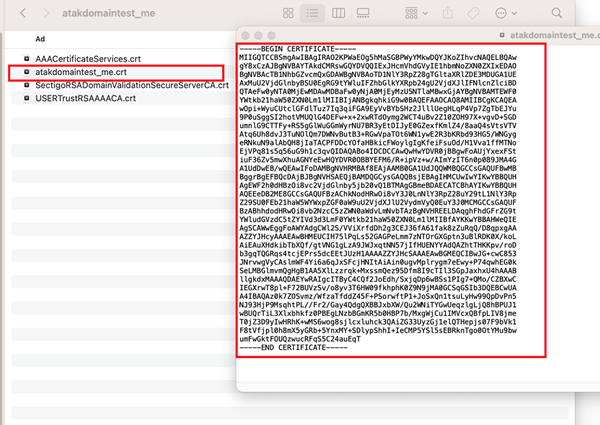
-
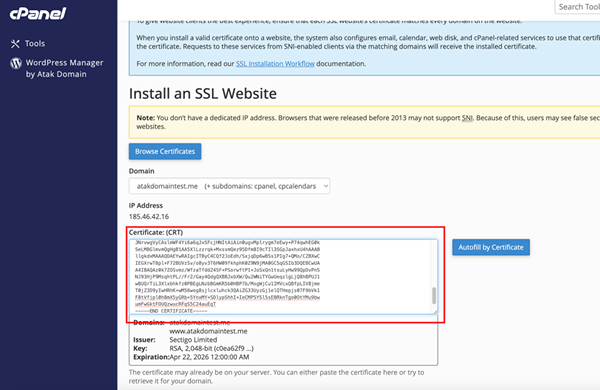
Open the certificate file you downloaded, copy the section that includes "-----BEGIN CERTIFICATE-----" to "-----END CERTIFICATE-----" and paste it into the Certificate: (CRT) field in cPanel.
Note: You can open certificate files using a text editor such as Notepad (Windows) or TextEdit (macOS).
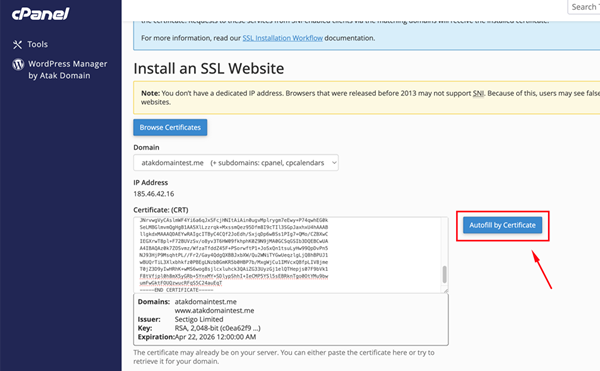
Click the "Autofill by Certificate" button next to the entered certificate. The Private Key (KEY) and Certificate Authority Bundle (CABUNDLE) fields will be auto-filled.
Finally, click the "Install Certificate" button.
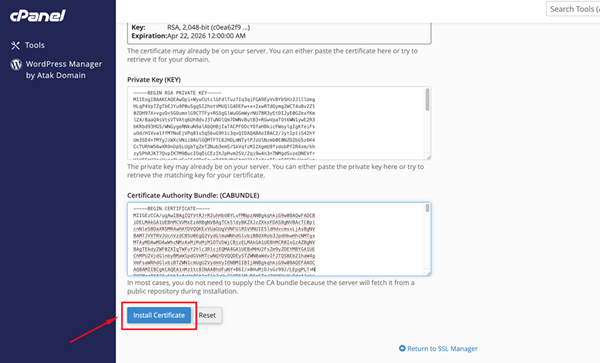
Congratulations! You have successfully installed your certificate. Your website is now accessible via the https:// protocol.
Random Articles

How to Build a Website with AI: Best AI Website Builders & Tools
02.04.2026
10 Best WordPress A/B Testing Tools to Optimize Conversion Rate
13.07.2026
Why should you secure misspellings and alternatives to your domain name
22.04.2021
Short Domains, Big Benefits: The Perfect Formula for a Strong Online Presence
27.01.2025
What Is a Domain Name? How It Works and How to Register One (2026 Guide)
24.07.2026