Outlook Mail Setup
How to Add Outlook Mail, How to Setup Outlook Mail?
In order to install Outlook mail, you must first download Outlook mail management software Outlook Mail management panel has an easy interface. Email installation is also very easy. You can do the installation process by following the images we have prepared below.First of all, you must have your e-mail address information (If not, call us and we will help you.)
Sample e-mail address: [email protected]
Your password ******
- Find the IMAP, POP, and SMTP Configuration Details
- How to Set Up an Email Account on Outlook?
- Microsoft Outlook 2019 Setup
- Microsoft Outlook 2016 Setup
Find the IMAP, POP, and SMTP Configuration Details
Our standard settings that you can use in Mail Setup;
If you want to set up mail as POP;
- Incoming e-mail (Inbound)
- Address of incoming e-mail server: pop3.maillb.com ;
- Username and Password on the incoming mail side: Enter your e-mail address and e-mail password
- Incoming Mail Connection Security: Select SSL;
- Incoming Mail port: Select 995
- Sent email (OutBound) or SMTP
- Outgoing (SMTP) Email server address: smtp.maillb.com ;
- Username and Password on the Outgoing (SMTP) Mail side: Enter your e-mail address and e-mail password
- Outgoing (SMTP) Connection security: Select SSL
- Outgoing (SMTP) Port port: 465
If you want to set up Mail as IMAP;
- Incoming e-mail (Inbound)
- Address of incoming e-mail server: imap.maillb.com ;
- Username and Password on the incoming mail side: Enter your e-mail address and e-mail password
- Incoming Mail Connection Security: Select SSL;
- Incoming Mail port: Select 993
- Sent email (OutBound) or SMTP
- Outgoing (SMTP) Email server address: smtp.maillb.com ;
- Username and Password on the Outgoing (SMTP) Mail side: Enter your e-mail address and e-mail password
- Outgoing (SMTP) Connection security: Select SSL
- Outgoing (SMTP) Port port: 465
How to Set Up an Email Account on Outlook?
| IMAP (incoming) | POP3 (incoming) | SMTP (outgoing) |
|---|---|---|
| Host: imap.maillb.com Encryption: SSL Port number: 993 |
Host: pop3.maillb.com Encryption: SSL Port number: 995 |
Host: smtp.maillb.com Encryption: SSL Port number: 465 |
The following mail settings cover the mail setup settings of users who purchase corporate e-mail or web hosting package through Atak Domain. You can set up corporate e-mail Outlook mail offered by different mail servers by paying attention to the incoming and outgoing server and port settings used by your mail server for adding Outlook mail.
Microsoft Outlook 2019 Setup
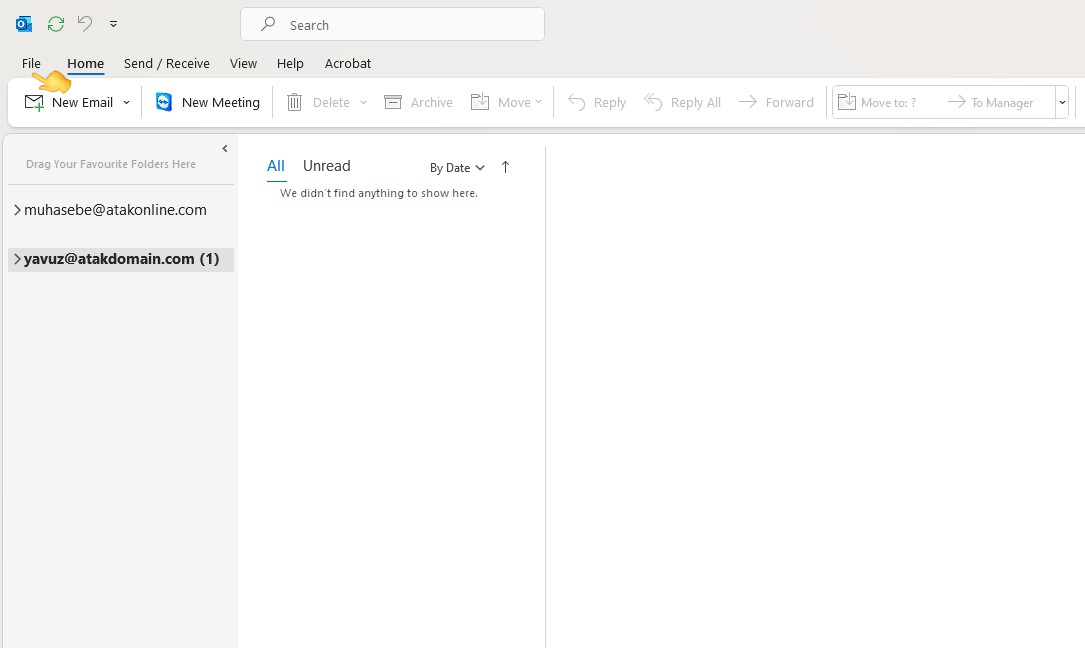
1. Go to the File> section on the Outlook main screen.
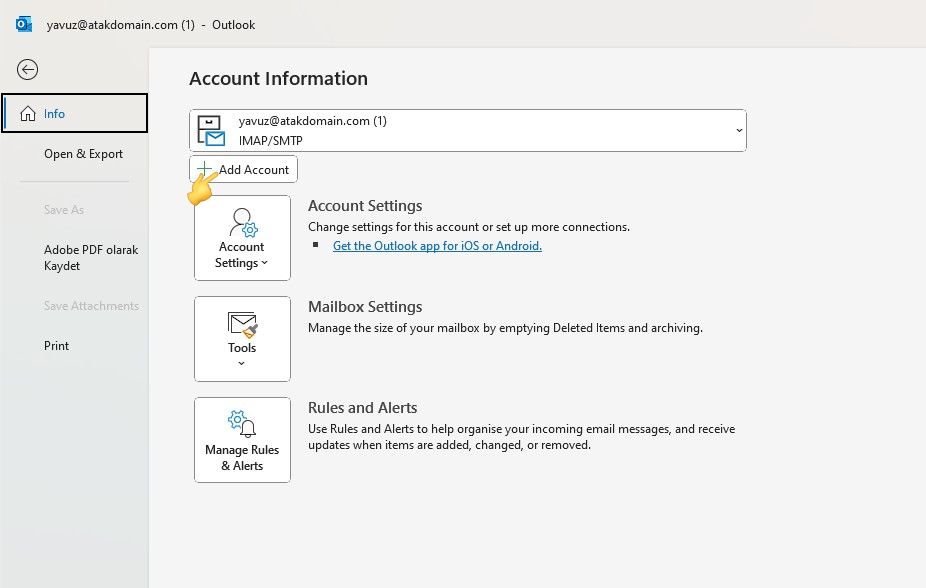
2. Click the Add Account button in Outlook>File.
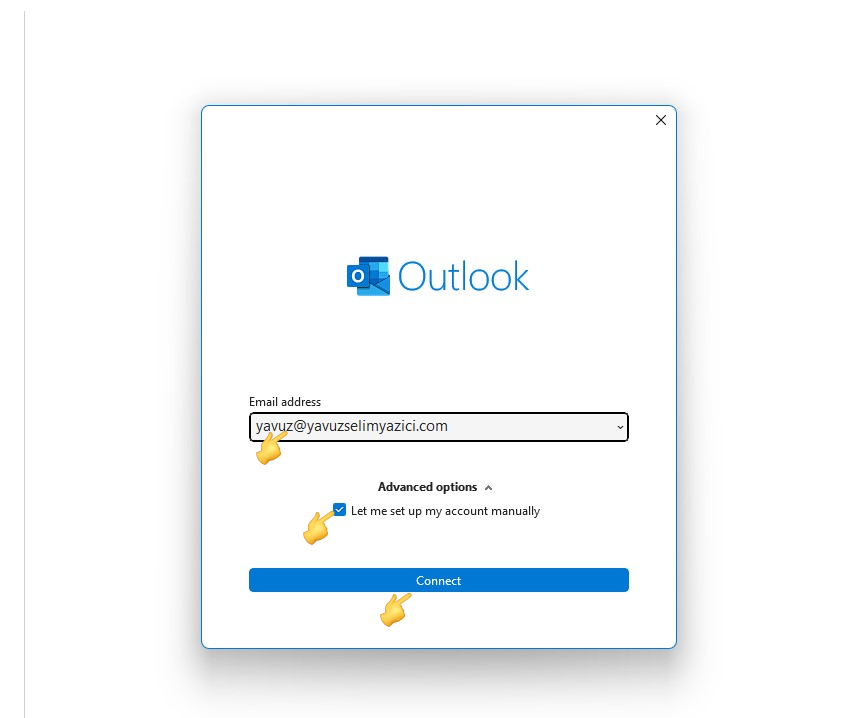
3. Enter your e-mail address and select "I want to set up my account myself" and click on the Connect button.
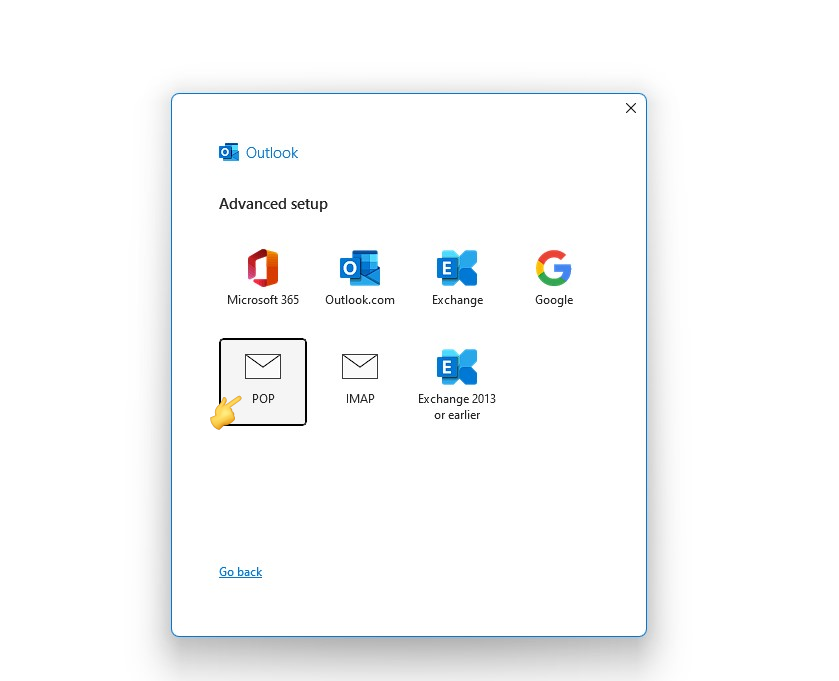
4. Select either POP or IMAP.
Note: When you select IMAP, your mail files will be stored on the mail server and may cause your mail capacity to fill up in a short time. In POP mail installations, since the mails will take place in the storage of your device, the capacity of your mail on the mail server will not be full.
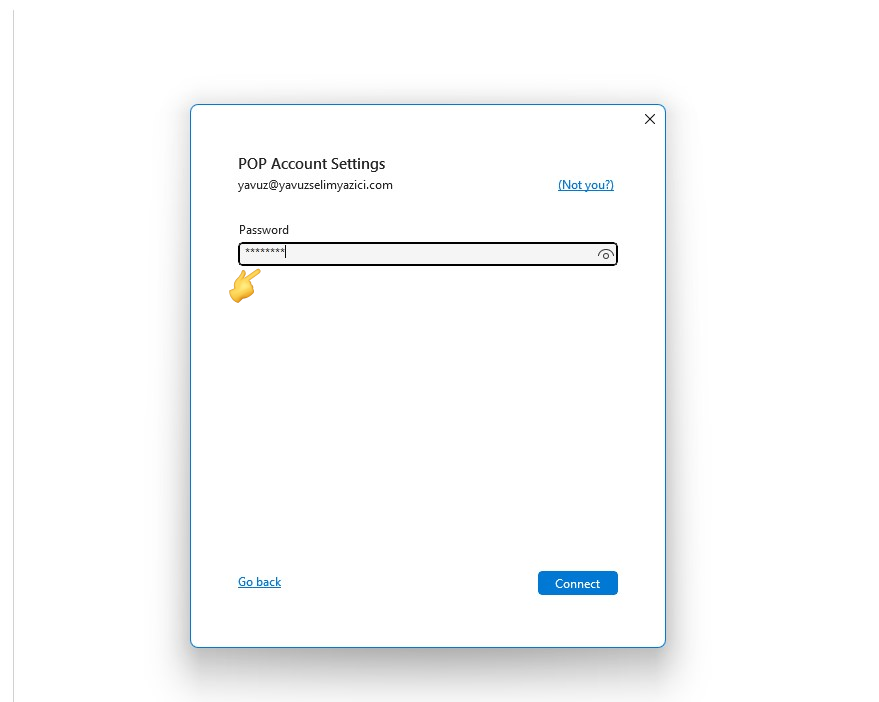
5. Enter your e-mail password and click the connect button.
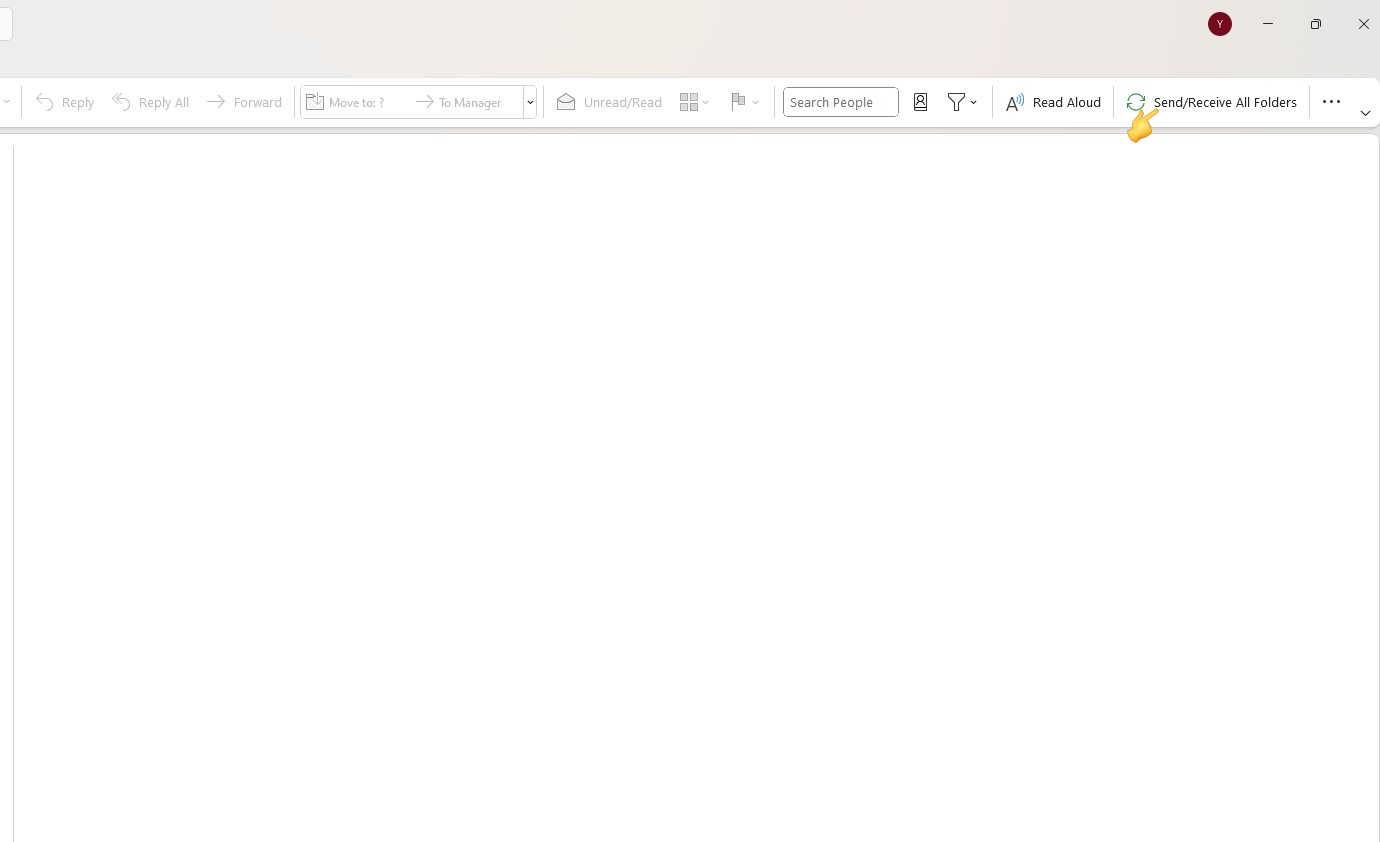
6. Mail Setup is complete, you can bring your existing mails to your mailbox by clicking the "Send / Receive All Folders" button.
Microsoft Outlook 2016 Setup
How to configure Outlook 2016 with a Atak Domain / MailLB email account.
First of all, you must have your e-mail address information (If not, please enter atakdomain.com account. You can create new email adres sor you can change your email adress password).
Your example e-mail address: [email protected]
Password: ******
POP3 Mail Setup

1. Click Start>Control Panel>Mail (Microsoft Outlook) or the marked area that says Mail.
2. Click on Email Accounts.

3. Click the “New” button.
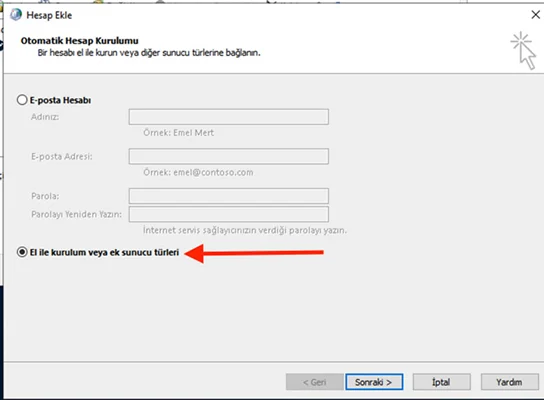
4. Click on the manual installation option. It may also be referred to as “Manual installation” in some Outlook versions.
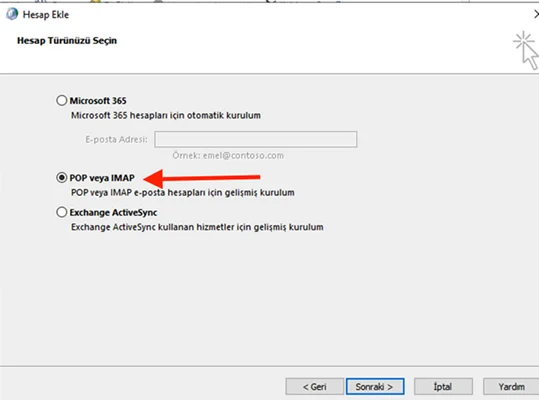
5. Click POP or IMAP.
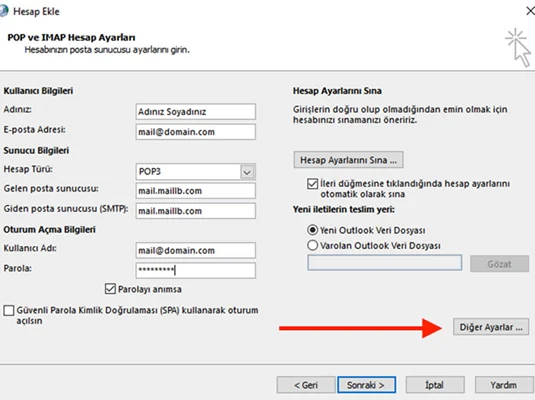
- Your Name: Company name or Name Surname
- Email Address: Your email address. For example [email protected]
- Account Type: POP3
- Incoming mail server: pop3.maillb.com
- Outgoing mail server: smtp.maillb.com
- Username: Your email address. For example [email protected]
- Password: Password of your e-mail address
6. After making the above arrangements, click “Other Settings”.
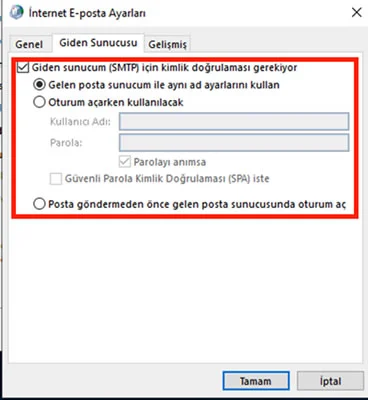
7. Click on the outgoing server and select the "My Outgoing Server (SMTP) requires authentication" option and "Use the same name settings as my incoming mail server" options as in the marked field.
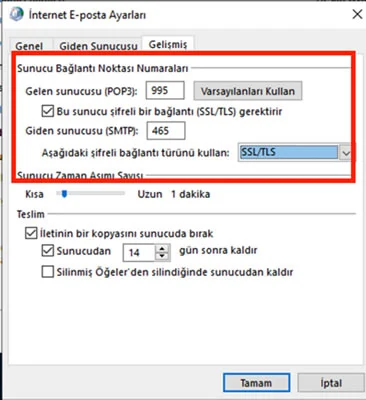
8. Finally, select Incoming and Outgoing (SMTP) SSL and write the port information as 995 for the Incoming server and 465 for the Outgoing (SMTP) server and click OK.
IMAP Mail Setup
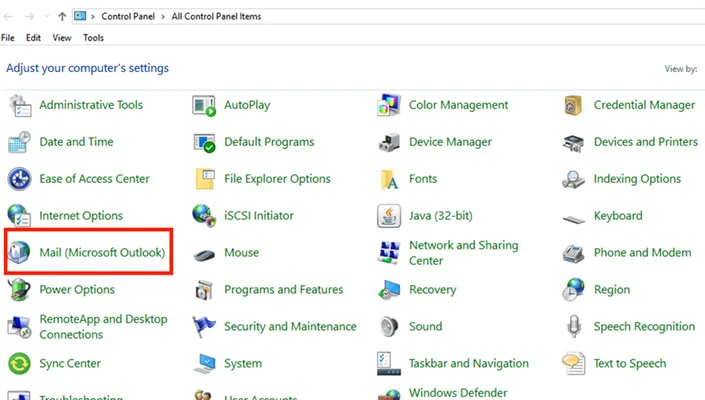
1. Click Start>Control Panel>Mail (Microsoft Outlook) or the marked area that says Mail.

2. Click Email Accounts.
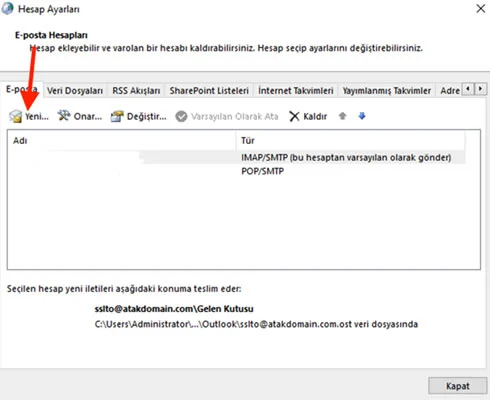
3. Click the “New” button.
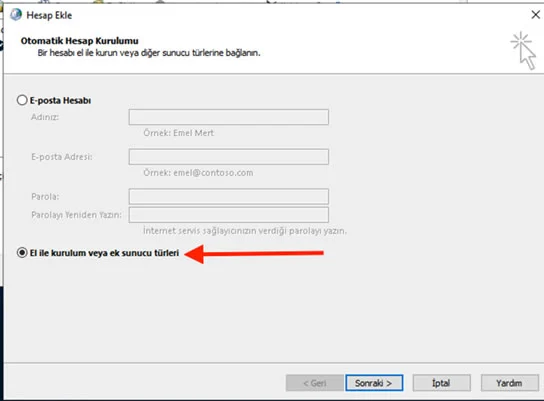
4. Click on the manual installation option. It may also be referred to as “Manual installation” in some Outlook versions.
5. Click POP or IMAP.

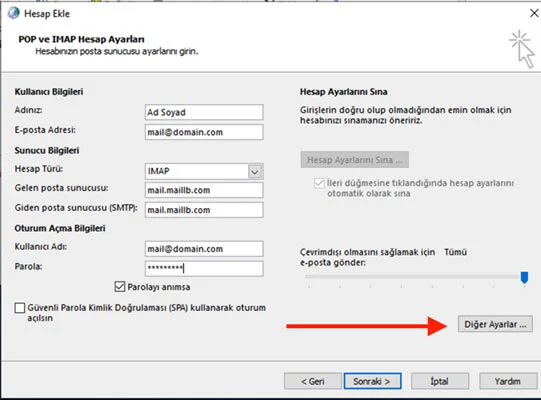
- Your Name: Company name or Name Surname
- Email Address: Your email address. For example [email protected]
- Account Type: IMAP
- Incoming mail server: imap.maillb.com
- Outgoing mail server: smtp.maillb.com
- Username: Your email address. For example [email protected]
- Password: Password of your e-mail address
6. After making the above arrangements, click “Other Settings”.

7. Click on the outgoing server and select the My Outgoing Server (SMTP) requires authentication option and the Use the same name settings as my incoming mail server options as in the marked field.
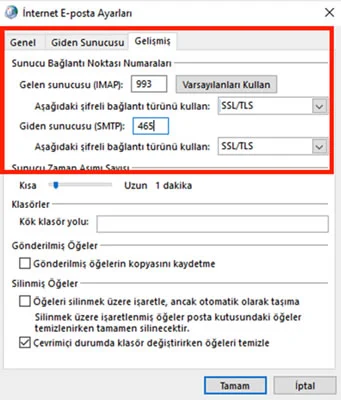
8. Finally, select Incoming and Outgoing (SMTP) SSL and write the port information as 993 for the Incoming server and 465 for the Outgoing (SMTP) server and click OK.
Complete your e-mail setup with the Next or Complete option.