Android Mail Setup
How to Add Android Mail, How to Setup Android Mail?
Phones with the Android operating system have a simple and user-friendly interface for adding an email account. Here is a step-by-step guide to add an email account to your Android device:
First of all, you must have your e-mail address information, if not, call us and we will help you.
Sample e-mail address: [email protected] Your password: ******
The following mail settings cover the mail setup settings of users who purchase corporate e-mail or web hosting packages through Atak Domain. You can set up corporate e-mail Android mail offered by different mail servers by paying attention to the incoming outgoing server and port settings used by your mail server for adding Android mail.
Phone brands suitable for Mail installation: Samsung, Huawei, Xiaomi, Realme, Casper, General Mobile, TCL, Tecno, Vestel, Poco, Nokia, Google Pixel.
1. Enter the Settings app from the home screen of your Android device
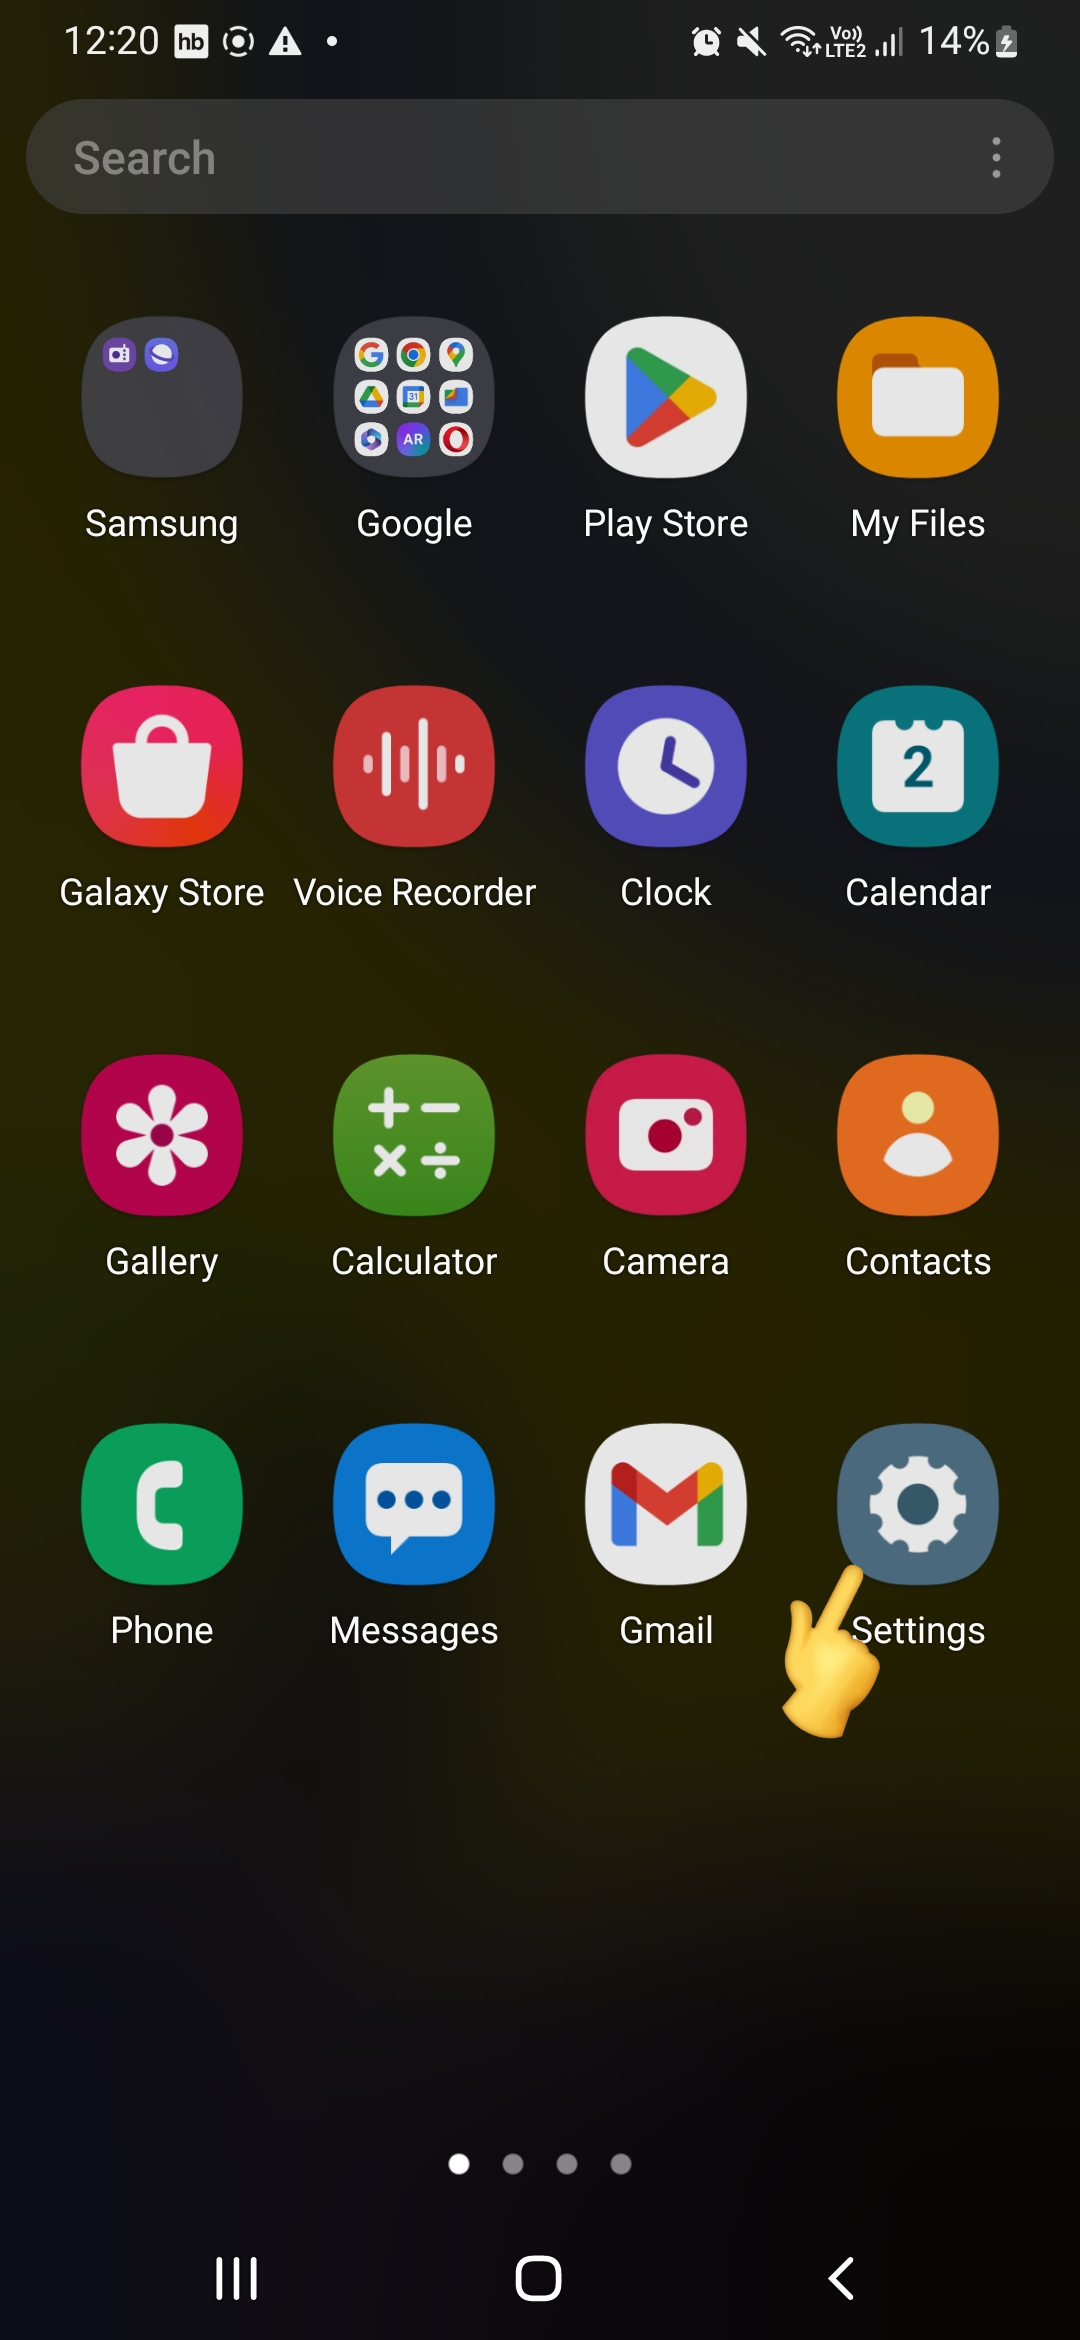
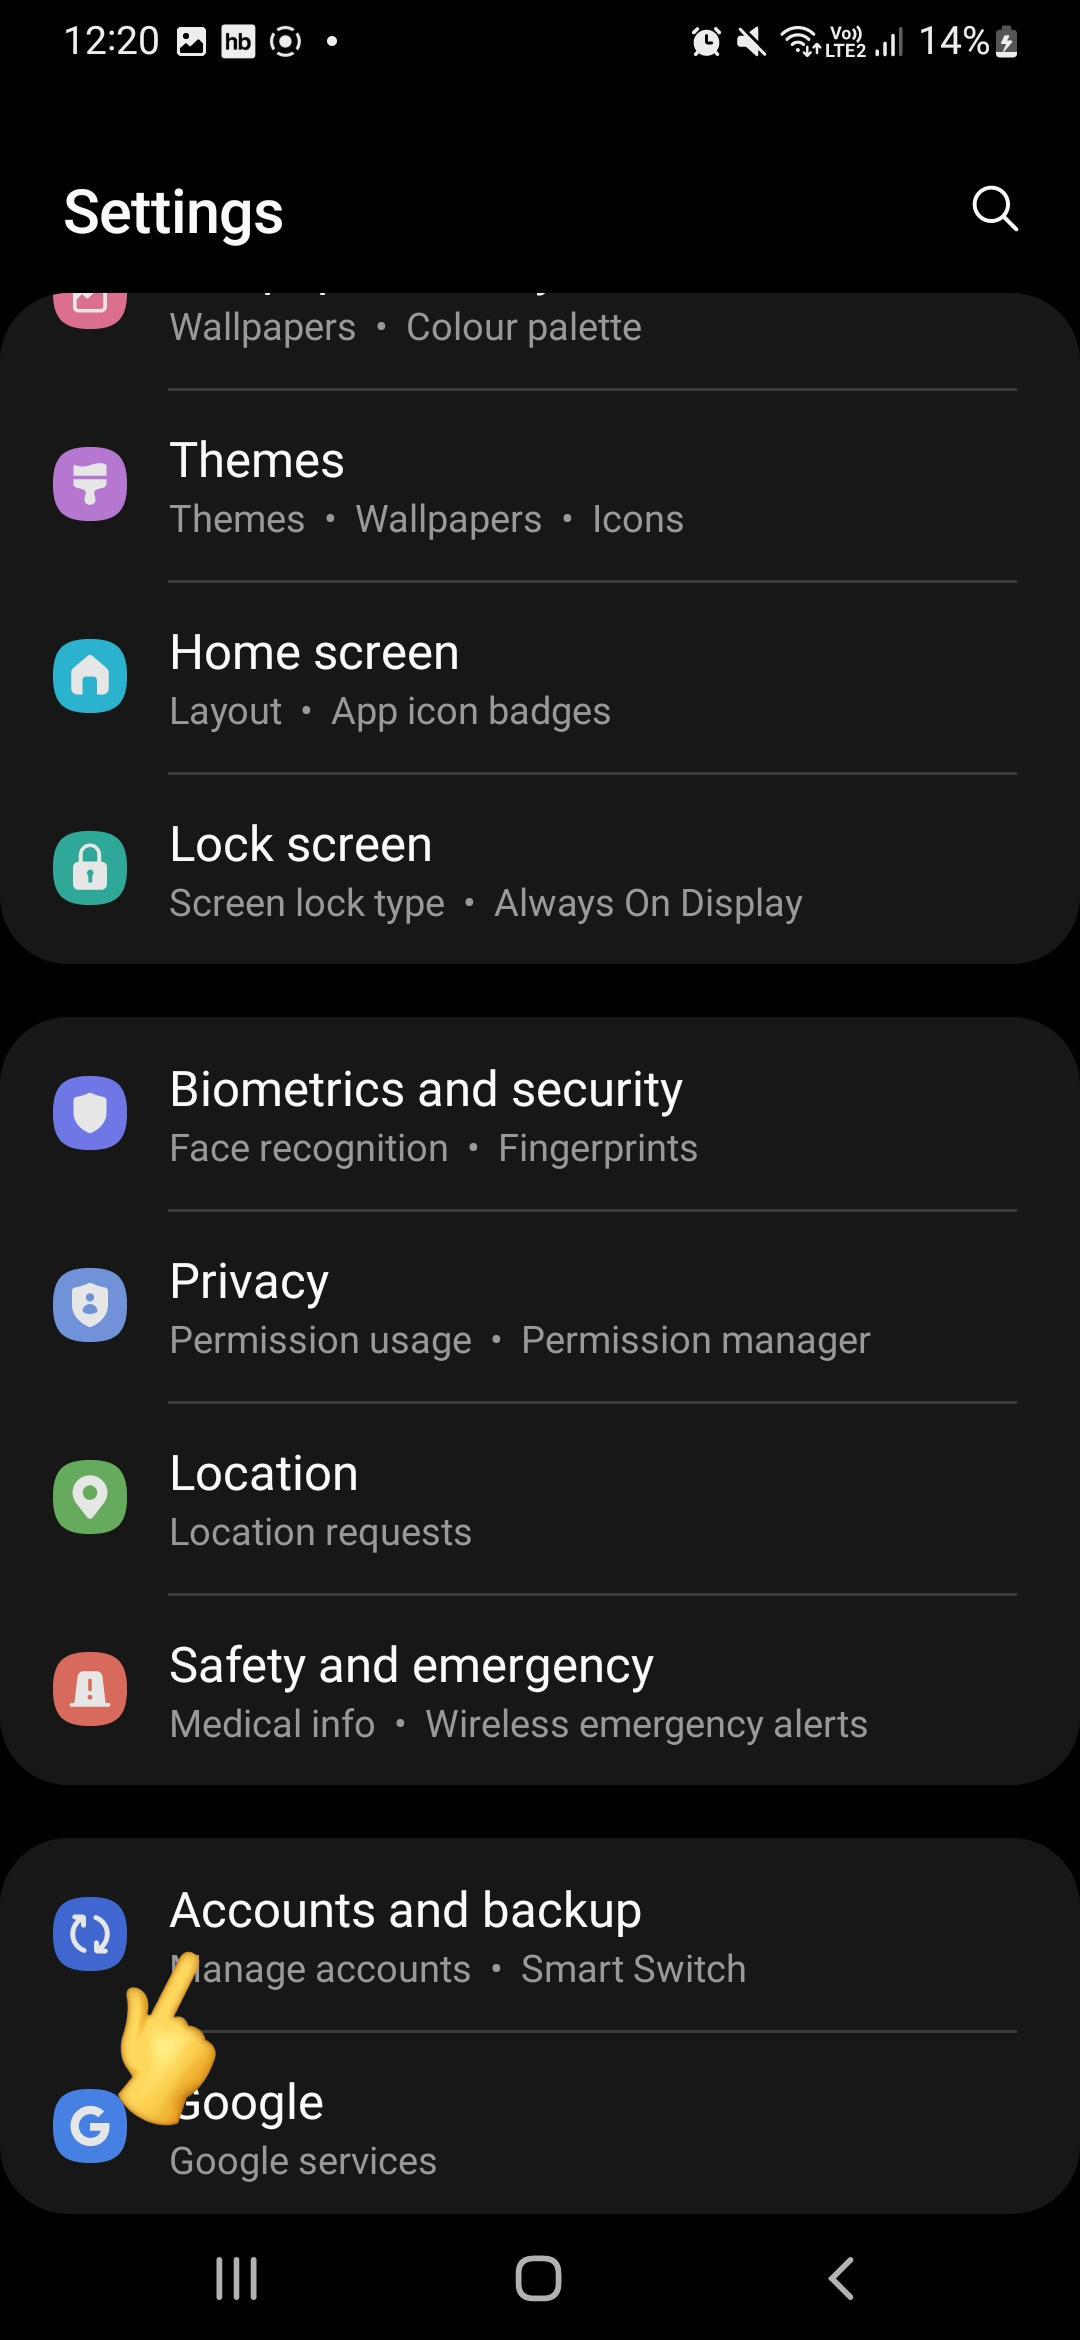
2. In Settings, find the Accounts and Backup or Accounts option and click on it.
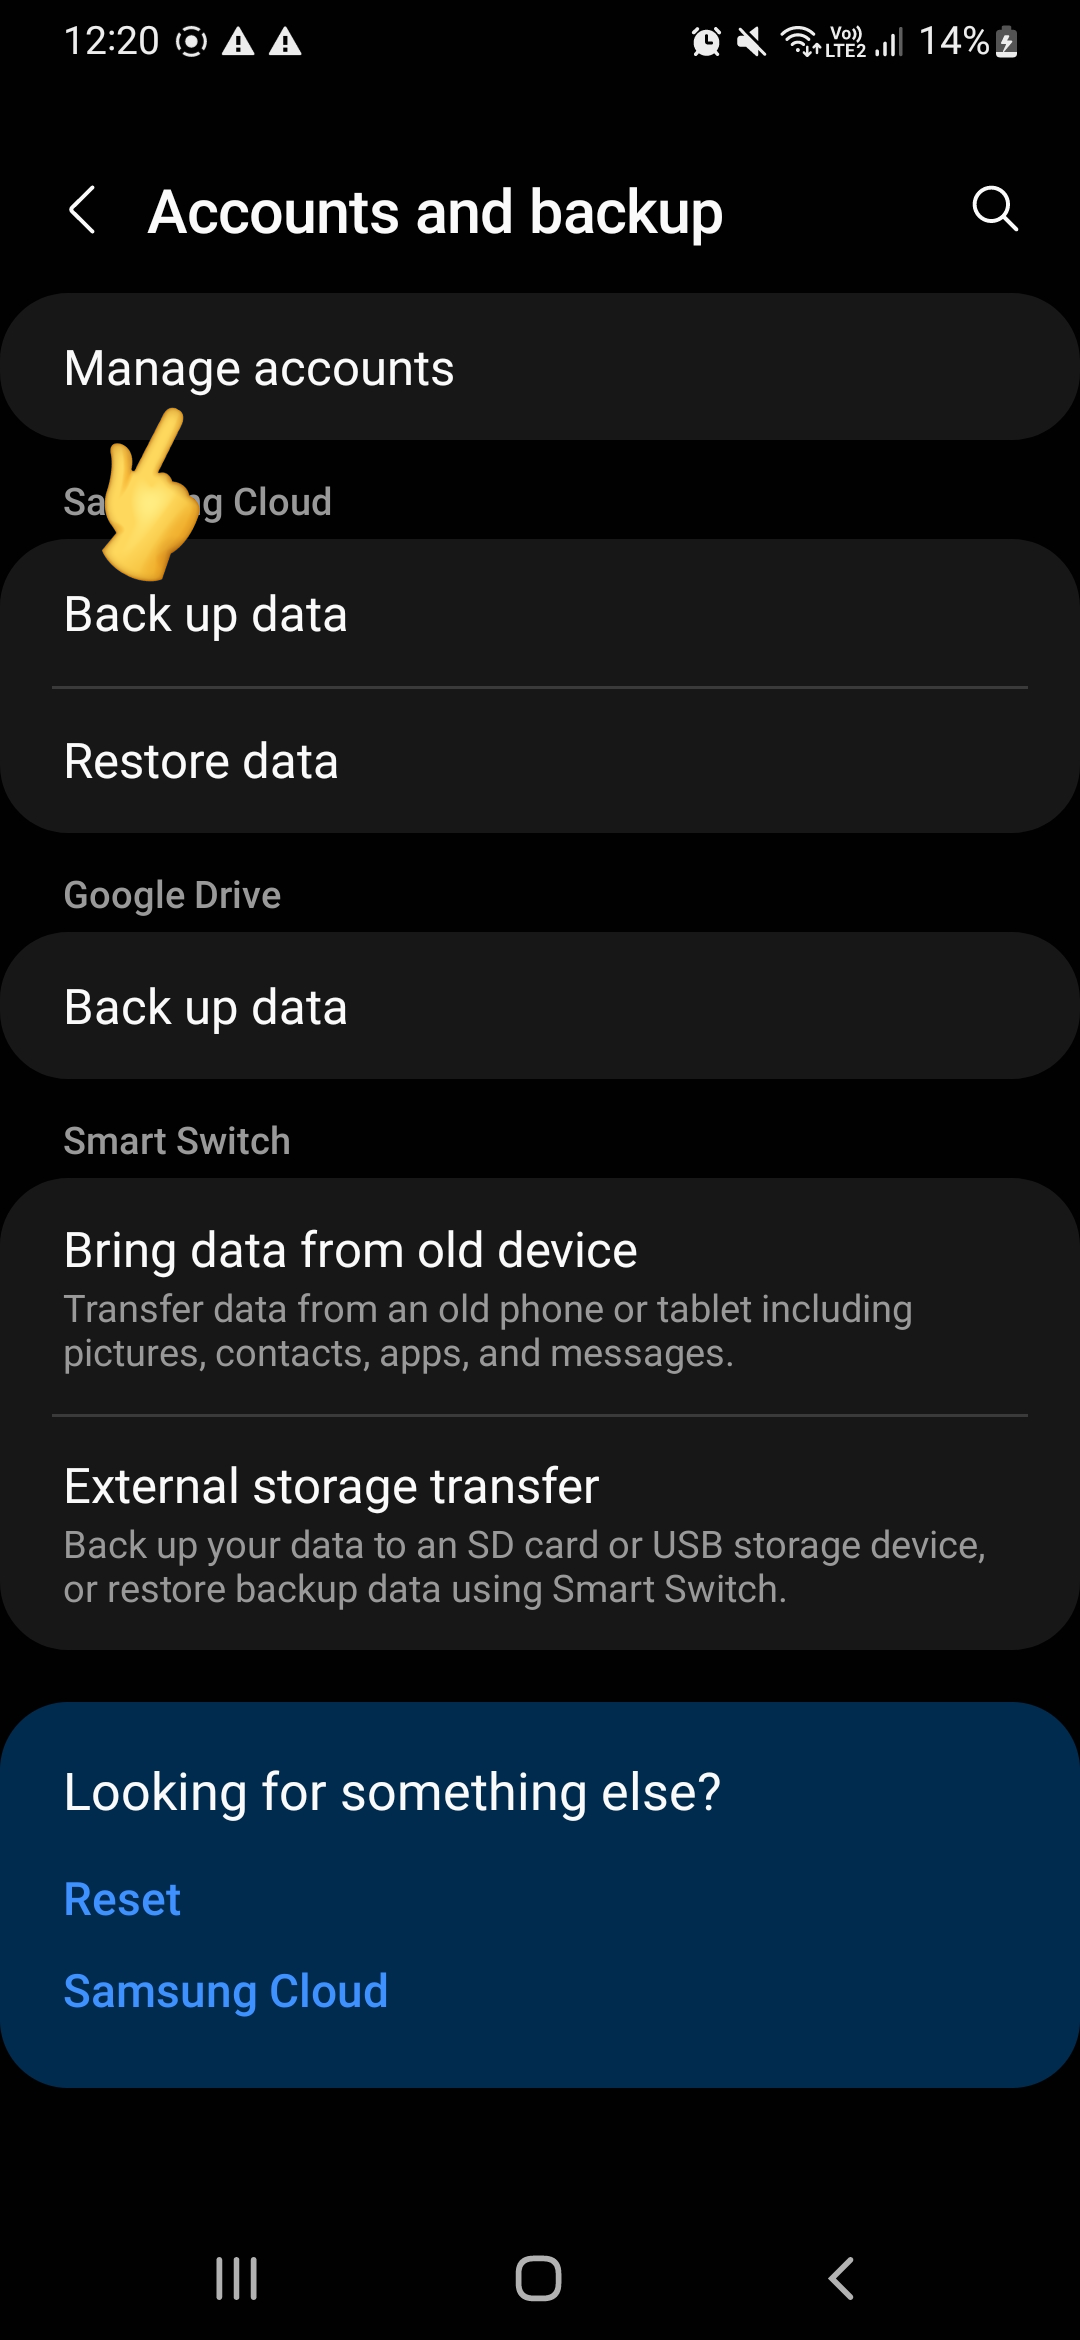
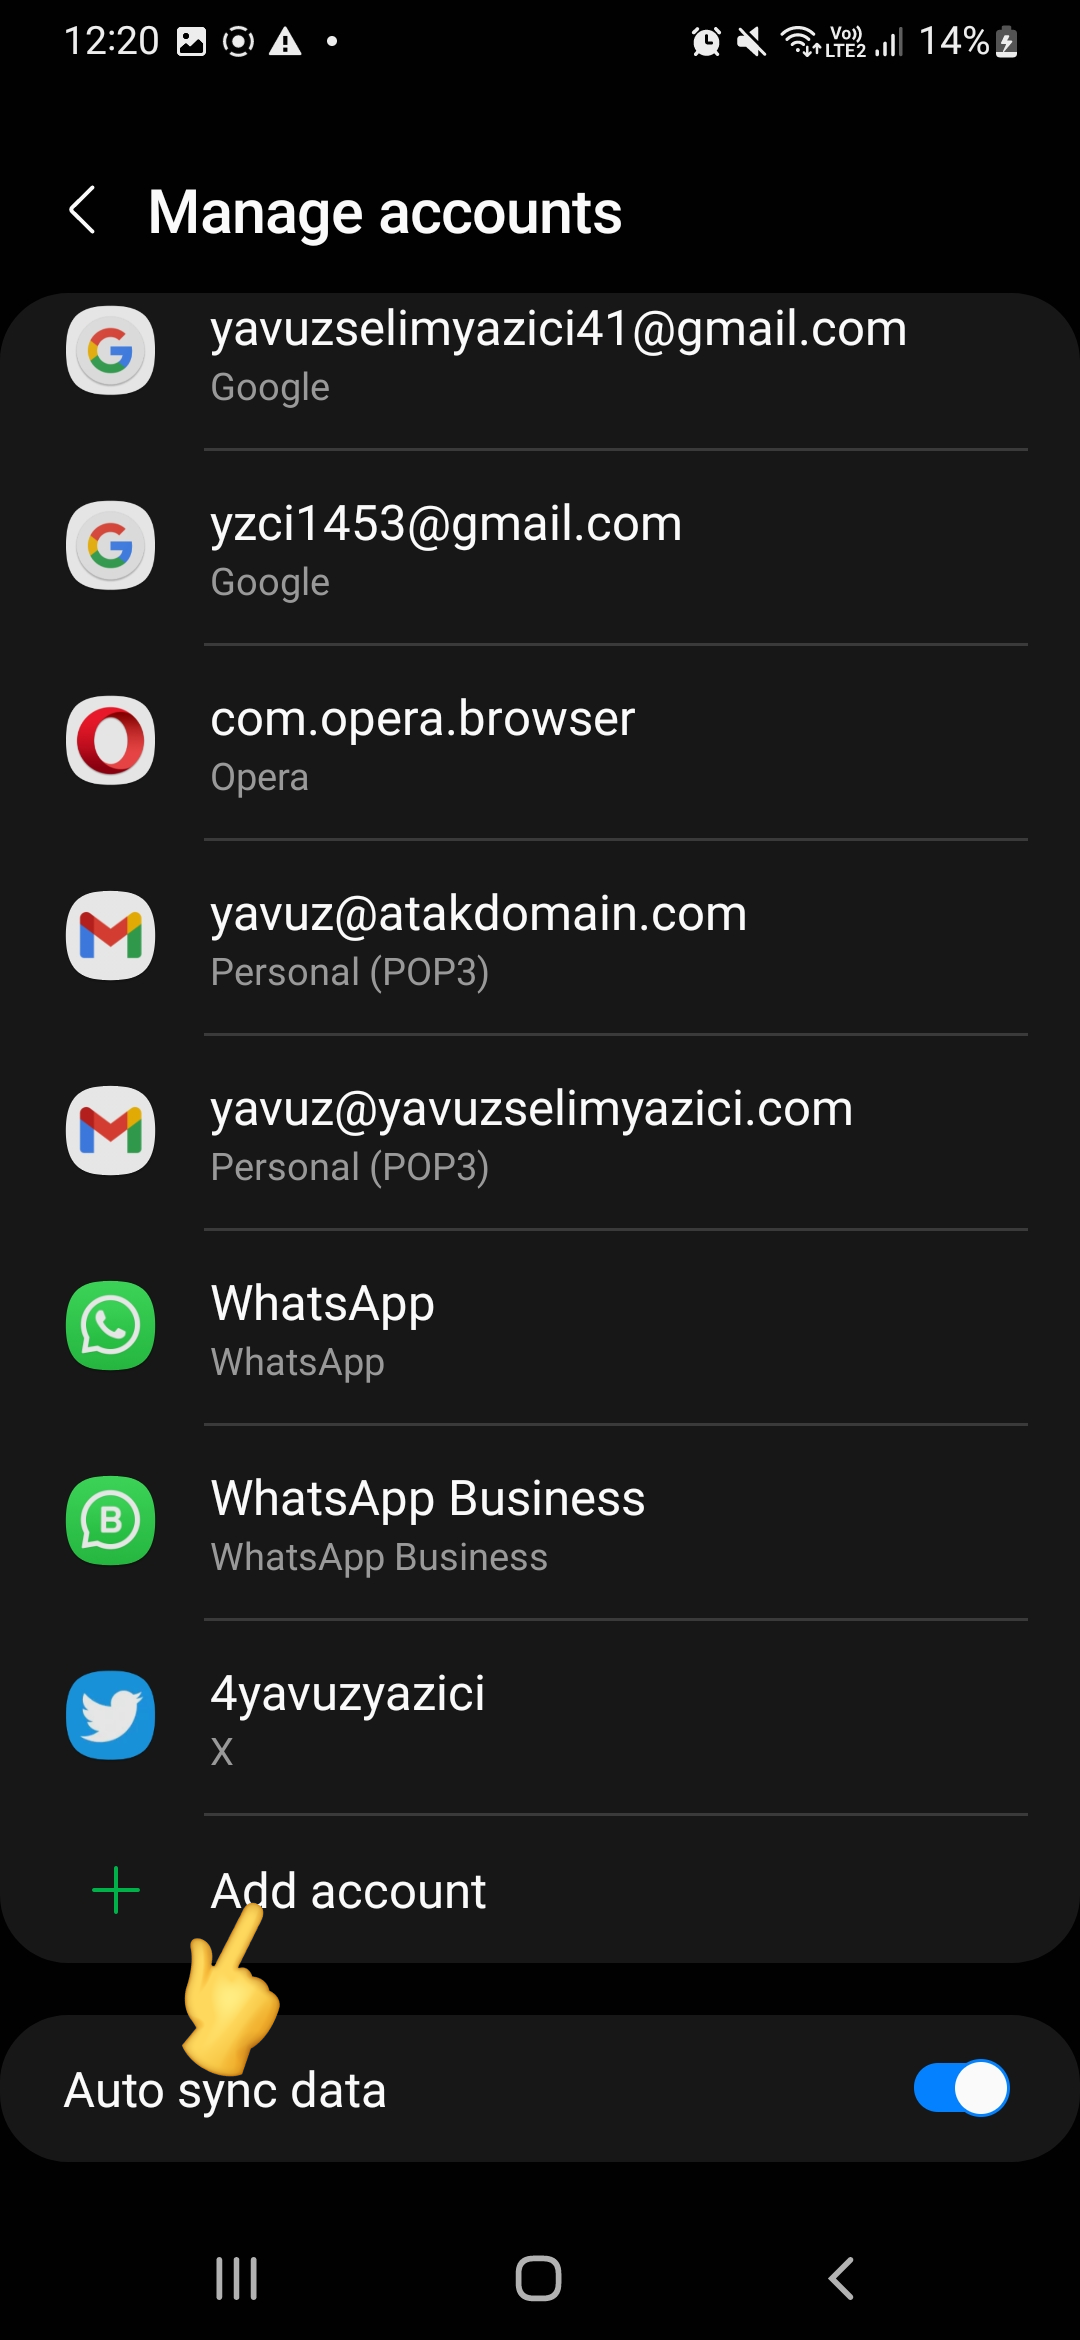
3. Tap Manage Accounts. This option is located at the top of the list.
4. Click Add Account. This option is usually located at the bottom of the list.
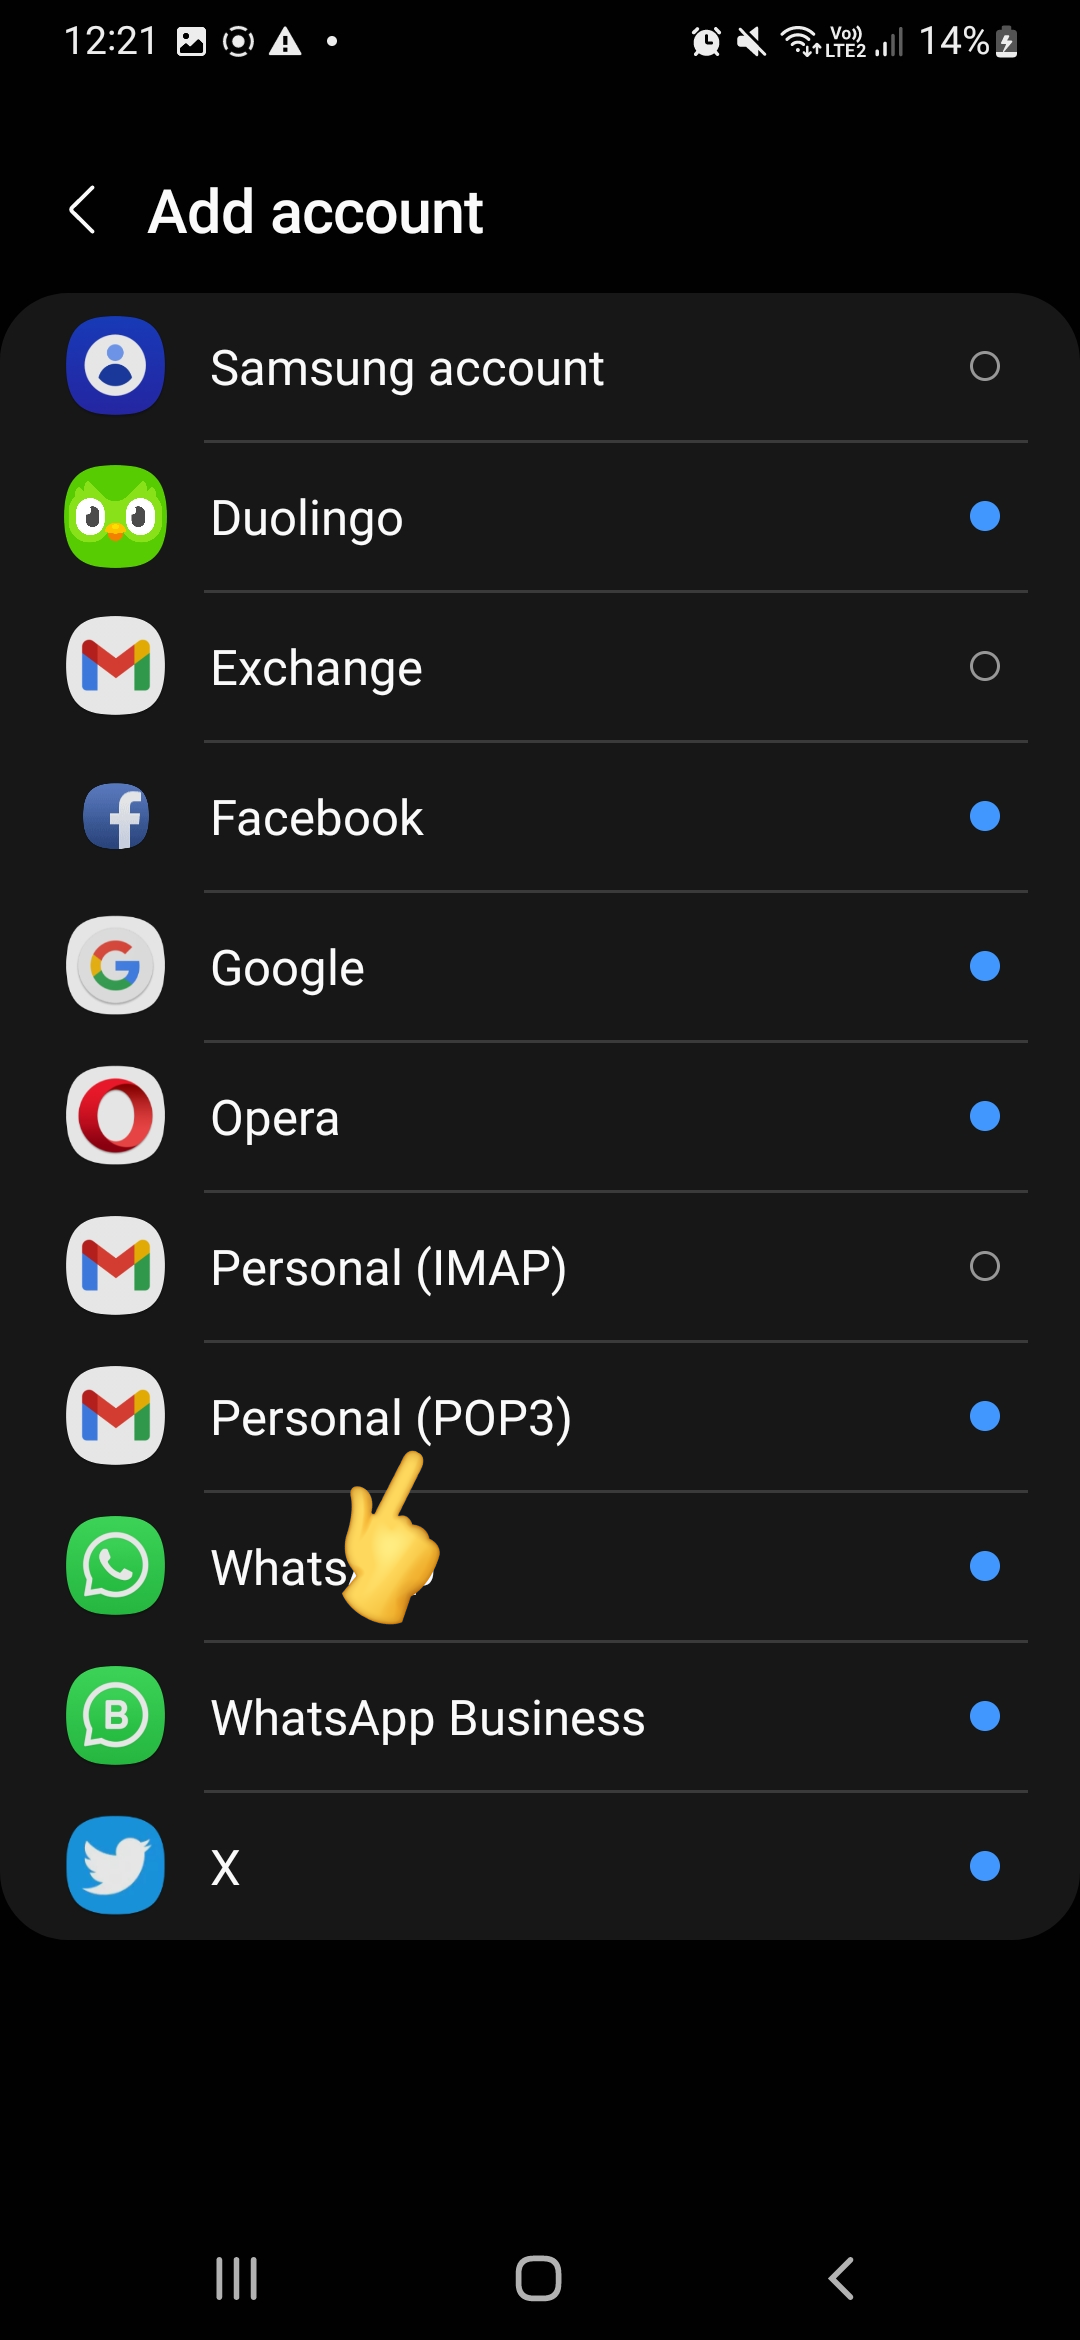
5. Than find Personal (IMAP) or Personal (POP3) and click on it.
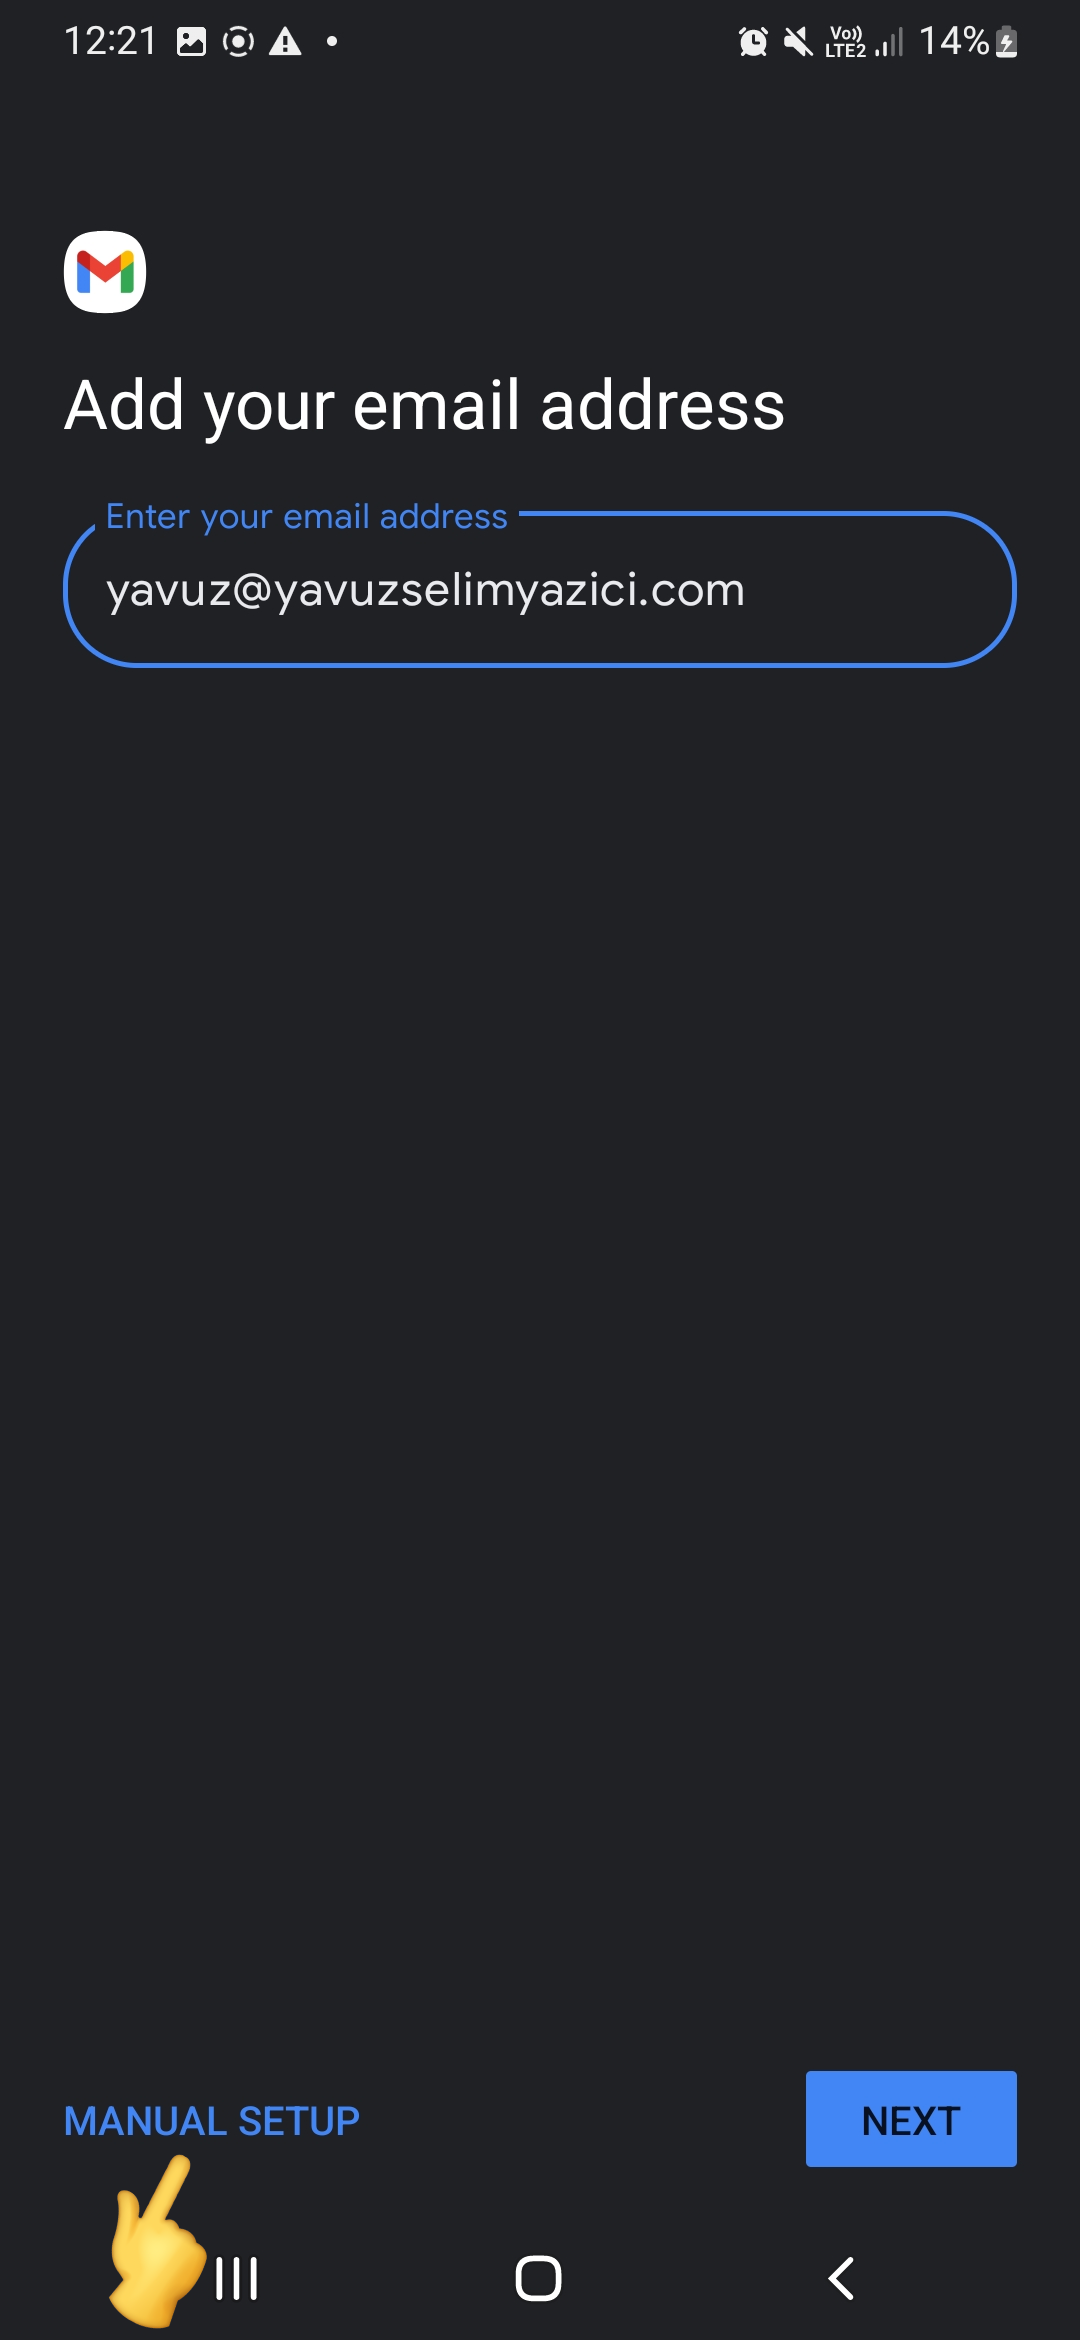
6. On the screen that opens, enter your e-mail address in the relevant fields. Then click the Manual Setup button.
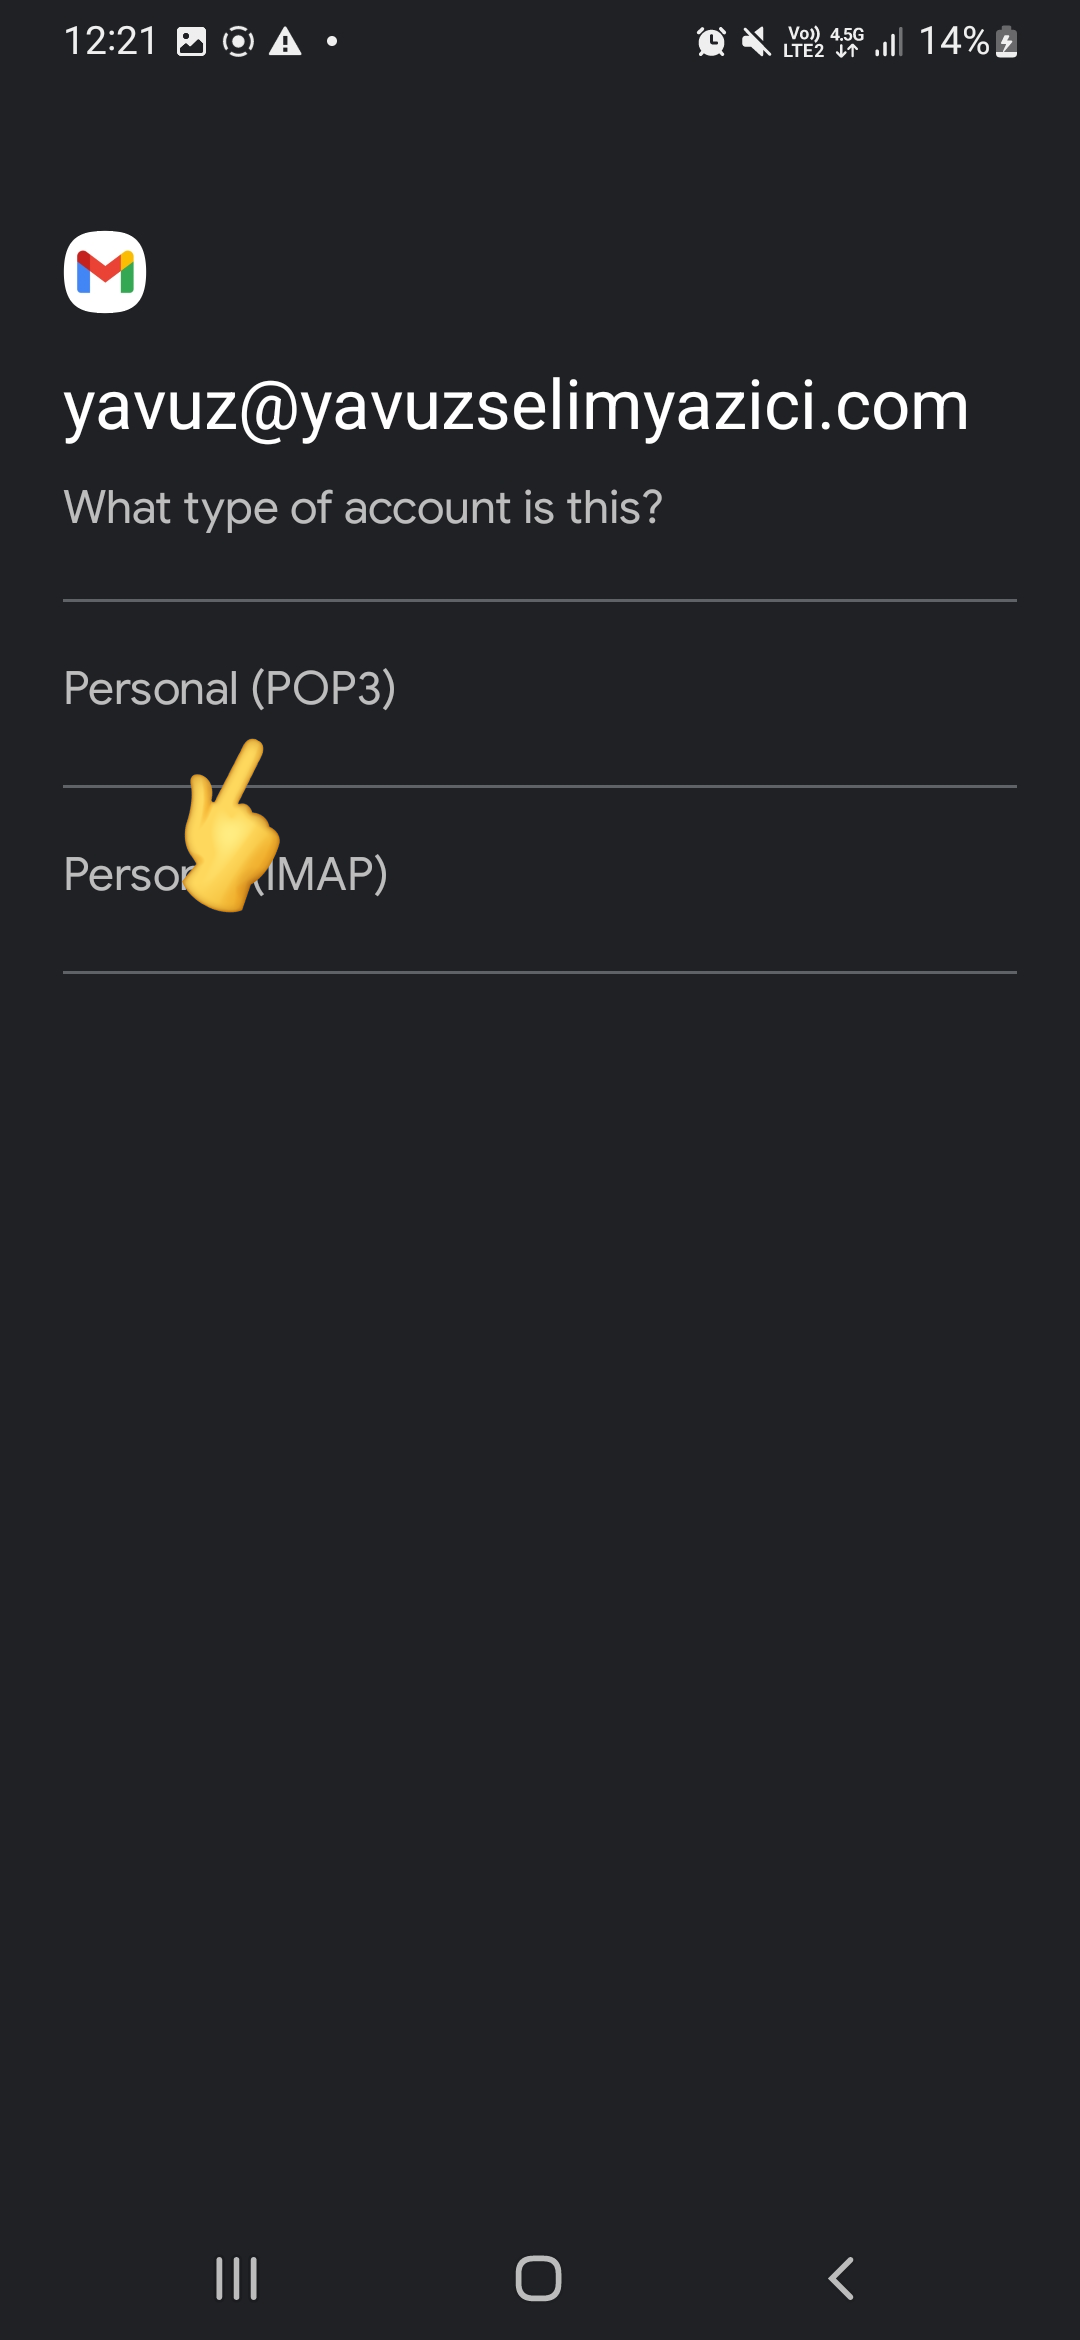
On the screen that opens, select the option you selected in Step 5 (IMAP - POP3)
Note: When you select IMAP, your mail files will be stored on the mail server and may cause your mail capacity to fill up in a short time. In POP mail installations, since the mails will take place in the storage of your device, the capacity of your mail on the mail server will not be full.
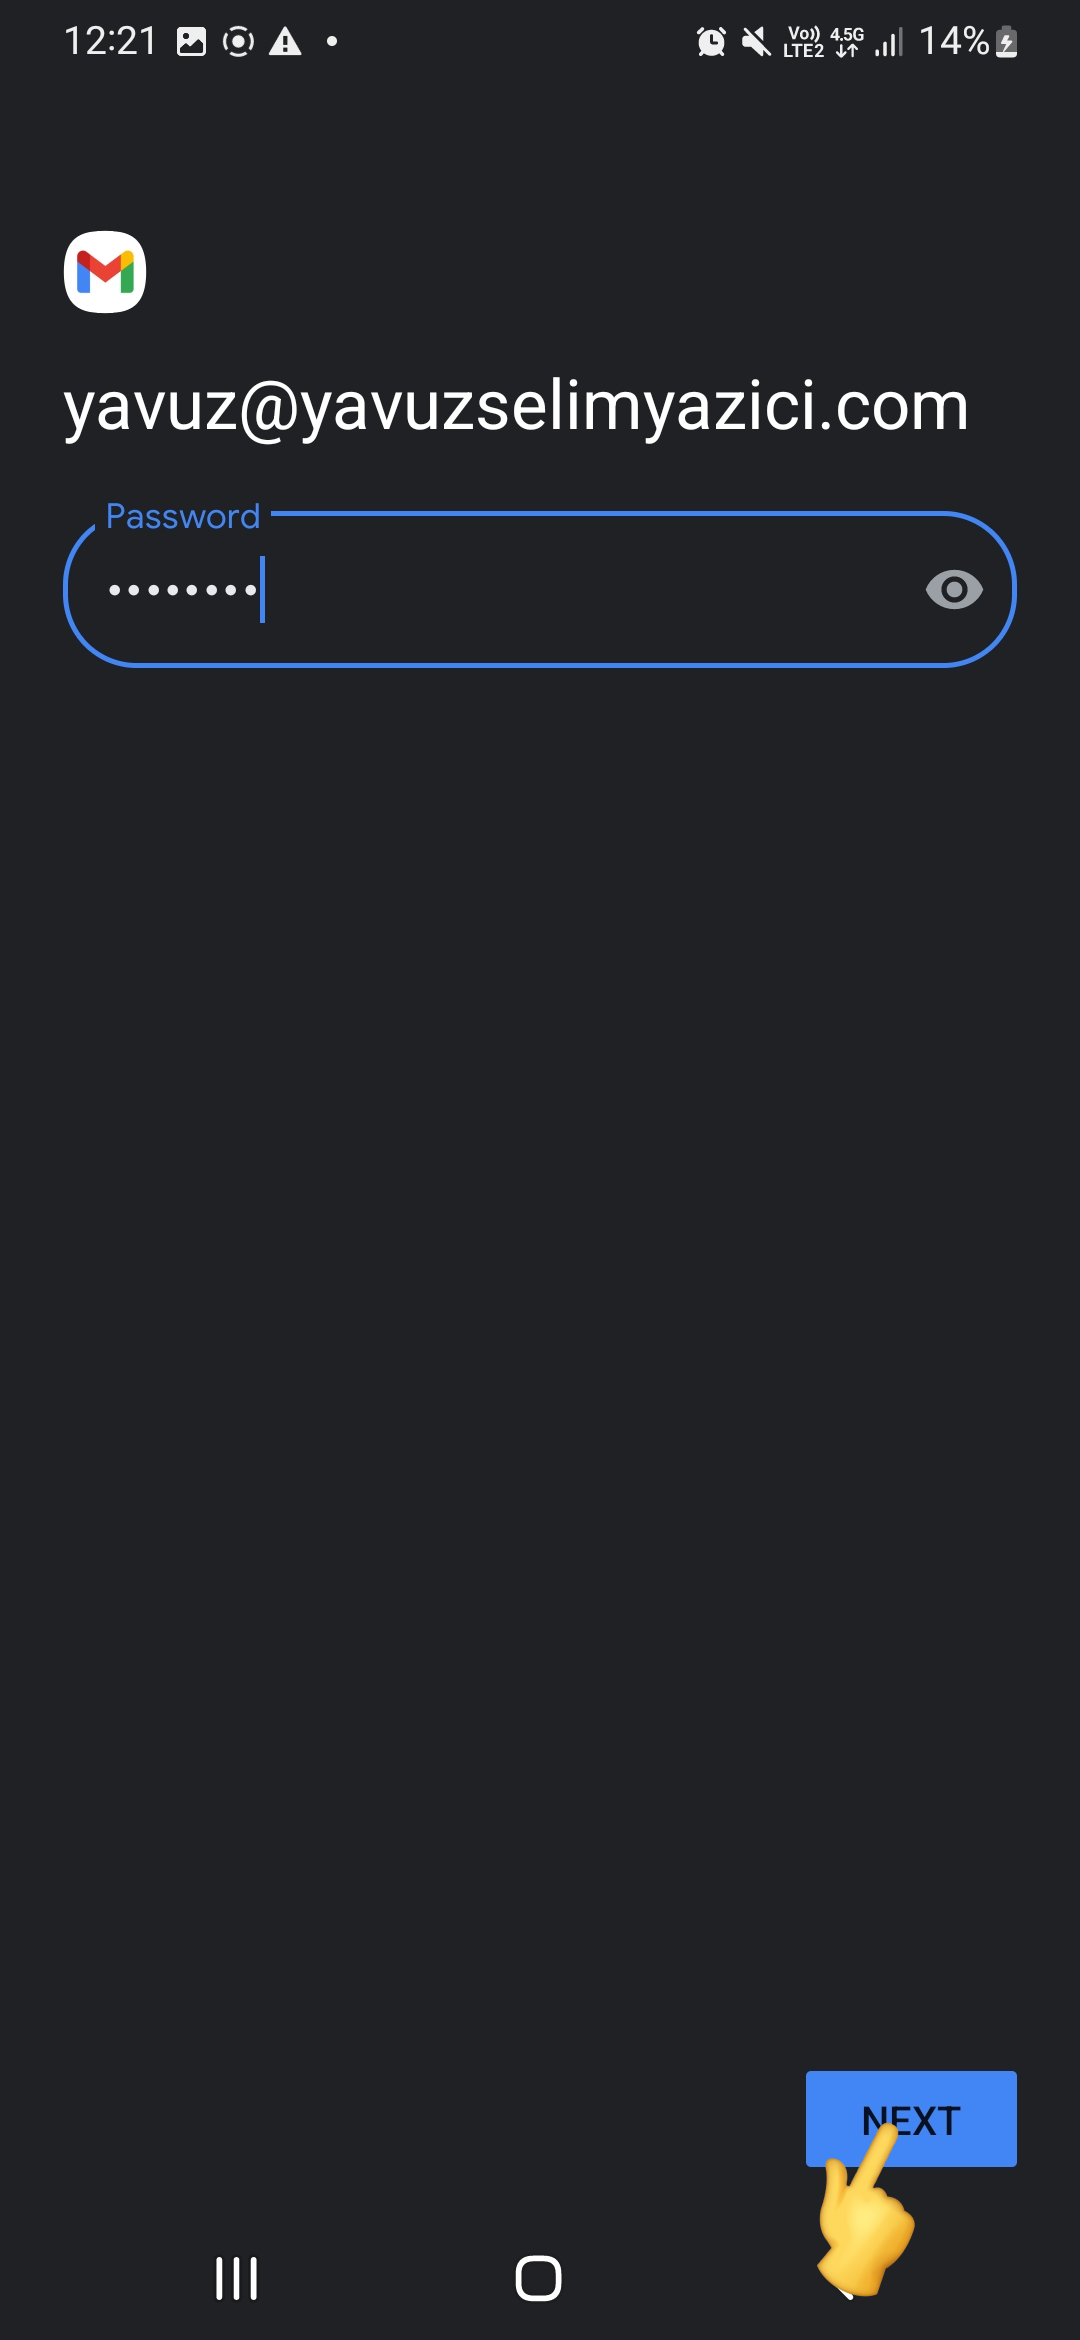
8. Enter your e-mail password on the screen that opens. Then click the Next button.
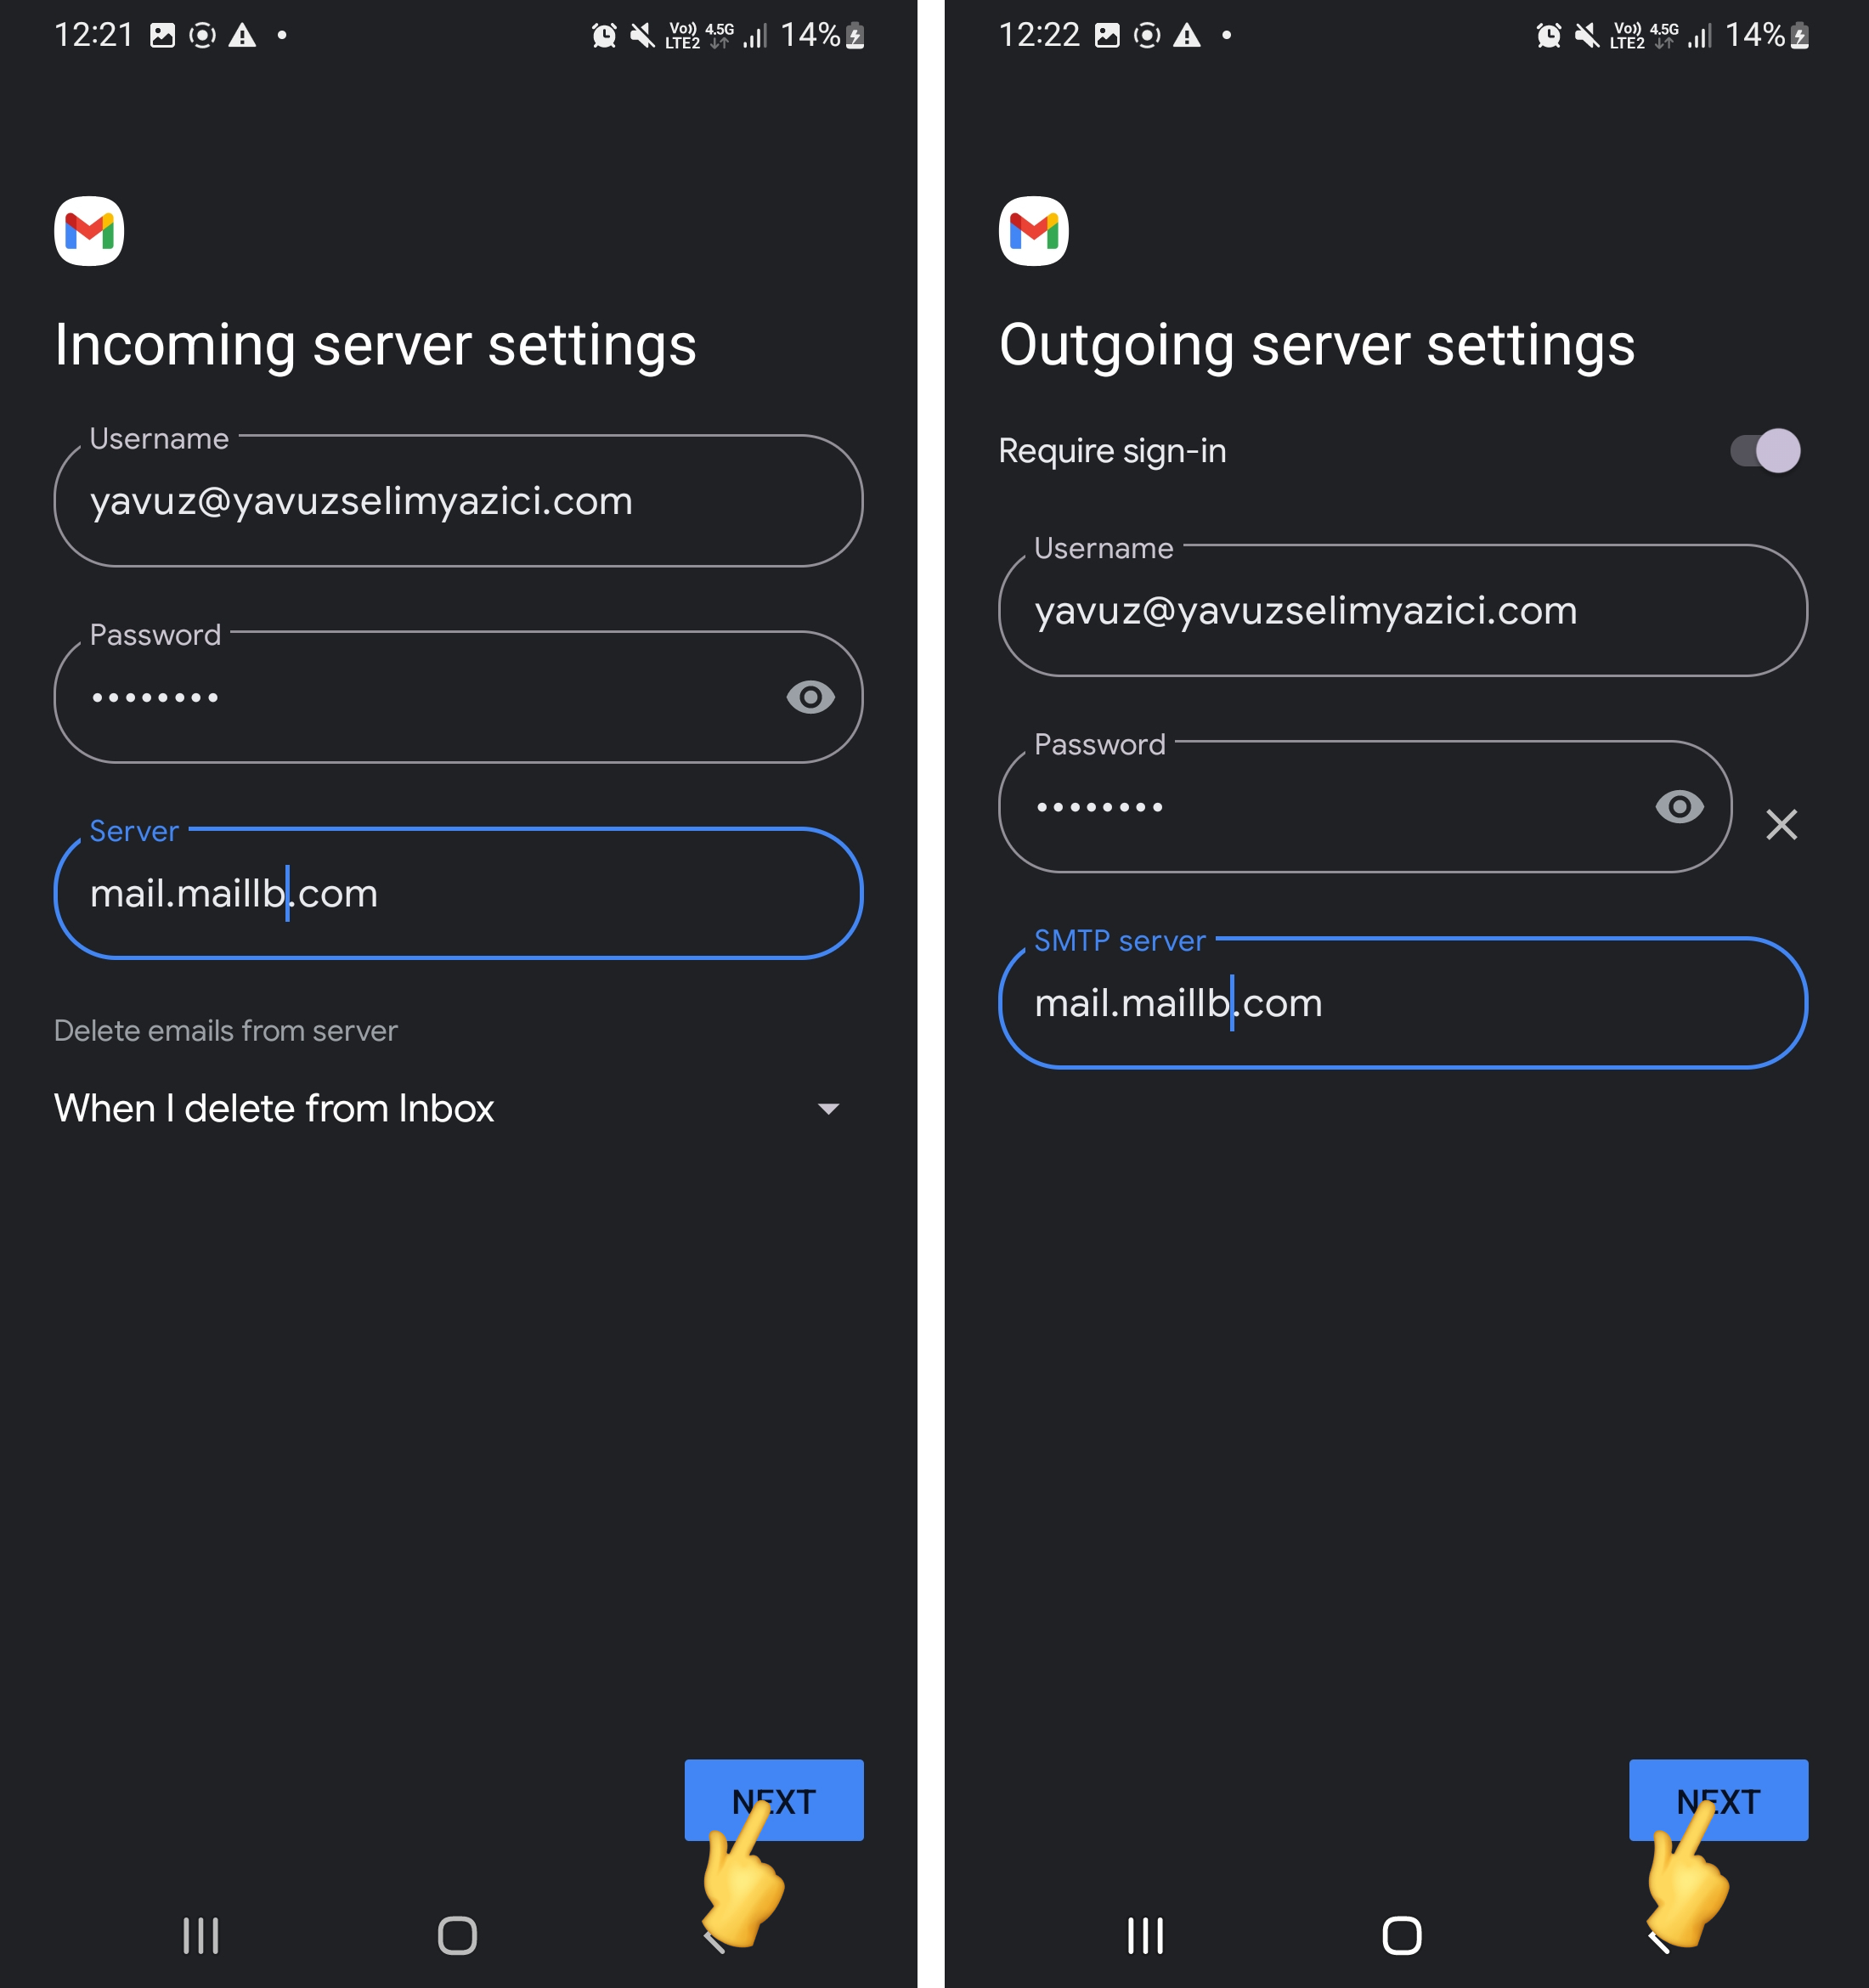
9. Make the necessary settings for incoming and outgoing mail servers.
Incoming Mail Server Settings;
- IMAP Server Name: Allows emails to be stored on the server and accessed in a synchronized way from multiple devices. With IMAP, email storage space is limited to the storage capacity of your purchased email package. imap.maillb.com
- POP3 Server Name: Downloads emails to the device and usually deletes them from the server. Therefore, it is more suitable for single-device use and does not provide long-term server storage. pop3.maillb.com
- Username: Your e-mail address
- Password: Your email password
Outgoing Mail Server Settings;
- Server Name: smtp.maillb.com
- Username: Your e-mail address
- Password: Your email password
After entering the settings correctly, tap the "Next" or "Complete" button.
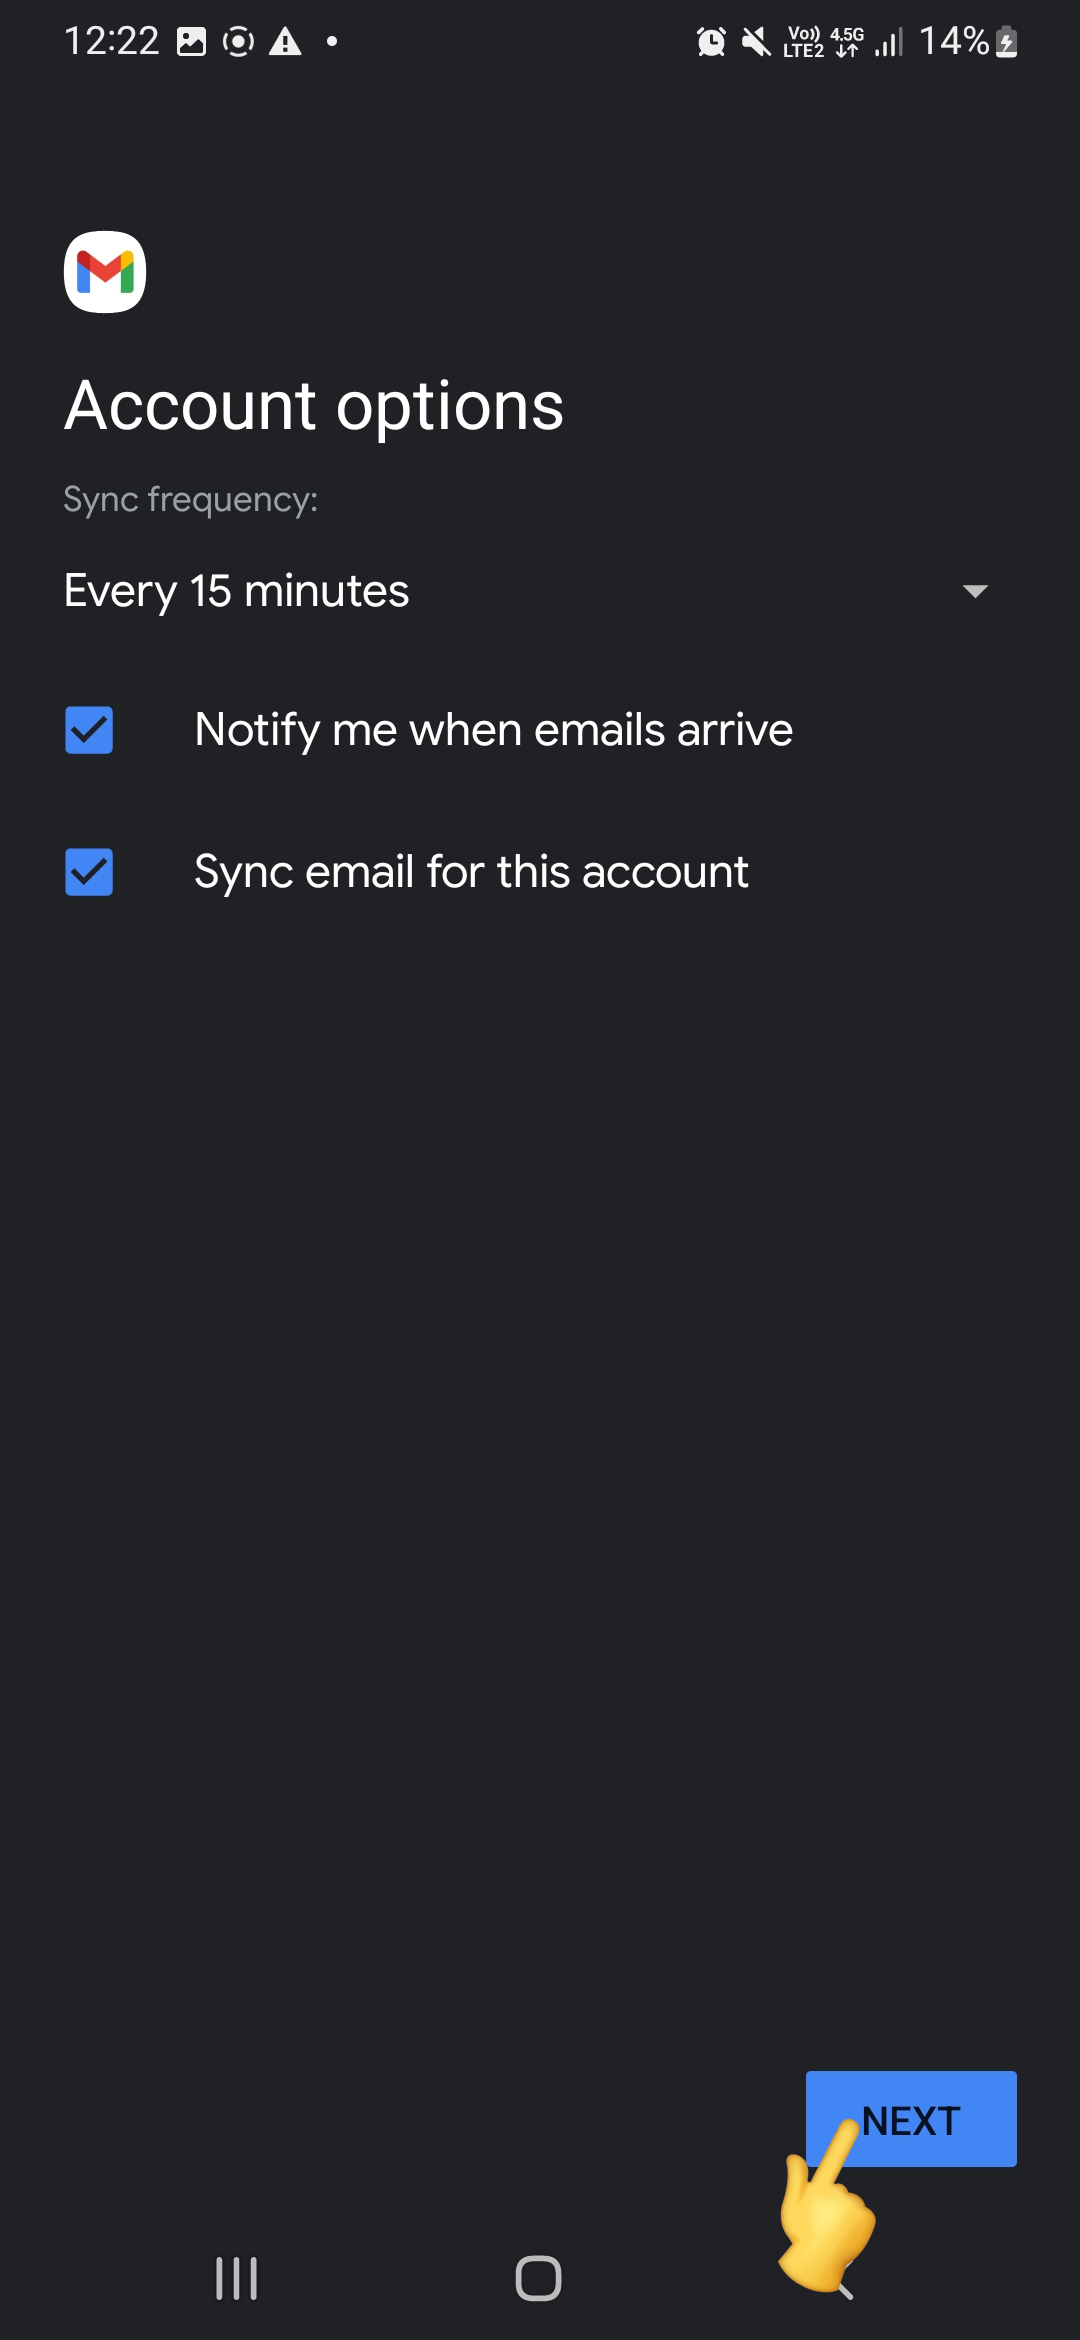
10. Set the email synchronisation frequency and other synchronisation settings. Then tap the Next button.
You now have your email account set up on your Android device! To check your emails, go to the Email app and select your account.
You can add an email account to your Android device by following these steps. Feel free to contact us if you have any questions or need any help.