


How can I enable ASP error pages?
In this article, we will explain step by step how to enable detailed error pages on IIS (Internet Information Services).
Enabling Detailed Errors via IIS Manager
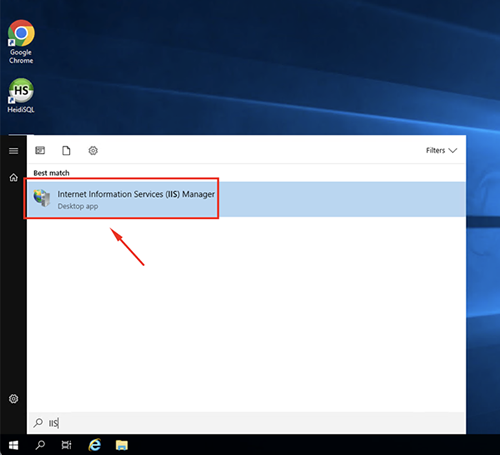
1. Open IIS Manager.
You can access it by clicking Start and typing IIS or InetMgr.
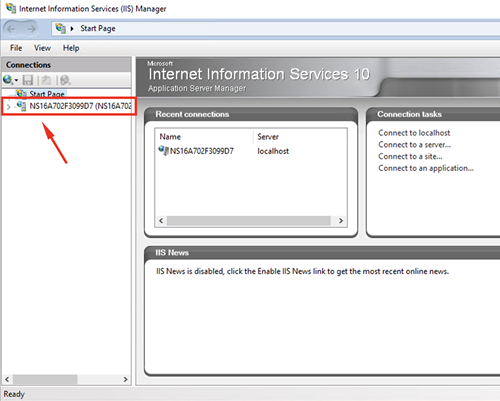
2. SELECT YOUR SERVER
In IIS Manager, select your server from the directory menu on the left.
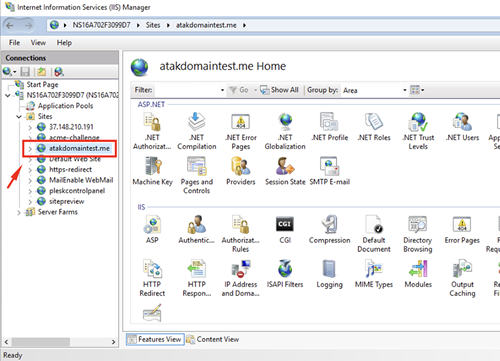
3. SELECT YOUR SITE
Expand the “Sites” section and click on the domain name you want to configure.
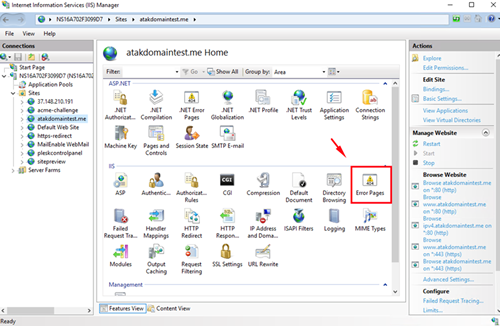
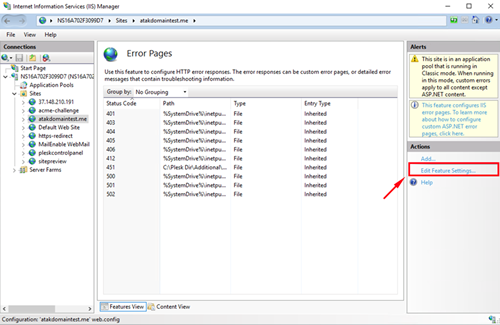
4. GO TO ERROR PAGES
Navigate to the "Error Pages" section.
5. SELECT EDIT FEATURE SETTINGS
Click on "Edit Feature Settings..." from the right-hand menu.
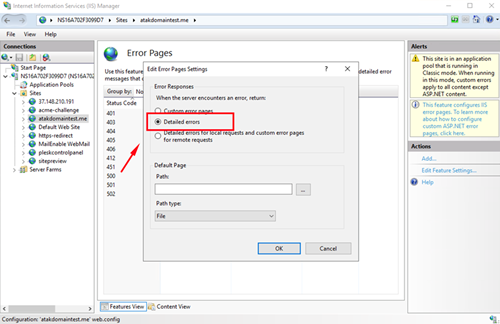
6. ENABLE ERROR MESSAGES
In the window that appears, check the "Detailed Errors" option.
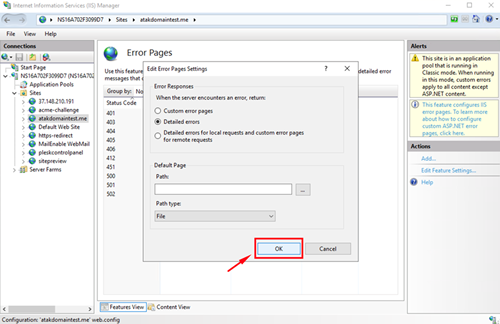
7. SAVE
Click the OK button to save the changes.
Note:
At Atak Domain, IIS access is not directly provided to customers using shared hosting. Therefore, you need to create a support ticket to request changes that require IIS access.
Random Articles

What Is a Chatbot – Should You Add One to Your WordPress Site?
01.03.2022
Rebuild thumbnails in WordPress
06.01.2022
How to Register Domain Names: A Helpful Guide
26.04.2021
An In-Depth Look at the 10 Best WordPress Comment Plugins
22.06.2022
10 Best WooCommerce CRM Options for Efficient WordPress Stores
05.07.2022