


Plesk SSL Installation
If you have completed the SSL validation process by generating a CSR for your SSL certificate, the next step is to complete the SSL installation. For the installation;
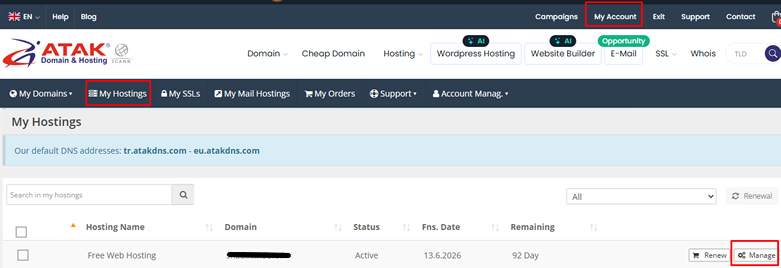
- Access the Plesk Panel. If you have a Hosting package with our company, first log in to your account. Go to My Account > My Hosting Services > click the Web Hosting button, and on the page that opens, click the “Manage” button for your Hosting service.
After clicking the Manage button, click the green “Go to Control Panel” button to access the Plesk Panel.

- On the Plesk Panel page that opens, click the “SSL/TLS Certificates” button marked with a lock icon.

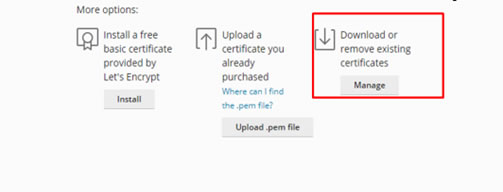
- After clicking the button, you will see purchase buttons for buying an SSL certificate and 3 different options.
The first option is to install a free basic certificate provided by Let's Encrypt.
The second option is to upload a certificate you purchased as a .pem file.
The third option is used to download or remove your existing certificates.
If you are going to install a paid SSL certificate, you should proceed with the third option. To do this, click the “Manage” button located under the “Download or remove existing certificates” heading.
There are two different installation methods available. You may complete the installation based on your preference.
First method;
- Click on the certificate name you specified.

- There are multiple ways to upload your certificate. You may upload your certificate file through the “Select File” section, or you may open your certificate file (.cer or .crt) with a notepad program and copy the code inside it (including the dashes) and paste it into the .CRT field. After this, you can complete the certificate upload by clicking the “Upload Certificate / Upload Certificate” button.
- After uploading the certificate in the Plesk panel, there are a few more steps you need to complete. For this, click the “Hosting Settings” button on the main page of the Plesk Panel.

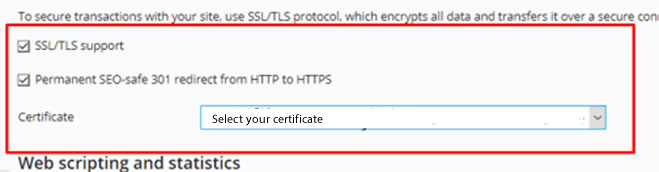
- Check the boxes next to “SSL/TLS support” and “Permanent SEO-safe 301 redirect from http to HTTPS”, then select your certificate name from the Certificate section and click the “OK” button to complete your SSL setup.
You can verify whether the SSL installation was successful at https://www.sslshopper.com/ssl-checker.html.
Second method;
- After logging in to the Plesk Panel, go to the SSL/TLS Certificates section. On the page you entered, click the alanadiniz.com link and go to the page where you will upload the certificates.
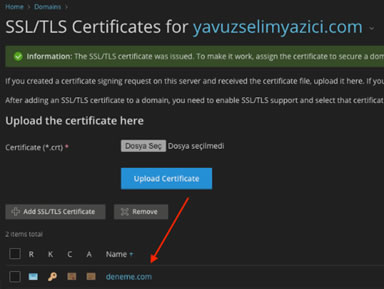
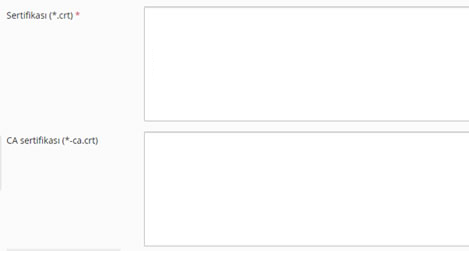
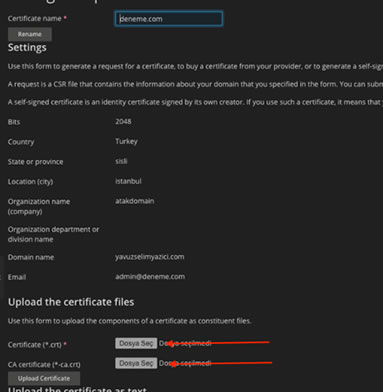
- In the Upload Certificate Files section, select the .crt and -ca.crt files, then click the “Upload Certificate” button.
- After uploading the certificate in the Plesk panel, there are a few more steps you need to complete. For this, click the “Hosting Settings” button on the main page of the Plesk Panel.

- Check the boxes next to “SSL/TLS support” and “Permanent SEO-safe 301 redirect from http to HTTPS”, then select your certificate name from the Certificate section and click the “OK” button to complete your SSL setup.

You can verify whether the SSL installation was successful at https://www.sslshopper.com/ssl-checker.html.
Categories
- Domain Guide & Registration Process
- Email Services & Setup Instructions
- Step-by-Step How-To Guides
- Insights & Articles from the Tech World
- Server Management & Performance Tips
- Software Development & Coding Resources
- SSL Certificate Guide for Secure Websites
- Choosing the Best Hosting & Optimization Tips
- Key IT Terms & Their Definitions
- SQL Database Management & Queries
- WordPress Setup & Optimization Strategies
Random Articles

Should You Build a Domain Name Portfolio?
24.12.2020
From Local to Global: Leveraging New Domain Extensions to Expand Your Business
13.09.2024
65+ WordPress Keyboard Shortcuts for Writing, Gutenberg + More
30.06.2022
What is the second level domain?
20.04.2021
16 Best WordPress Photo Gallery Plugins (Compared With Examples)
19.01.2022